Estimating power consumption for your equipment

Hello everyone! Today I wanted to post about a topic that is pretty important if you have an interest in off grid, grid down, or emergency communications: estimating power consumption for your equipment. This post is in part inspired by a topic I chose for the Portland Neighborhood Emergency Team chat net. Shortly after I chose this topic I got an e-mail from Kevin, N6KVN asking for some advice for setting up a portable field station, and so I figured I’d write a more detailed post about my methodology and way of thinking about operating a ham radio station when grid power isn’t available from a preparation or pre-planning standpoint.

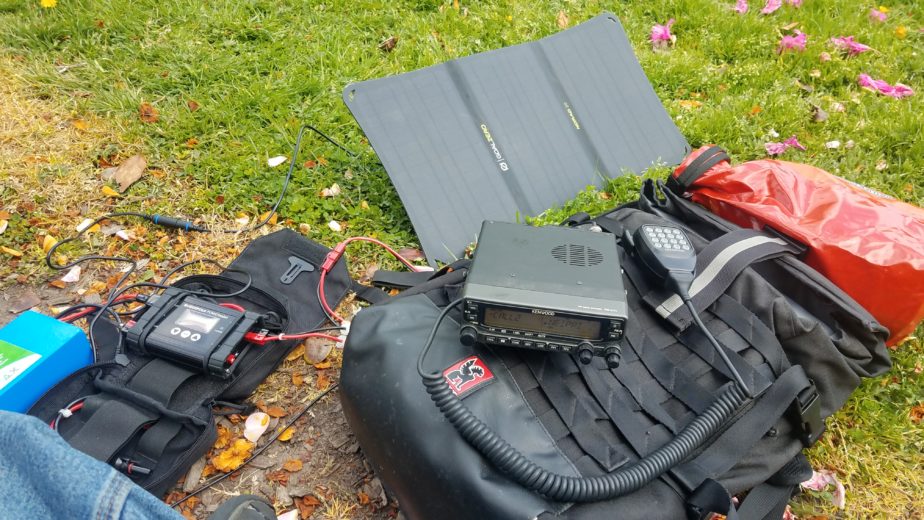
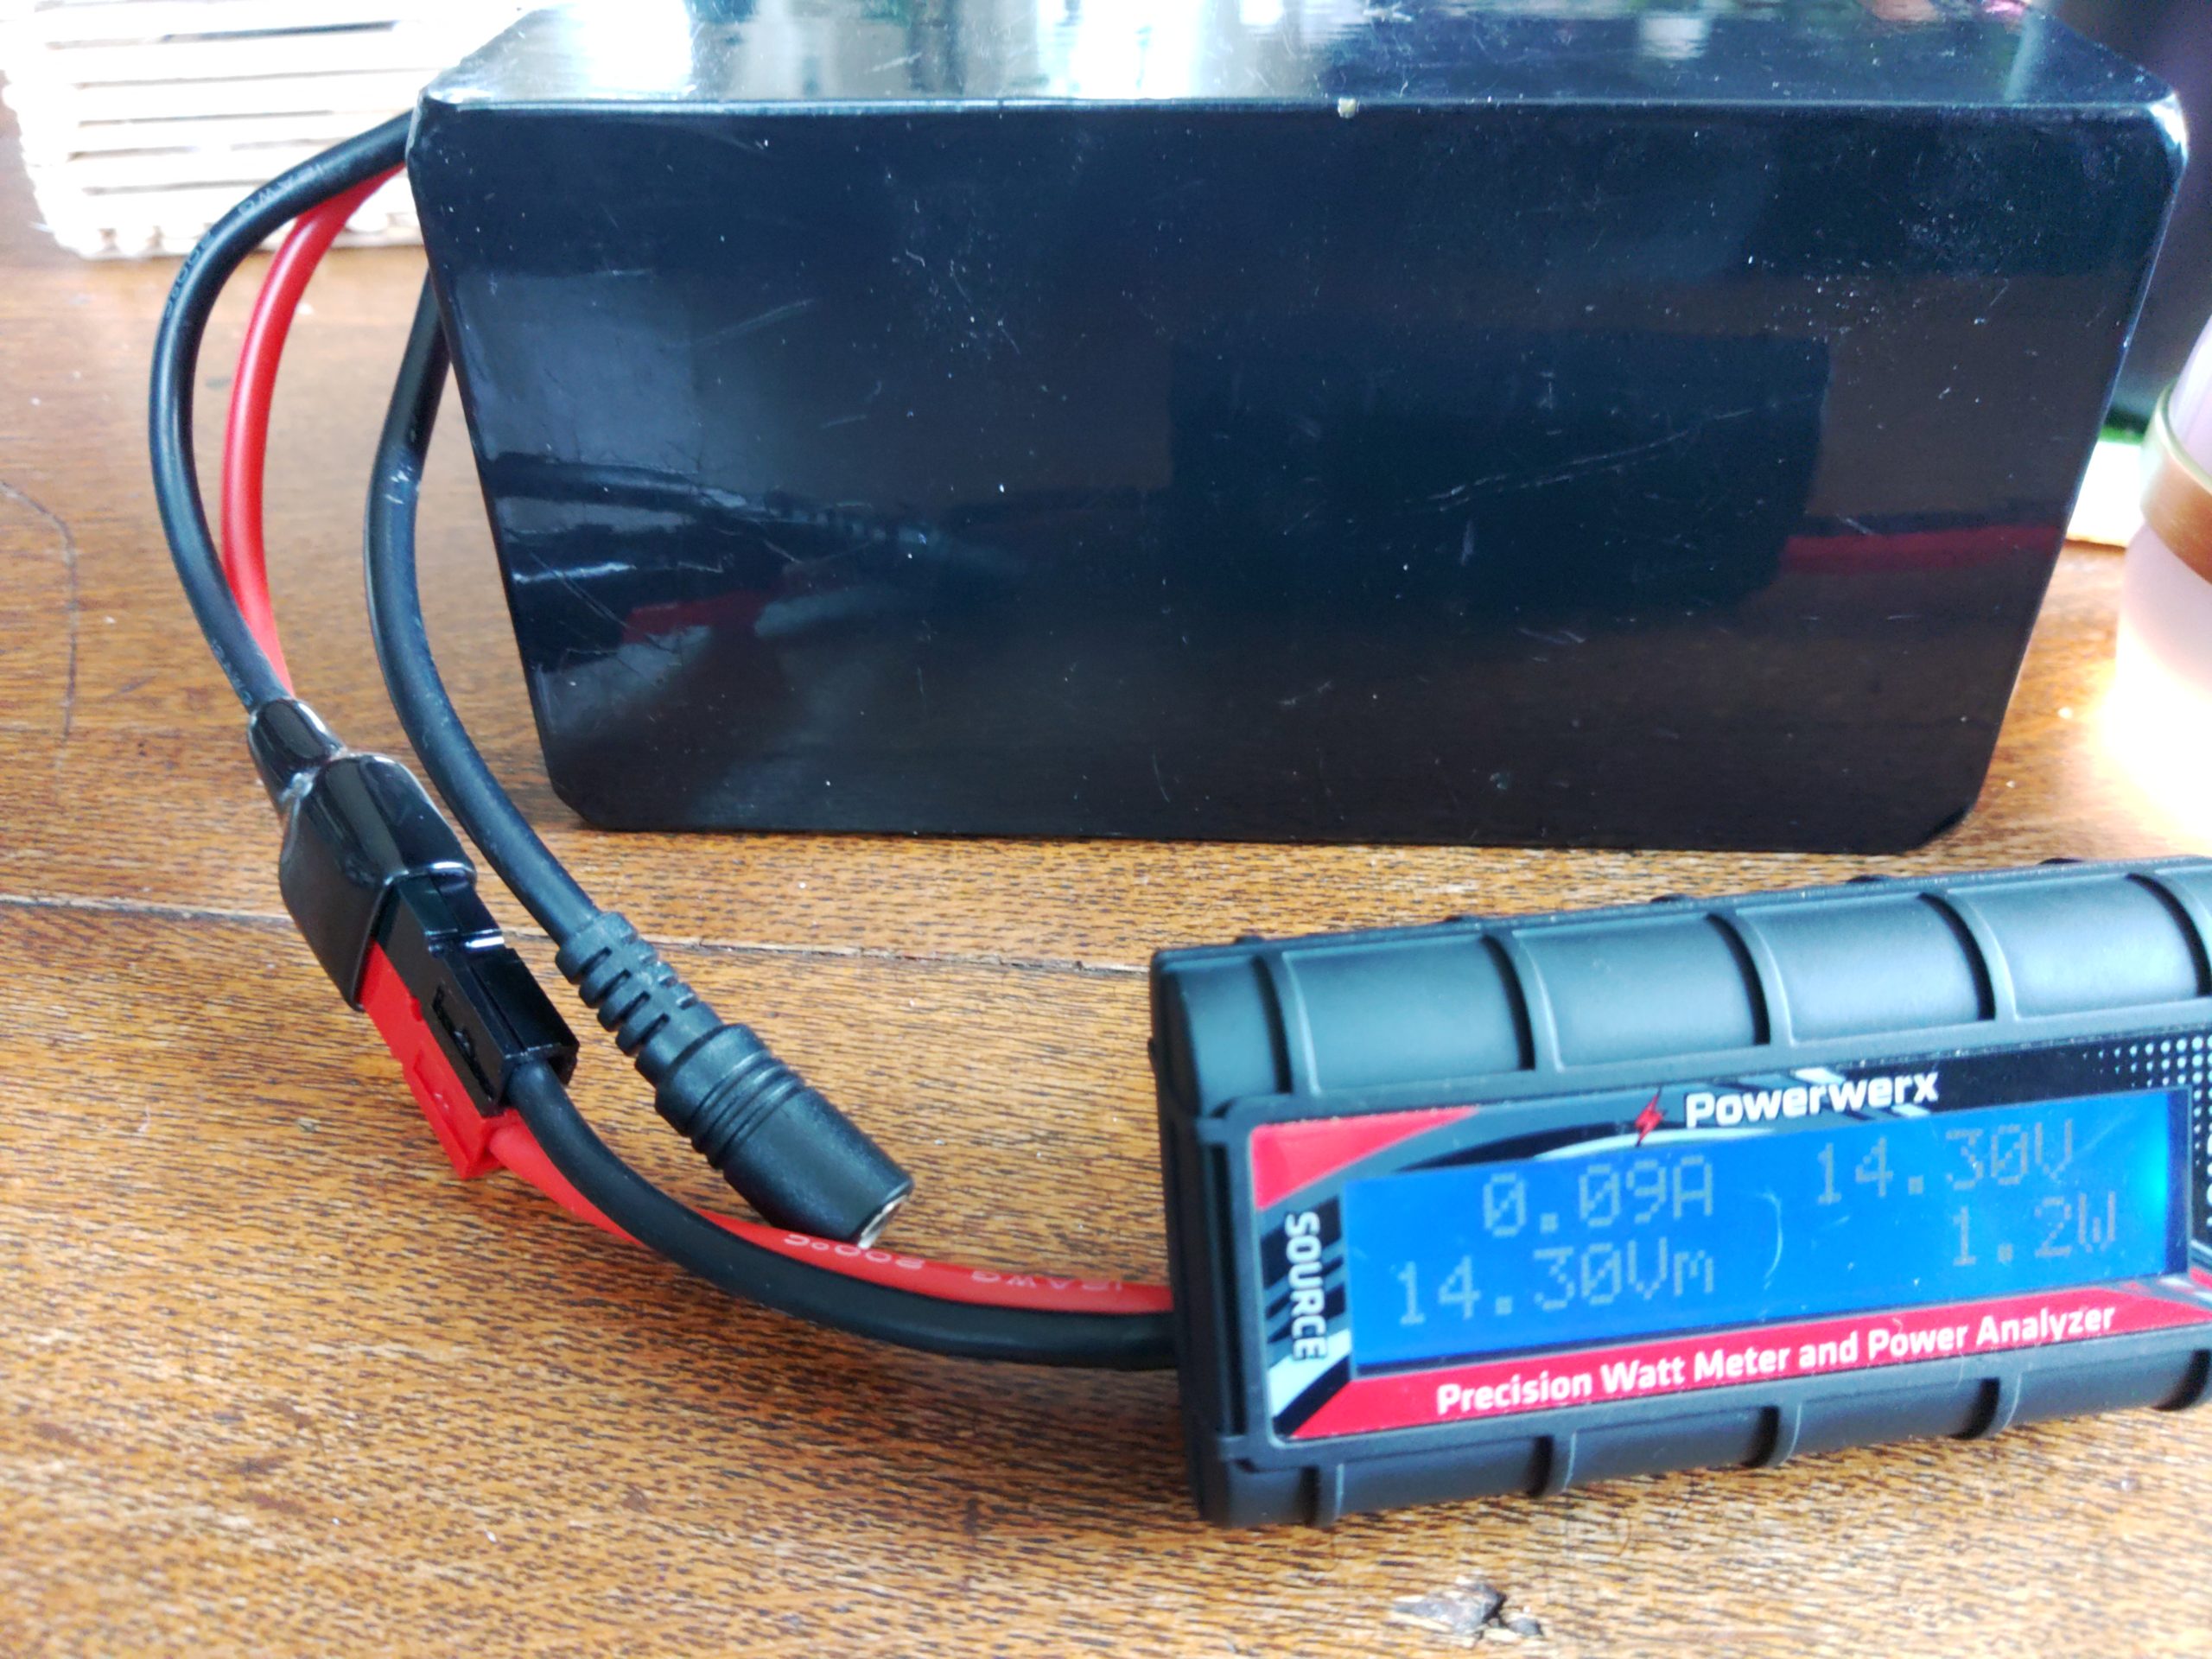
My basic test setup consists of three components. I have a power source of some kind. This could be a battery or a wall-connected power supply. The next component is a power meter connected between the load(s) and the battery. This component actually does the work of measuring power consumption. The final component of the test setup are the loads you wish to test. It’s important to make sure all the components in the setup are rated for the amount of current you expect to draw during testing. You can usually find that in the specifications of each individual component. You add those up and make sure your meter is rated for that much current and that your power supply can supply all of the required current. All the wiring in between should also be properly rated for that amount of current.

Example lighting current draw test

Example test setup

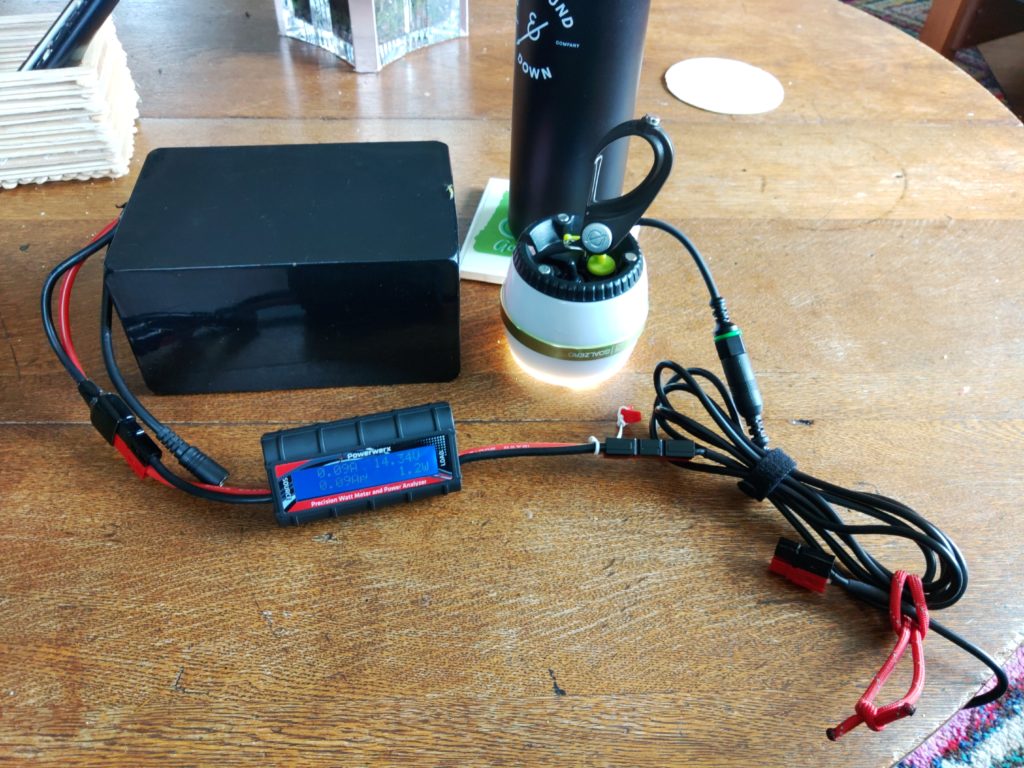
In this example I demonstrate testing a lighting device that runs on 12V and explain my methodology for hooking everything up and how I use back-of-the-napkin math to estimate power usage and requirements. In the above photo we have all three of our components for this specific test – a power source which is a battery in this case, the Powerwerx inline DC power meter, and load which is an LED lamp whose power usage I want to characterize. The Powerwerx inline meter supports a lot of measurements but in this post I’m going to mostly focus on current drawn and Ah, or amps per hour.

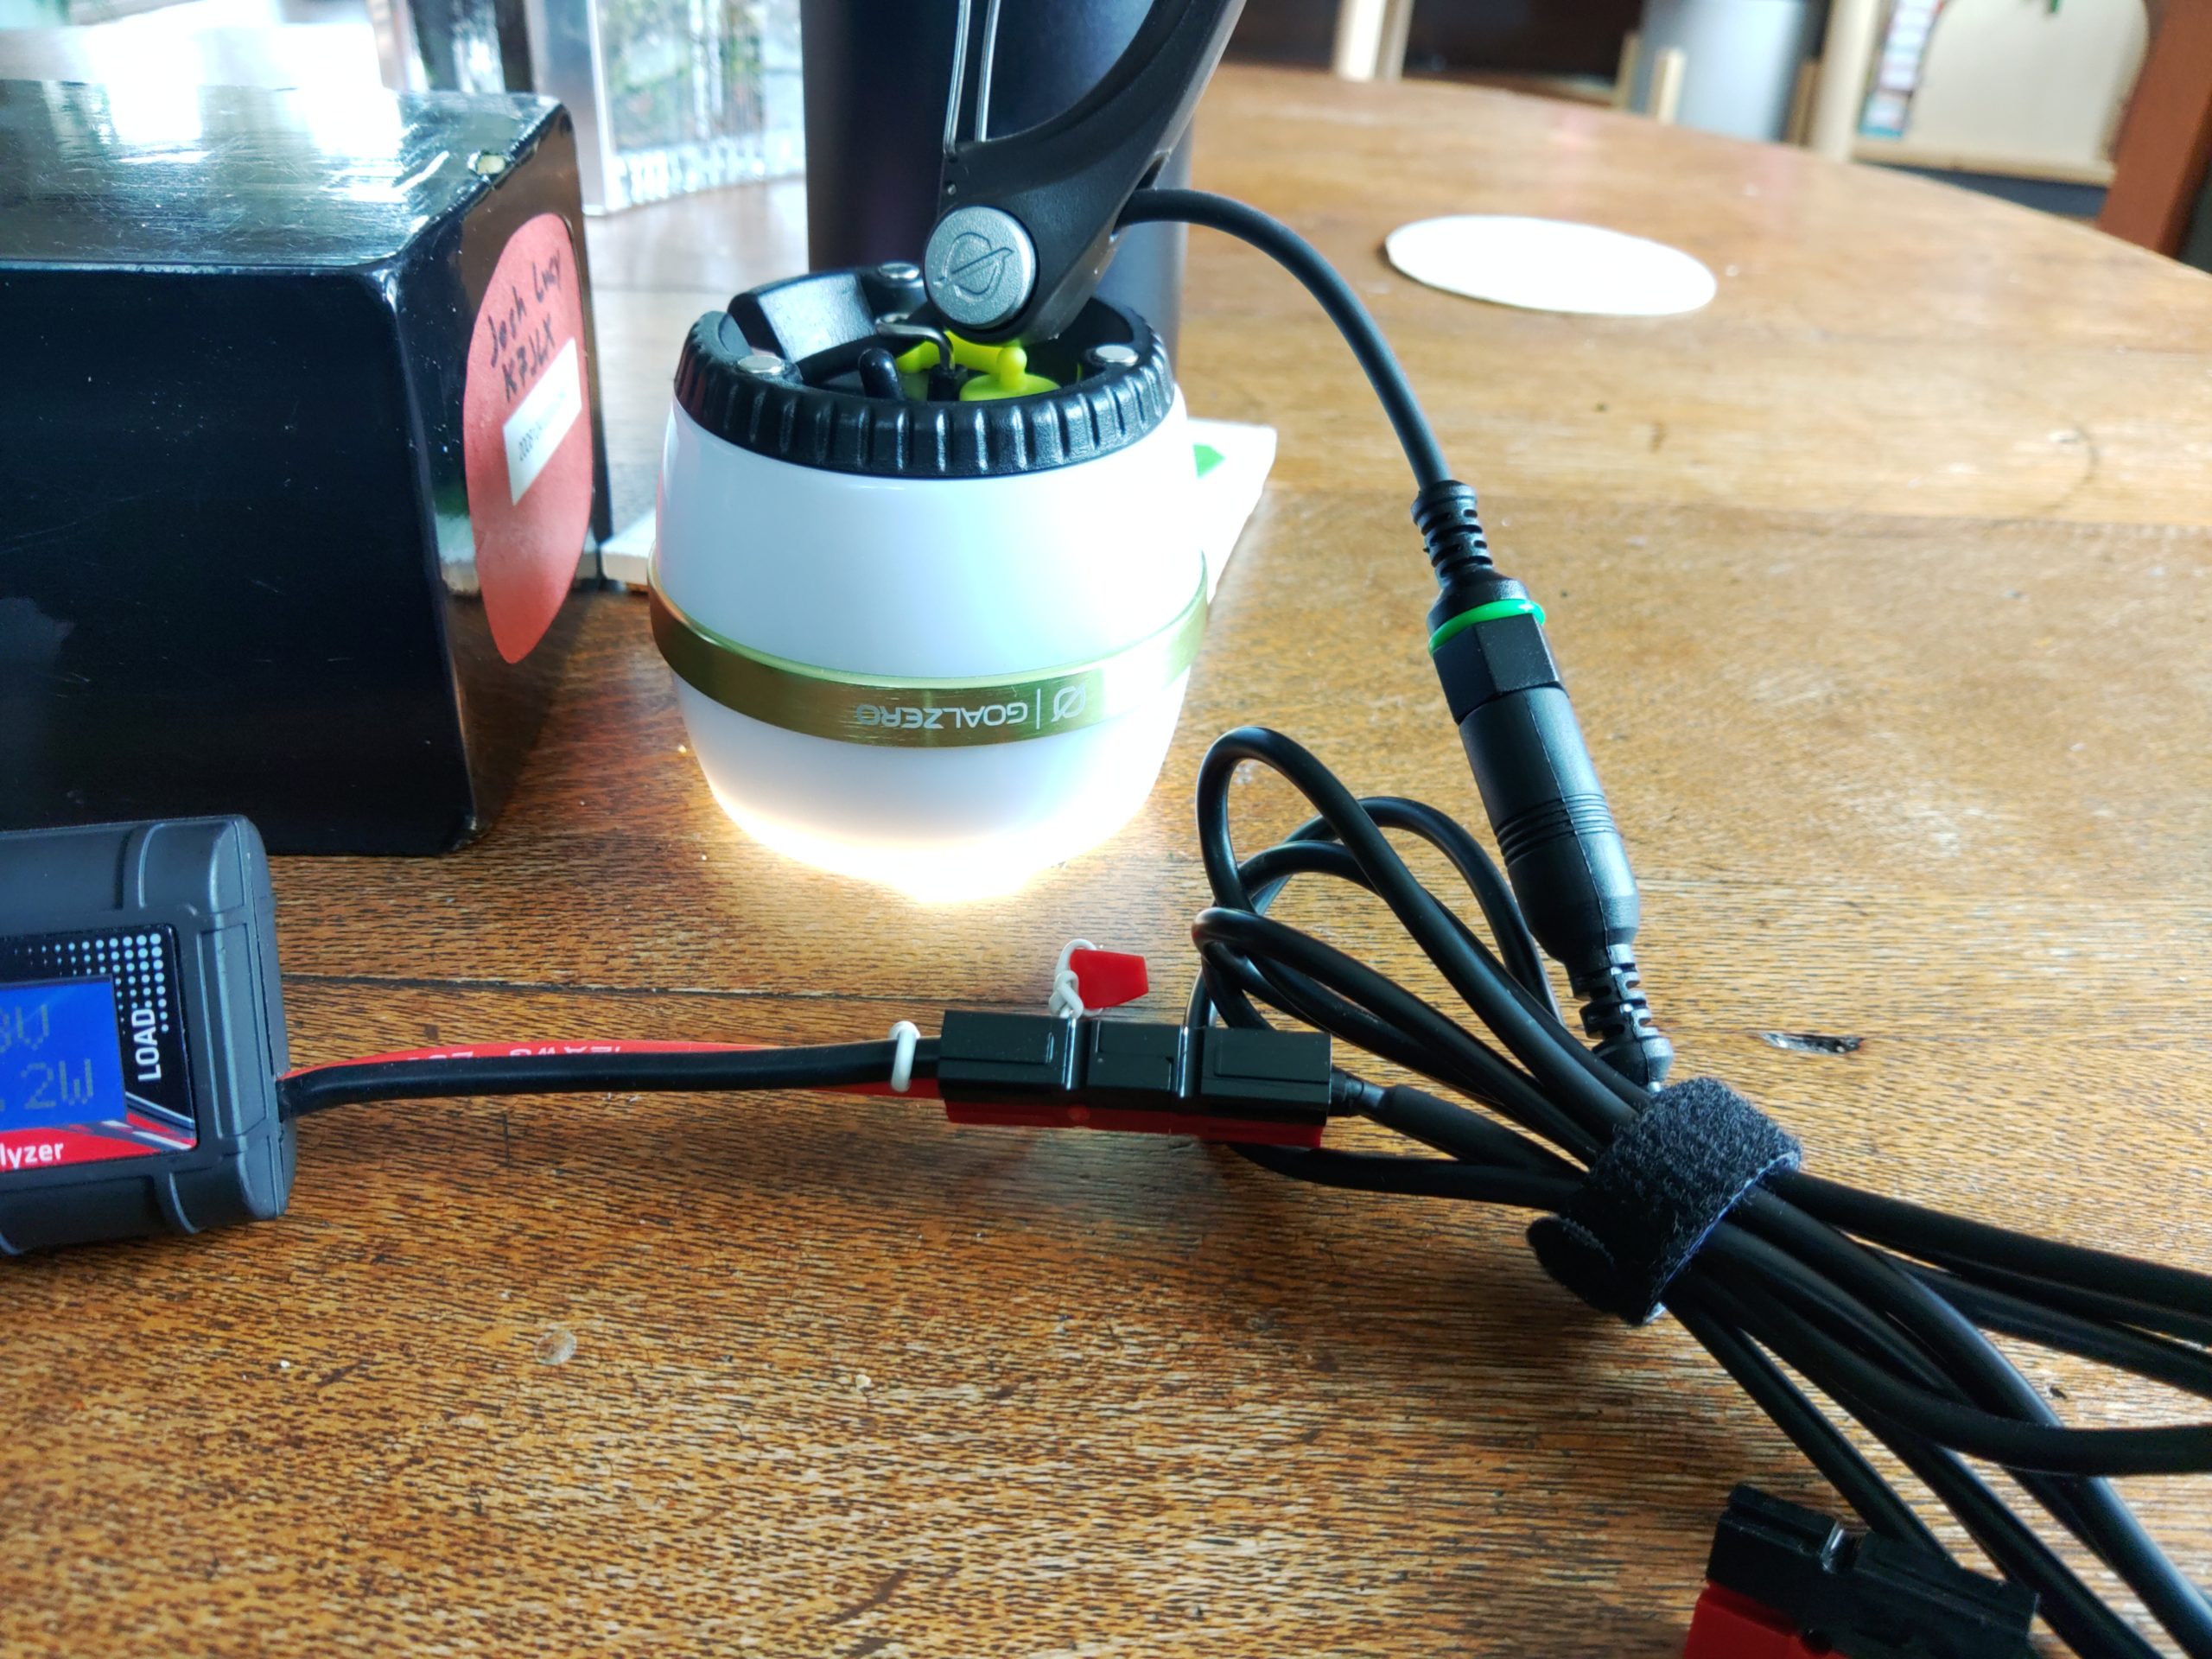
I started by connecting the power source to the “source” side of the power meter and then connected the load I wanted to test to the “load” side of the power meter. The images above show the light on but I will usually measure power with all the loads turned off to see if they draw current in the “off” position. It’s pretty common for devices to take a small amount of power even while off. This is called a parasitic load. The specific LED lamps I wanted to test have three settings: off, low, and high. I tested off and my power meter registered no current consumption. That’s probably because these lights have a hard off switch.

Power consumption with the switch in the “low” position

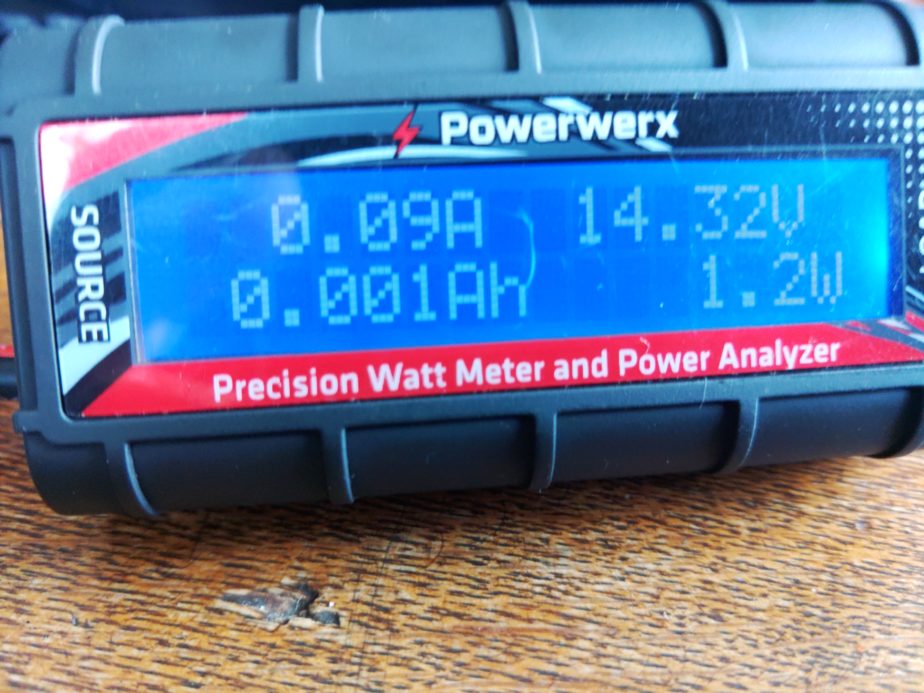
As you can see here this light draws 0.09A in the “low” position. If we were to run this device for 1 hour it would take 0.09Ah (amps per hour). You might have also noticed that there’s a measurement reading 0.001Ah. For this specific meter that means we’ve used 0.001Ah since the meter was connected to a load. There will be more on this measurement later.

The LED lamp with the switch in the “high” position

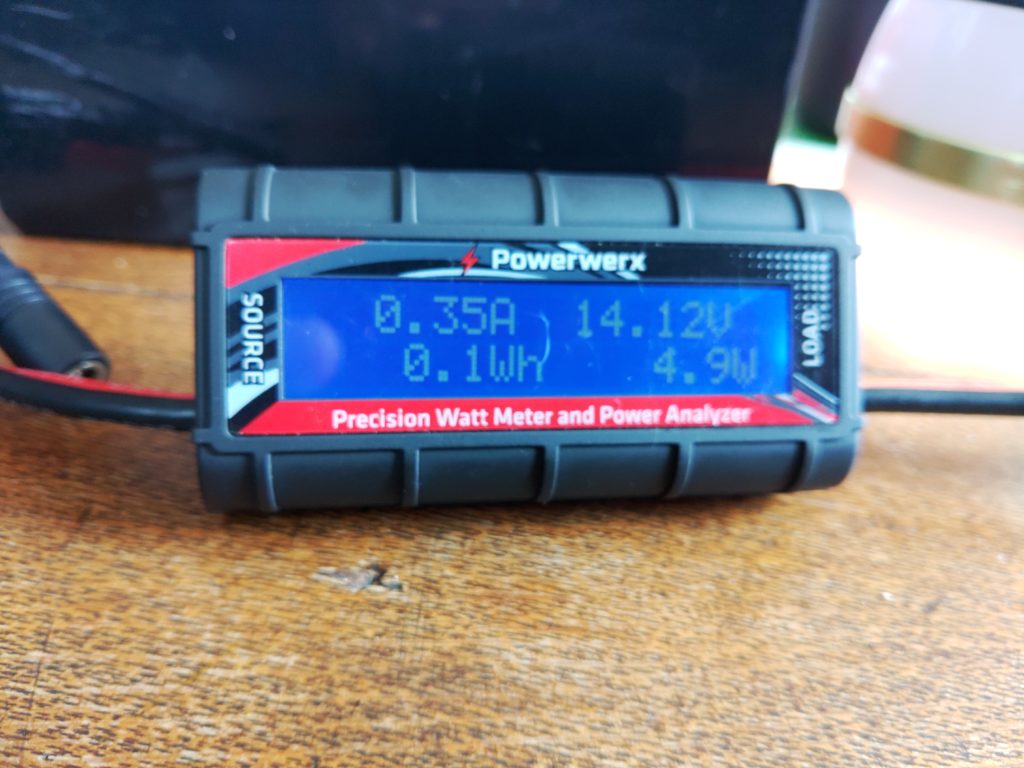
With the LED lamp in the “high” position it’s drawing 0.35A of power. With the information gathered so far I can estimate how much power I’ll need if I want to run this light for a certain amount of time, and I can figure out how much power I can expect it to take while it’s running. If we use the Ah reading I mentioned earlier we can also understand how much battery capacity we’ve used since the last time the meter was restarted. Let’s start with that since I mentioned it.

To determine how much battery we’ve used as a percentage I’d use the following formulas:

battery capacity used as percentage = battery capacity / battery consumed

battery remaining as percentage = 100% – battery capacity used percentage

For a theoretical battery with 20AH of a capacity and 2Ah consumed the formula looks like:

20AH / 2Ah = 10% capacity used

100% – 10%= 90% capacity remaining

Now let’s add time to the mix. I’m going to use a Yaesu FTM-100D radio as an example of thinking about how much power it will use based on the specifications from the manual. According to its specifications when it’s receiving only it’ll draw 0.5A. The max power it will draw when transmitting 50W on 2m is 11A. Using this information let’s figure out how much battery we’d need to operate this radio some percentage of the time for 8 hours. For the purposes of this post we’ll call the amount of time we’re transmitting our duty cycle. We’ll assume we’ll be transmitting at 50W for 10% of the time that the radio is powered on. The formula will look like this:

Ah used = current * hours * duty cycle

While the radio is receiving only during an 8 hour operating period we’ll use 3.6Ah of battery capacity:

0.5A * 8h * .90 (90% receiving time) = 3.6 Ah capacity used

Now we should compute power usage when transmitting at 50W:

11A * 8h * .10 (10% transmitting time) = 8.8 Ah capacity used

Total power consumption over 8 hours for the radio:

3.6Ah (RX only) + 8.8Ah (TX at 50W) = 12.4Ah

When we add them up we need at least 12.4 AH of battery capacity to run that radio for 8 hours while transmitting 10% of the time. If you want to run the radio for 16 hours transmitting 10% of the time you’d either need to be able to re-charge that battery to replace the discharged power before the battery gets too low or have a battery large enough to run the radio for 16 hours, meaning you had at least 24.8 AH of battery capacity. There’s also a way to cheat on battery capacity. If you can reliably charge your battery as you run your radio from a source like a solar panel you can replace current that’s drawn down by your loads. In that case you’d just subtract the current you’re able to supply from your charging source from the load. If you end up with 0 or a negative amount of current draw you’re able to power your radio without discharging the battery.

Figuring out how much power you use as you go

This section can apply to both bench testing and operating in “the wild”. This details how you’d use any power meter that’s capable of measuring cumulative power use while you’re running loads. The Powerwerx meter I mentioned earlier and the BuddiPole PowerMini have this capability. If you connect one of these power meters inline with your setup as you operate and run loads it will add the cumulative power drawn. This can be useful when you want to understand how much power you’ve drawn down on a battery. As I write this before the 4/3/2022 Portland Neighborhood Emergency Team chat net and NET net I plan to operate on battery with lighting during the net and record my power usage here later, but the thing I do is the following for both bench testing and off grid measurements:

  • Connect my power meter between the power source and load as described above
  • Perform whatever activities I would normally perform
  • When done I check the consumed Ah on the meter to get my battery capacity used
  • Calculate battery percentage used

Formula for calculating battery capacity used:

battery capacity used / battery capacity = percentage capacity used

For an example with a 20AH battery and 15Ah of capacity used during some activity I would have 25% capacity remaining on the battery. I can use this formula in the lab to estimate how much power I’ll need in the field later, or understand how close I am to drawing my battery down in the field:

15Ah / 20AH = 75% used battery capacity

100% – 75% = 25% remaining battery capacity

Adding it all up

When you perform this kind of analysis on devices you expect to run off of battery in the field you can begin adding up all your field components and understanding what your power requirements will be. If you know your lighting will take 2Ah to run for a few hours at night and 12 hours of radio operation might cost 13.2Ah you can say your station will take 15.2Ah to operate for 12 hours. As you add more devices such as phone chargers, laptops, etc. your power requirements will change. You can also use this methodology to reduce power consumption. For example if running your radio at 5W is sufficient to achieve your communication goals you could save a lot of power, requiring a smaller battery, or less recharging capacity. You could also achieve similar results by having fewer devices or keeping your radio transmissions more brief (decreasing your duty cycle). Comparing the sums of power consumption between different setups can also help you inform either your expectations of how to operate or what is possible with the setup you have. It can also help you right-size a battery or recharging system for your specific uses.

A real-world example

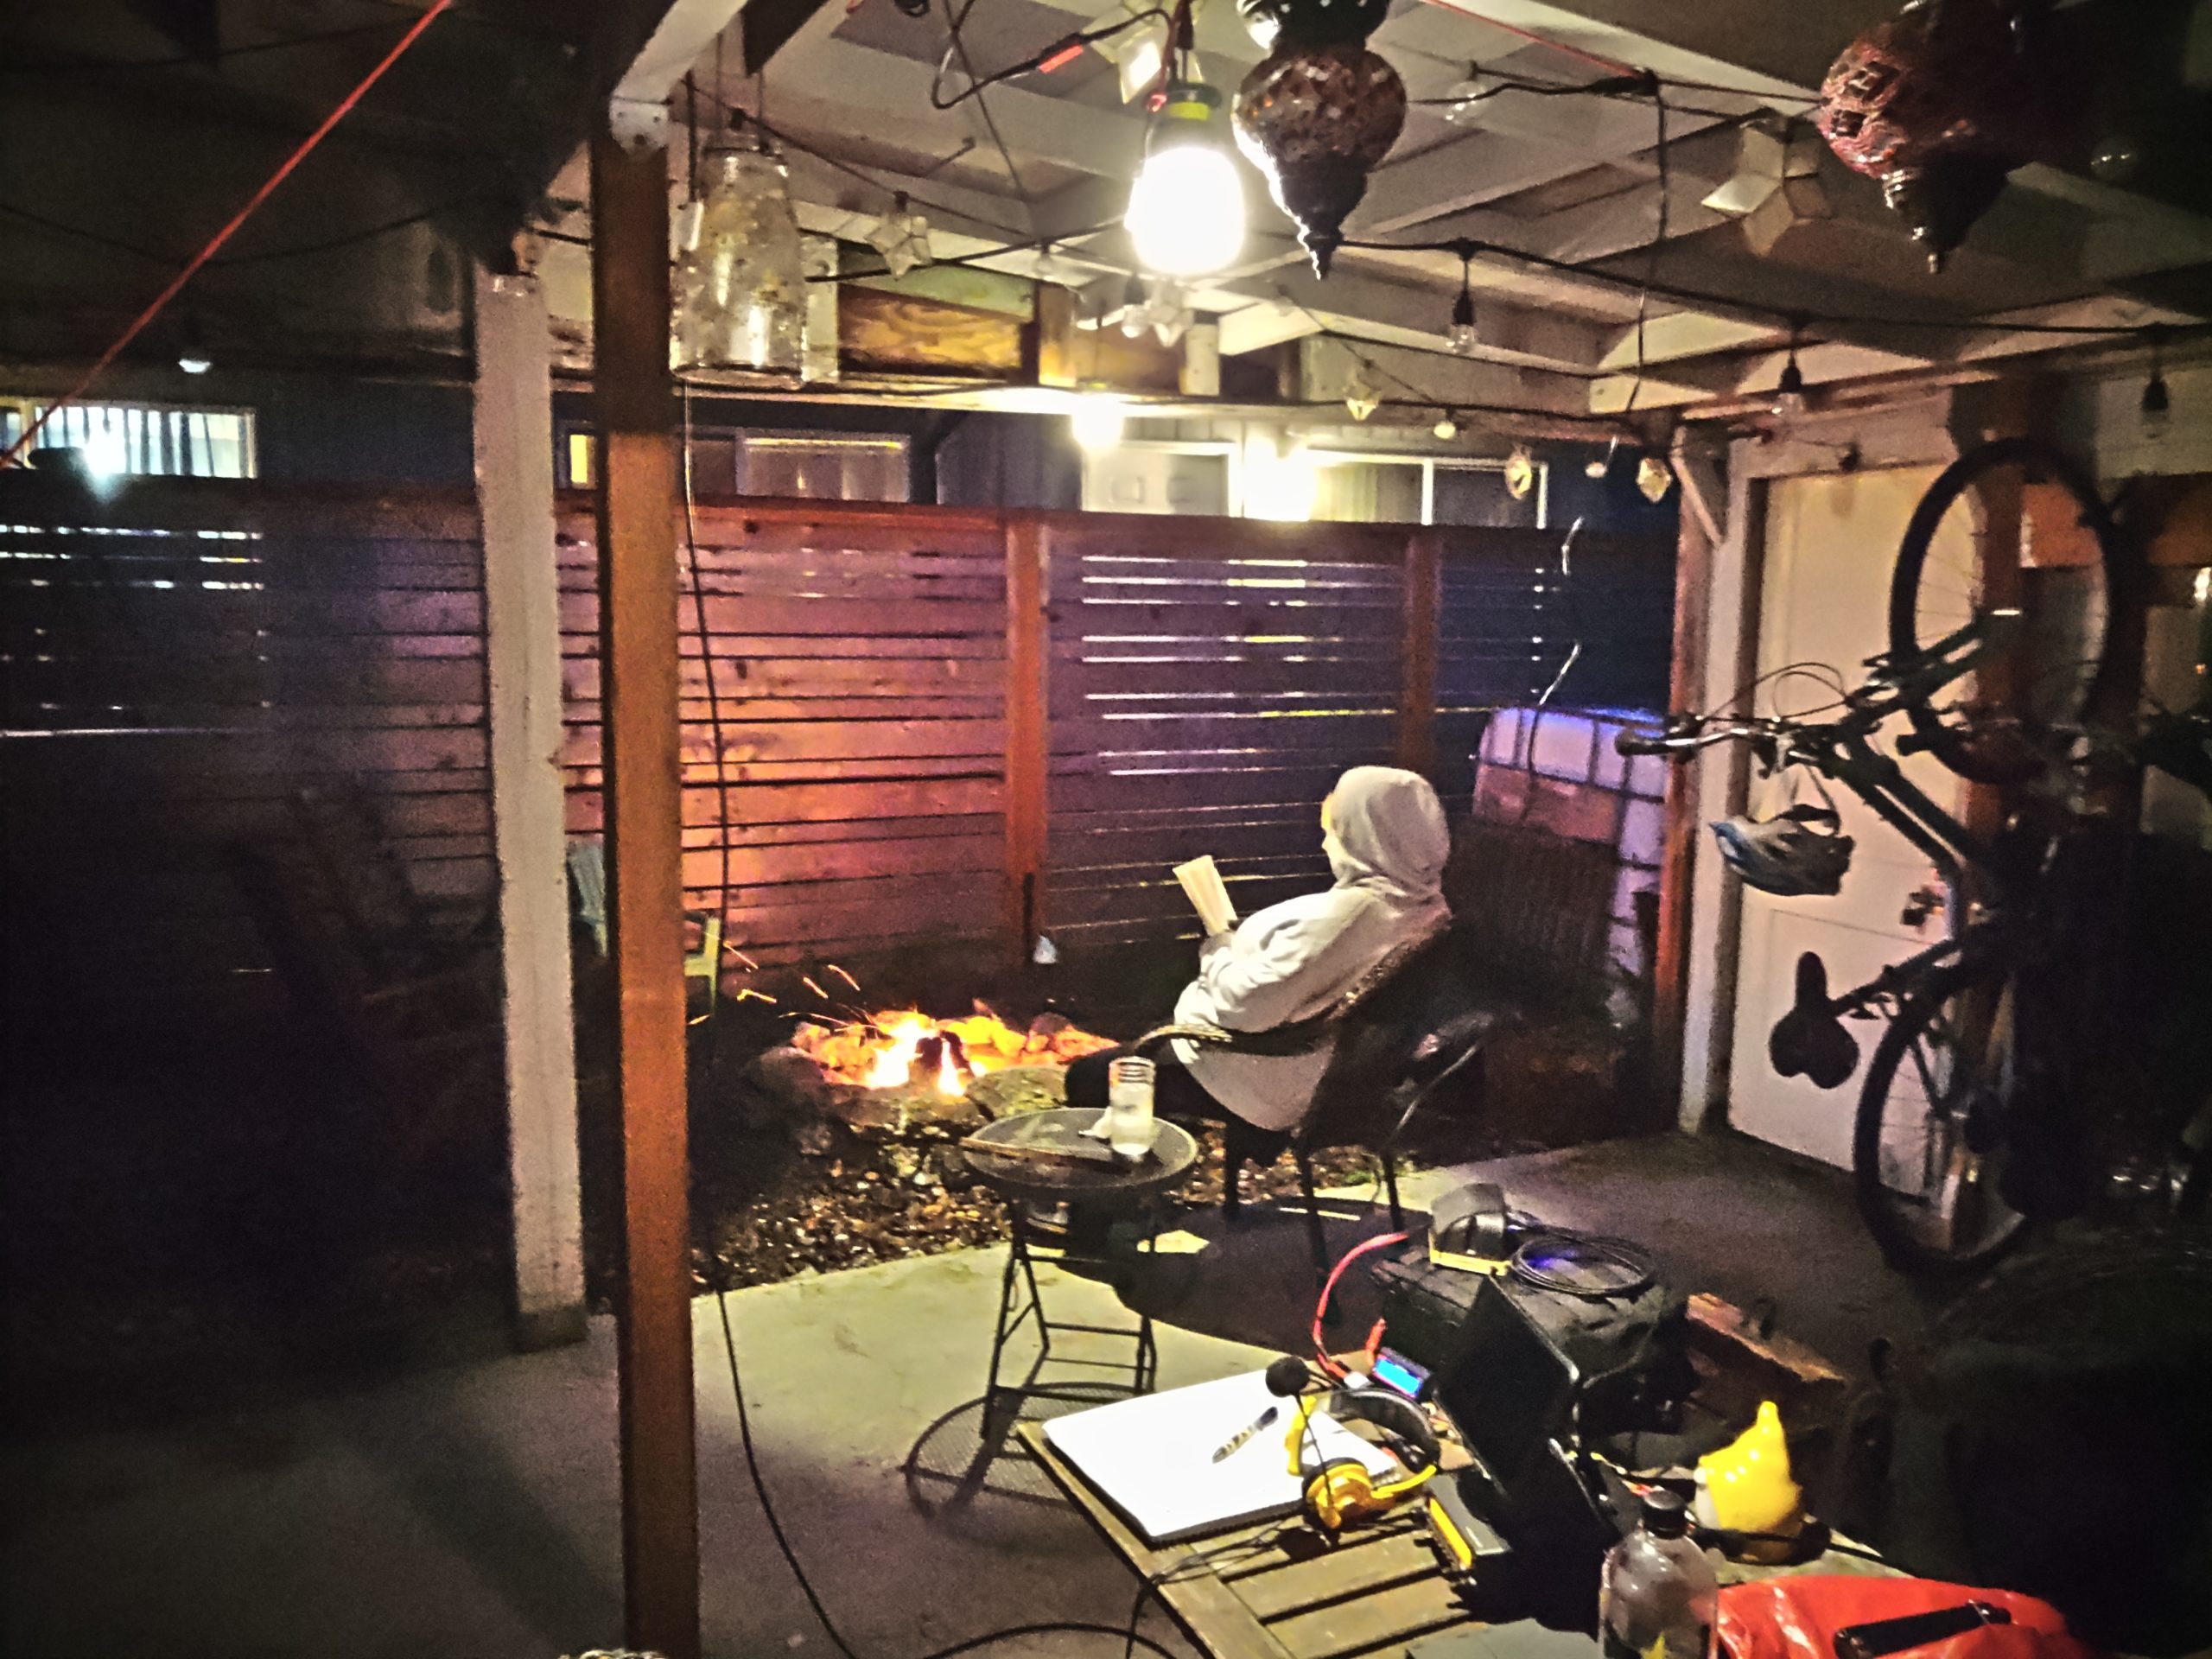
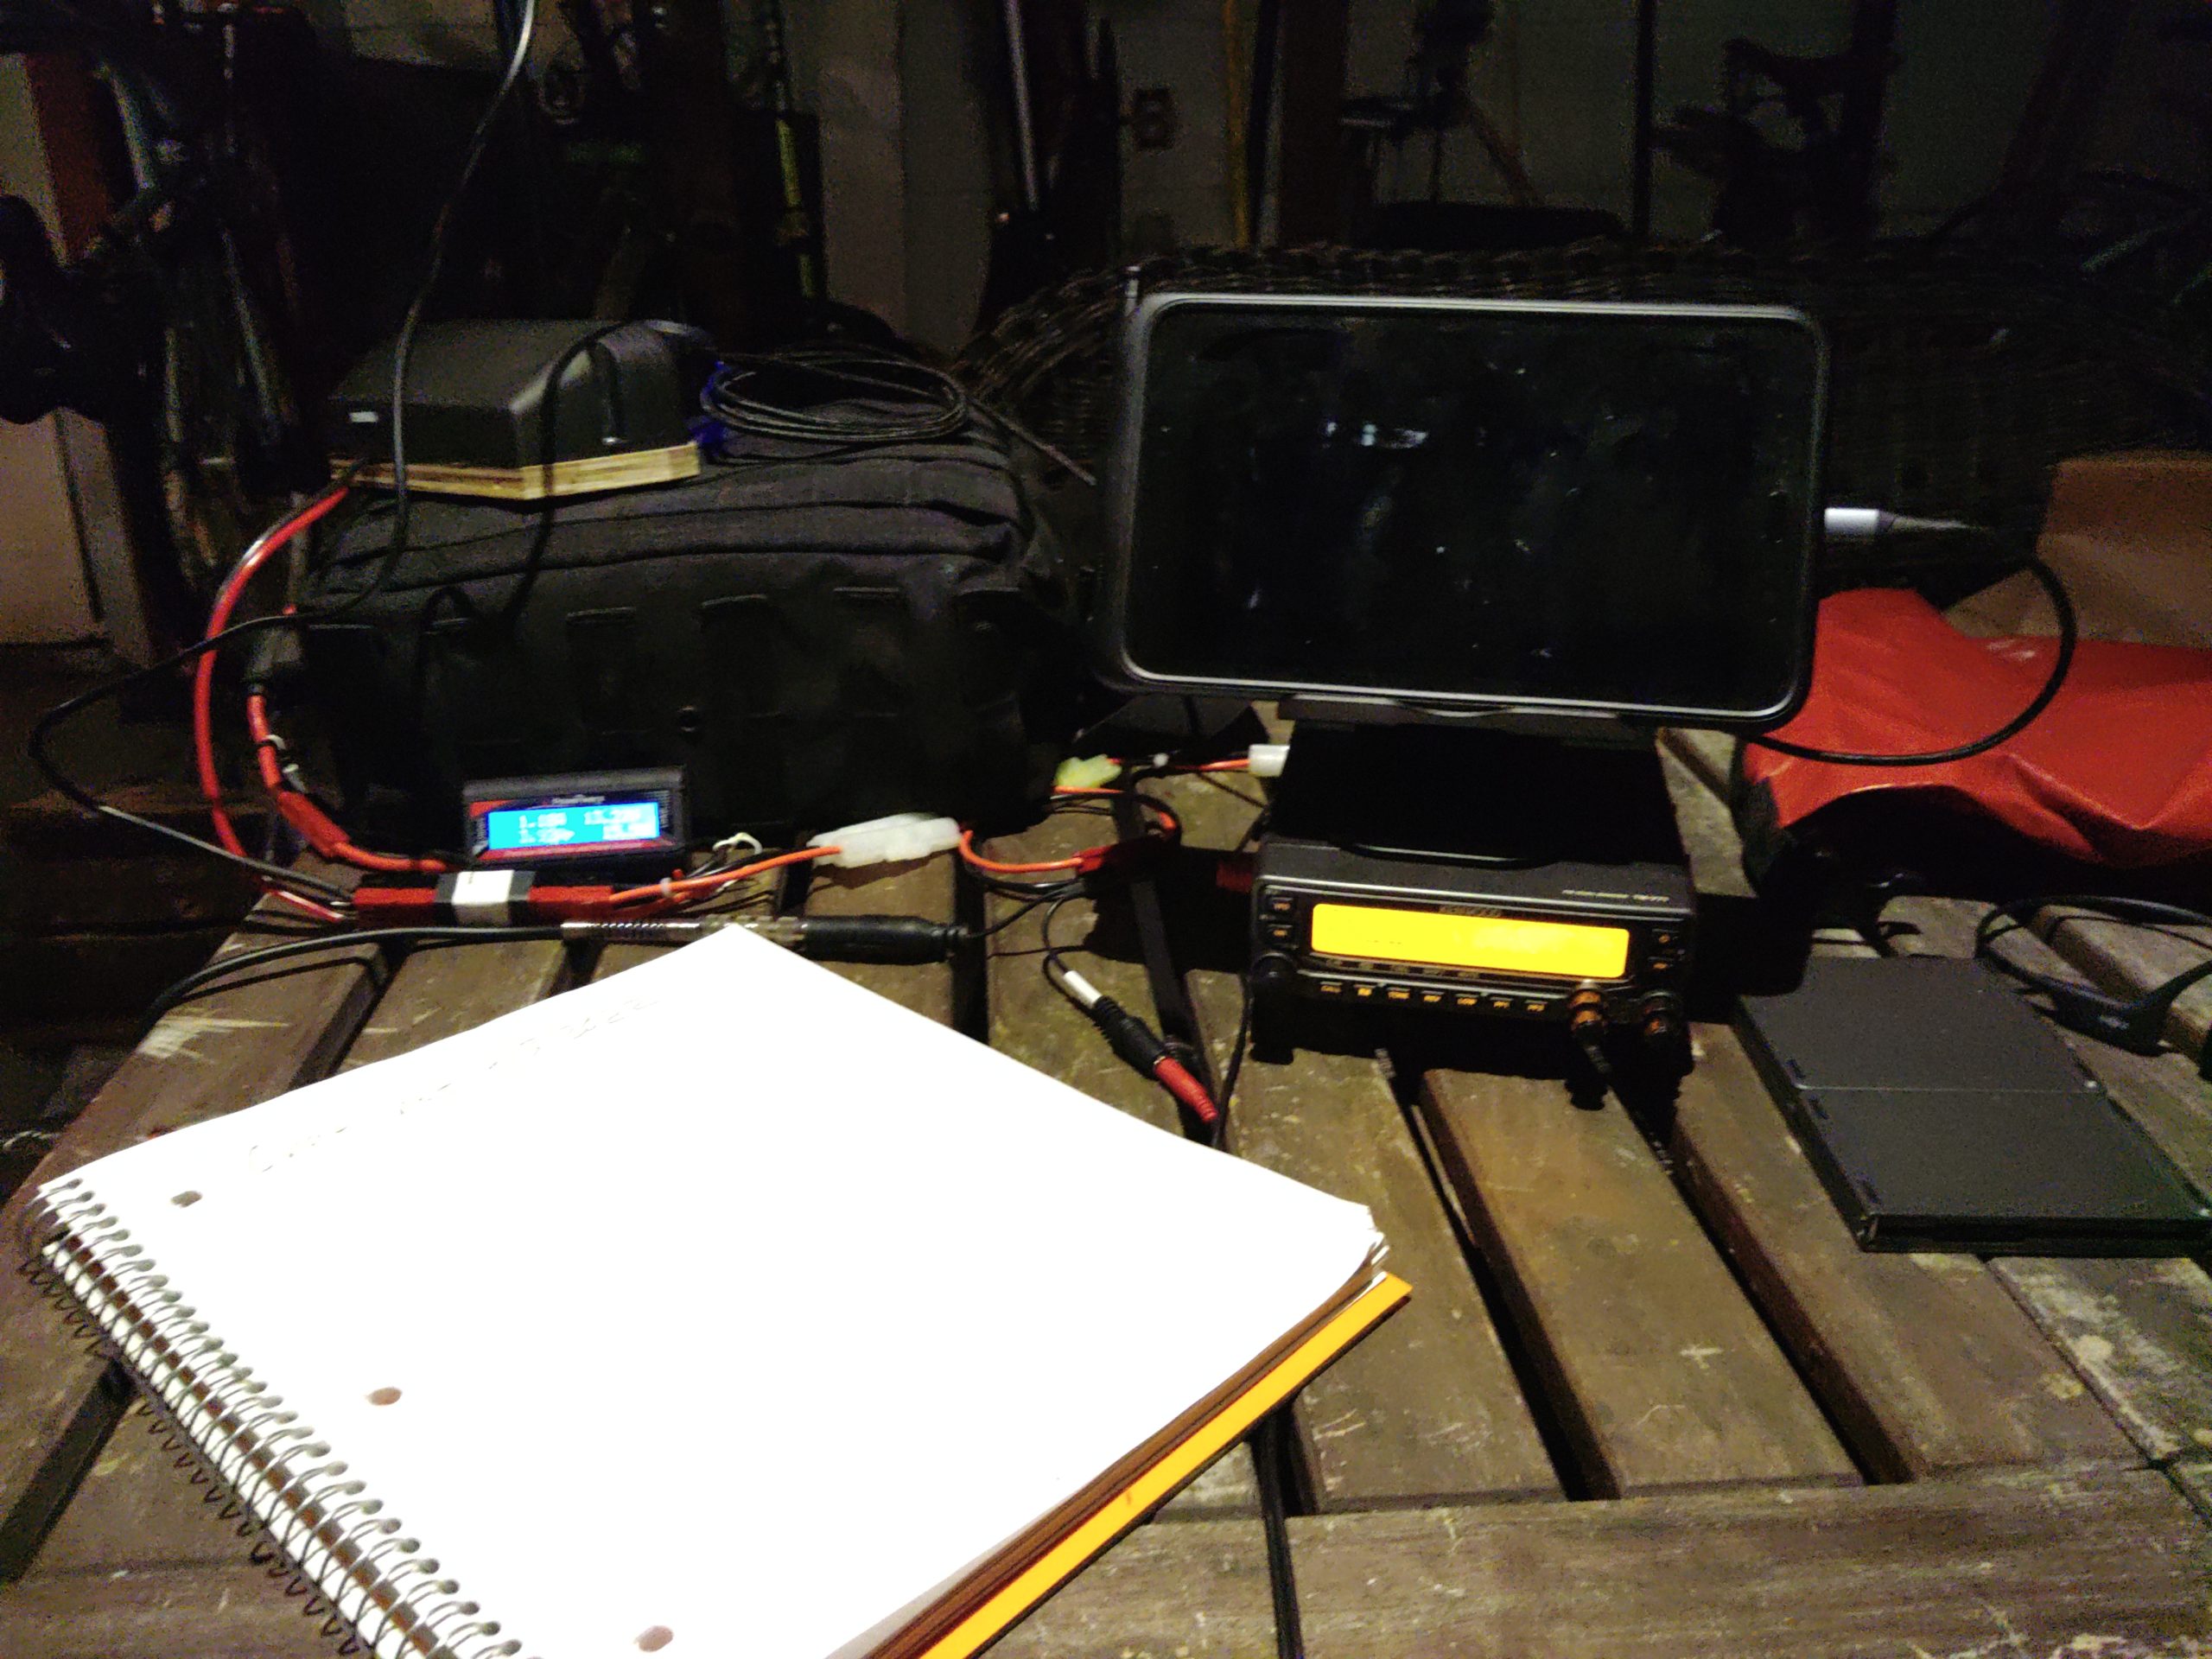
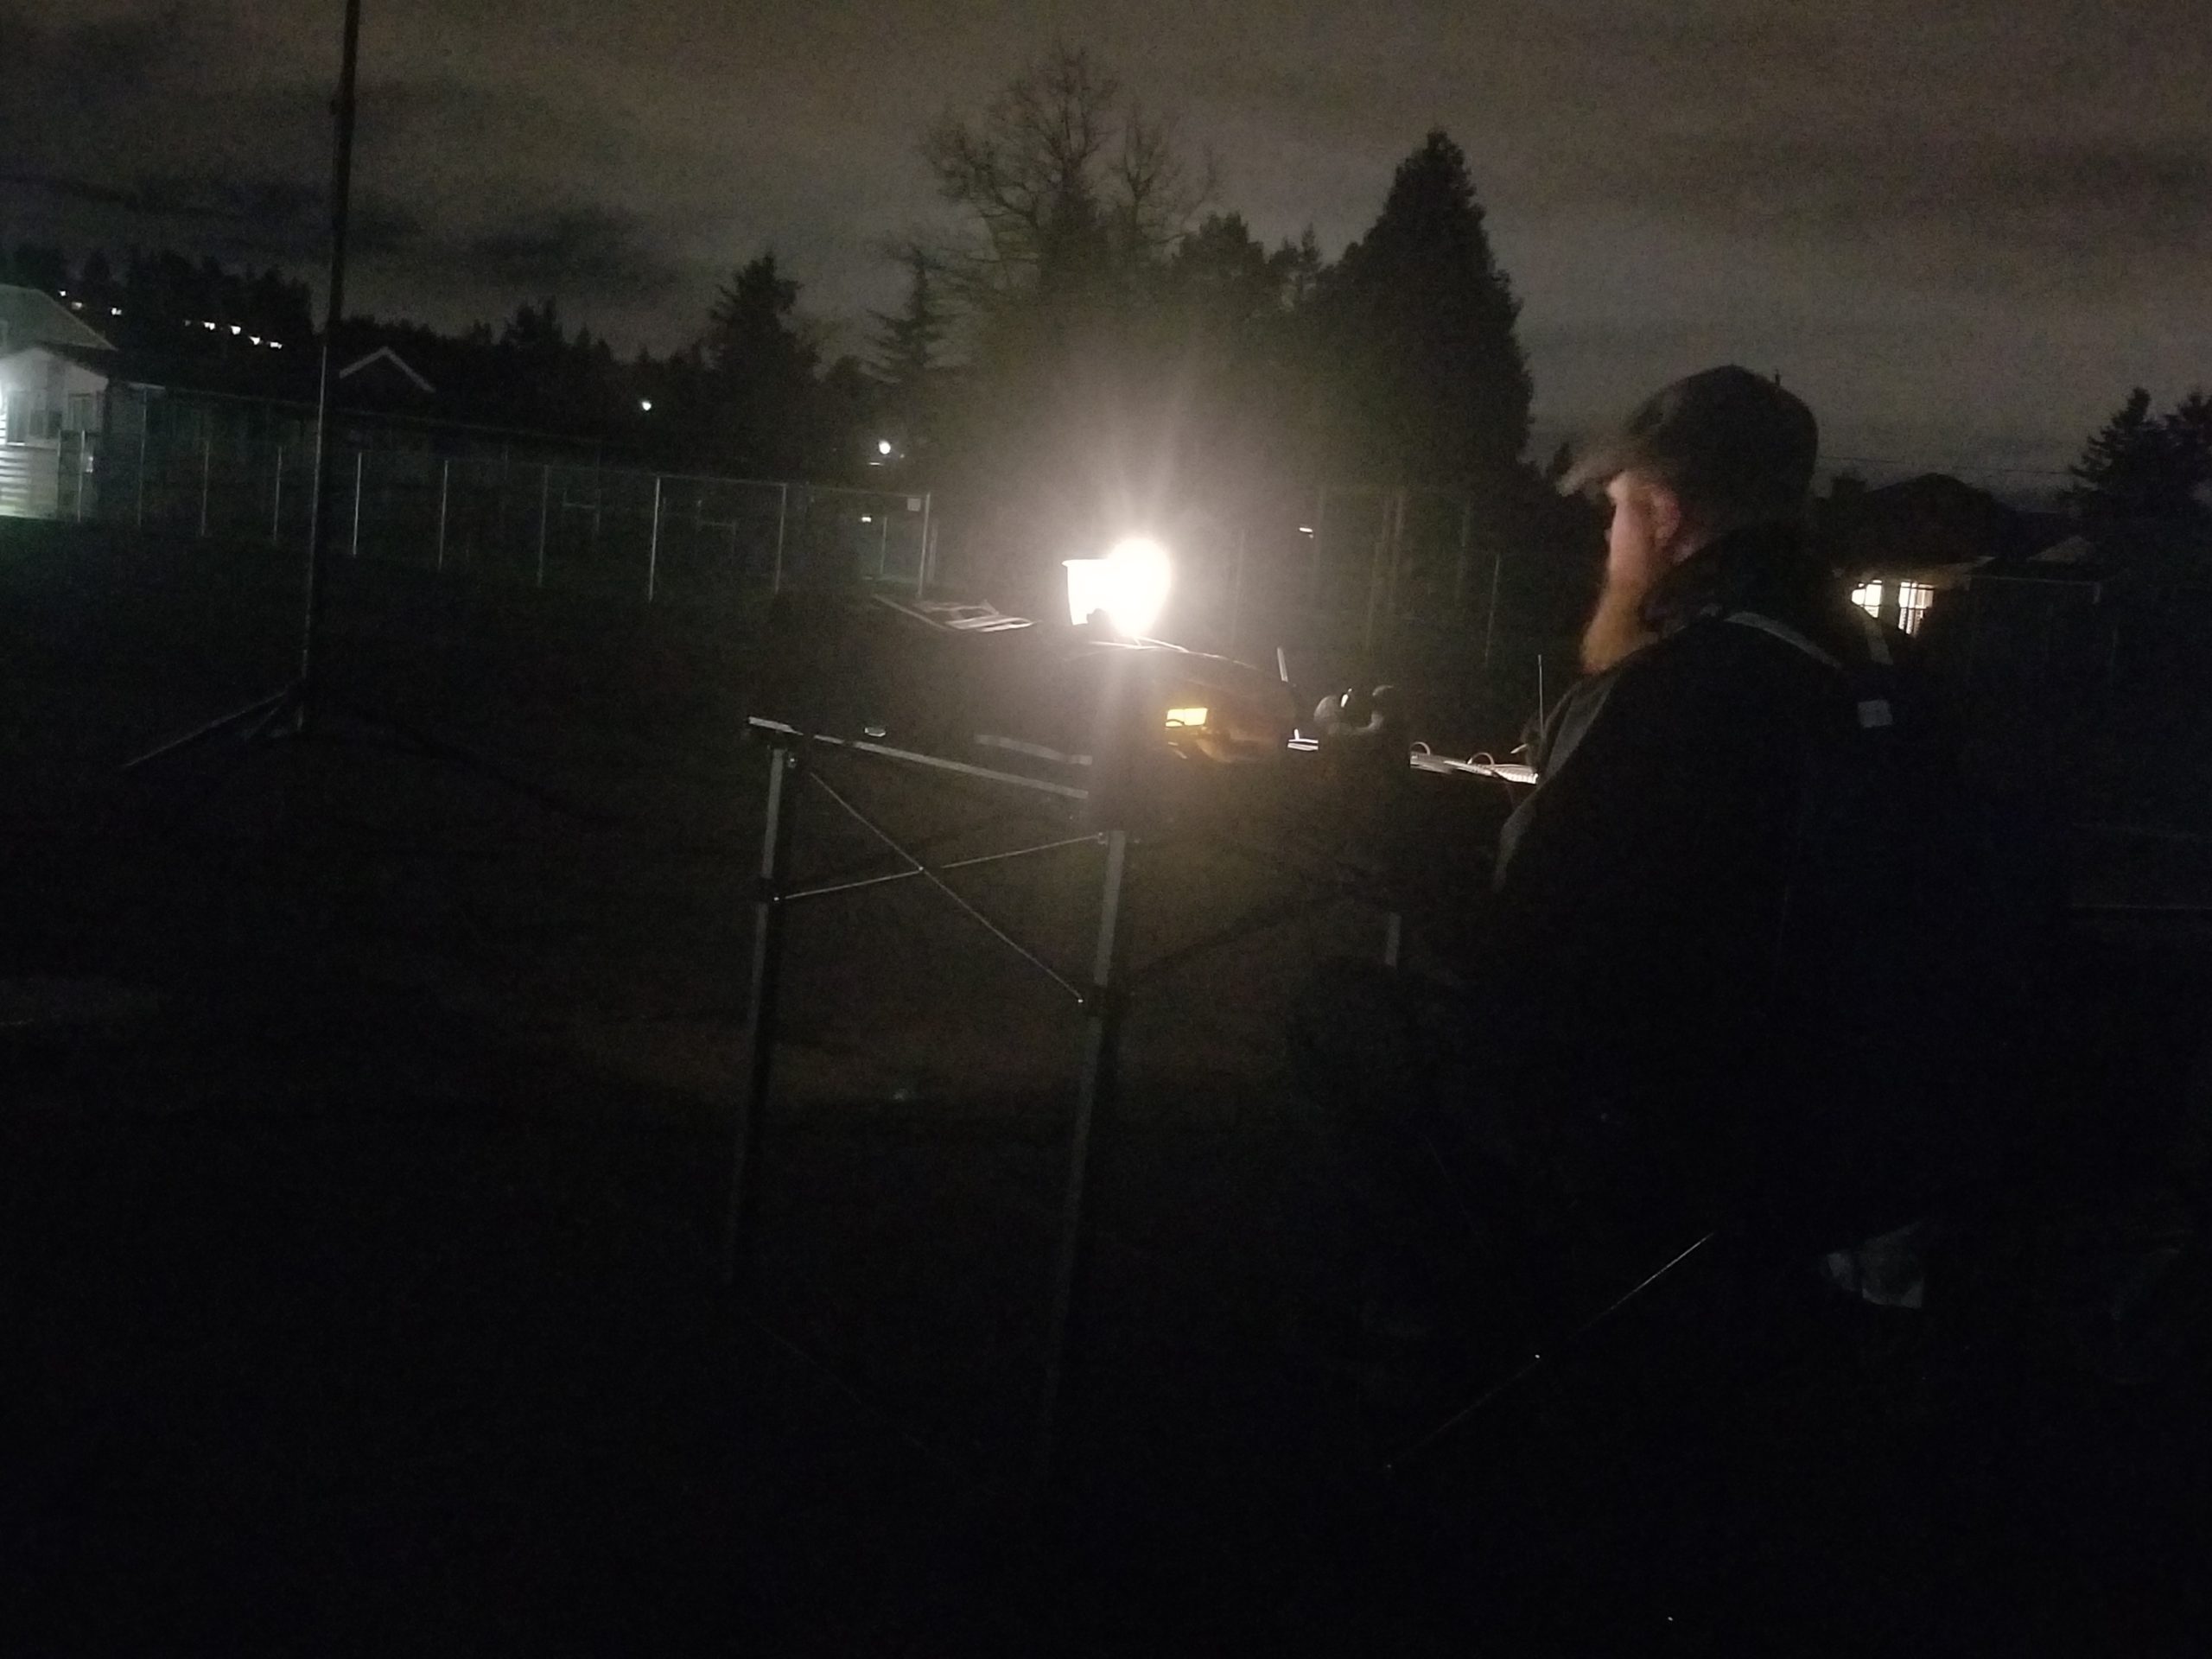
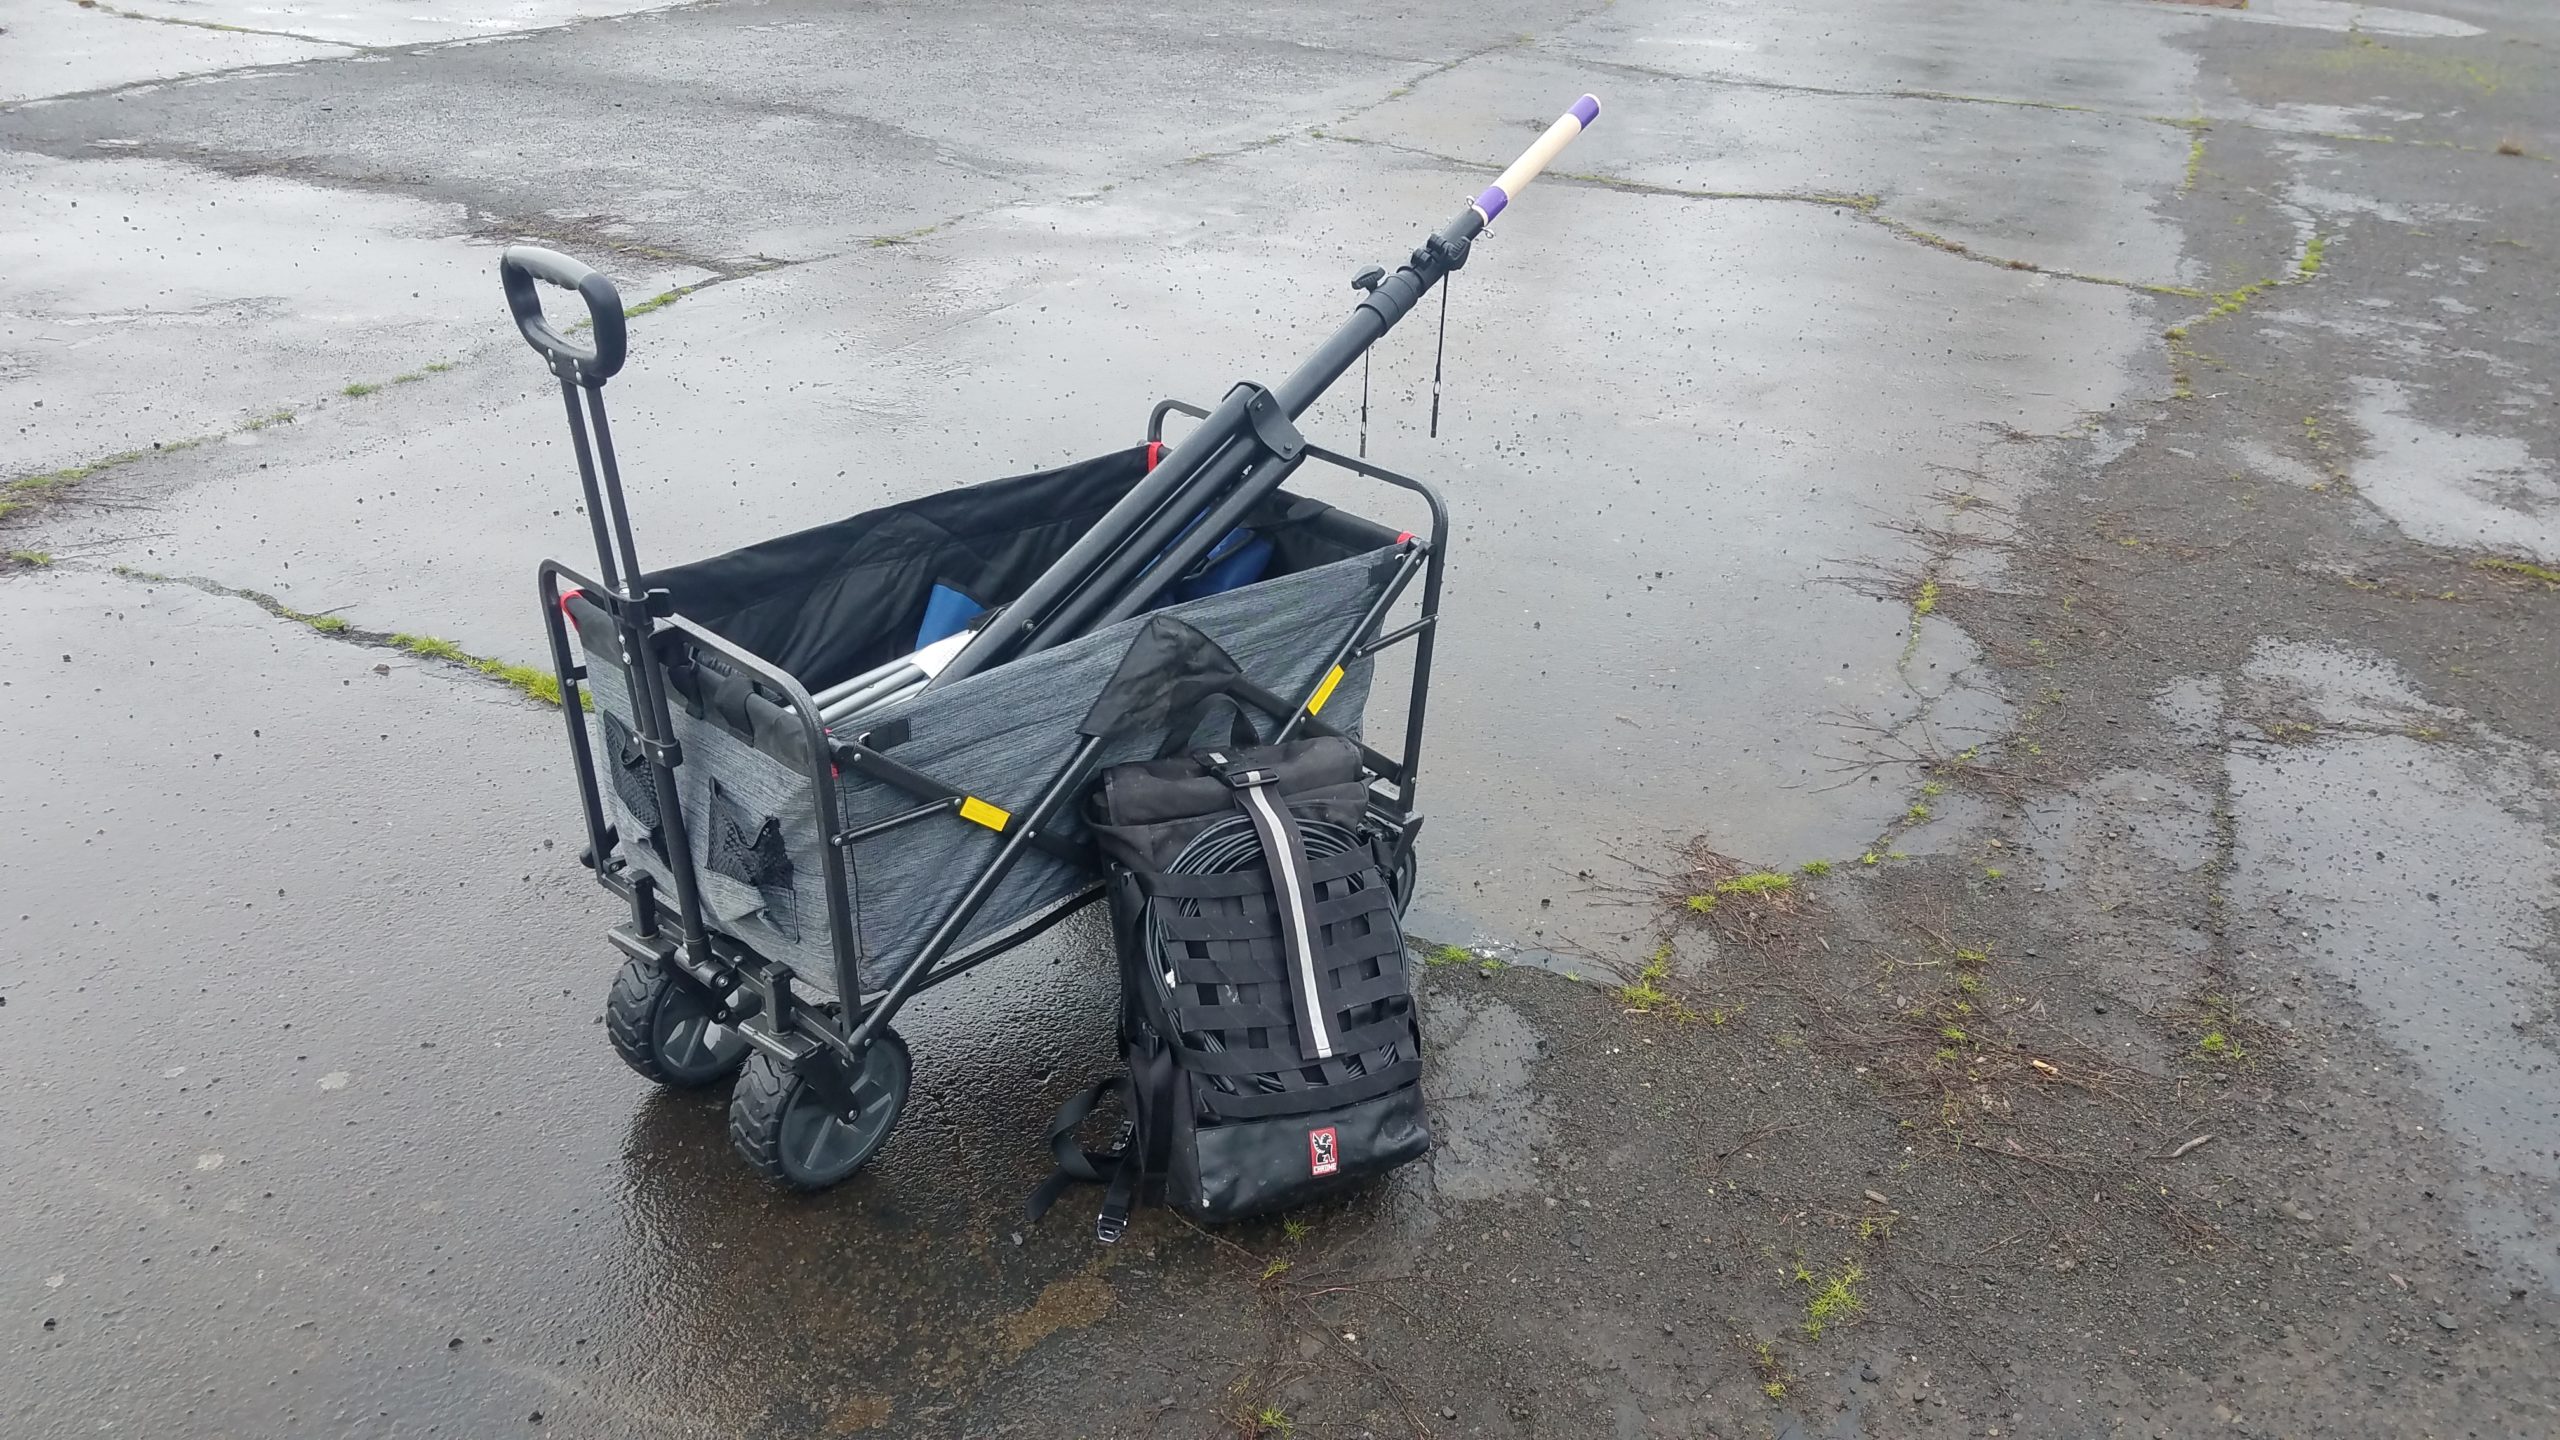
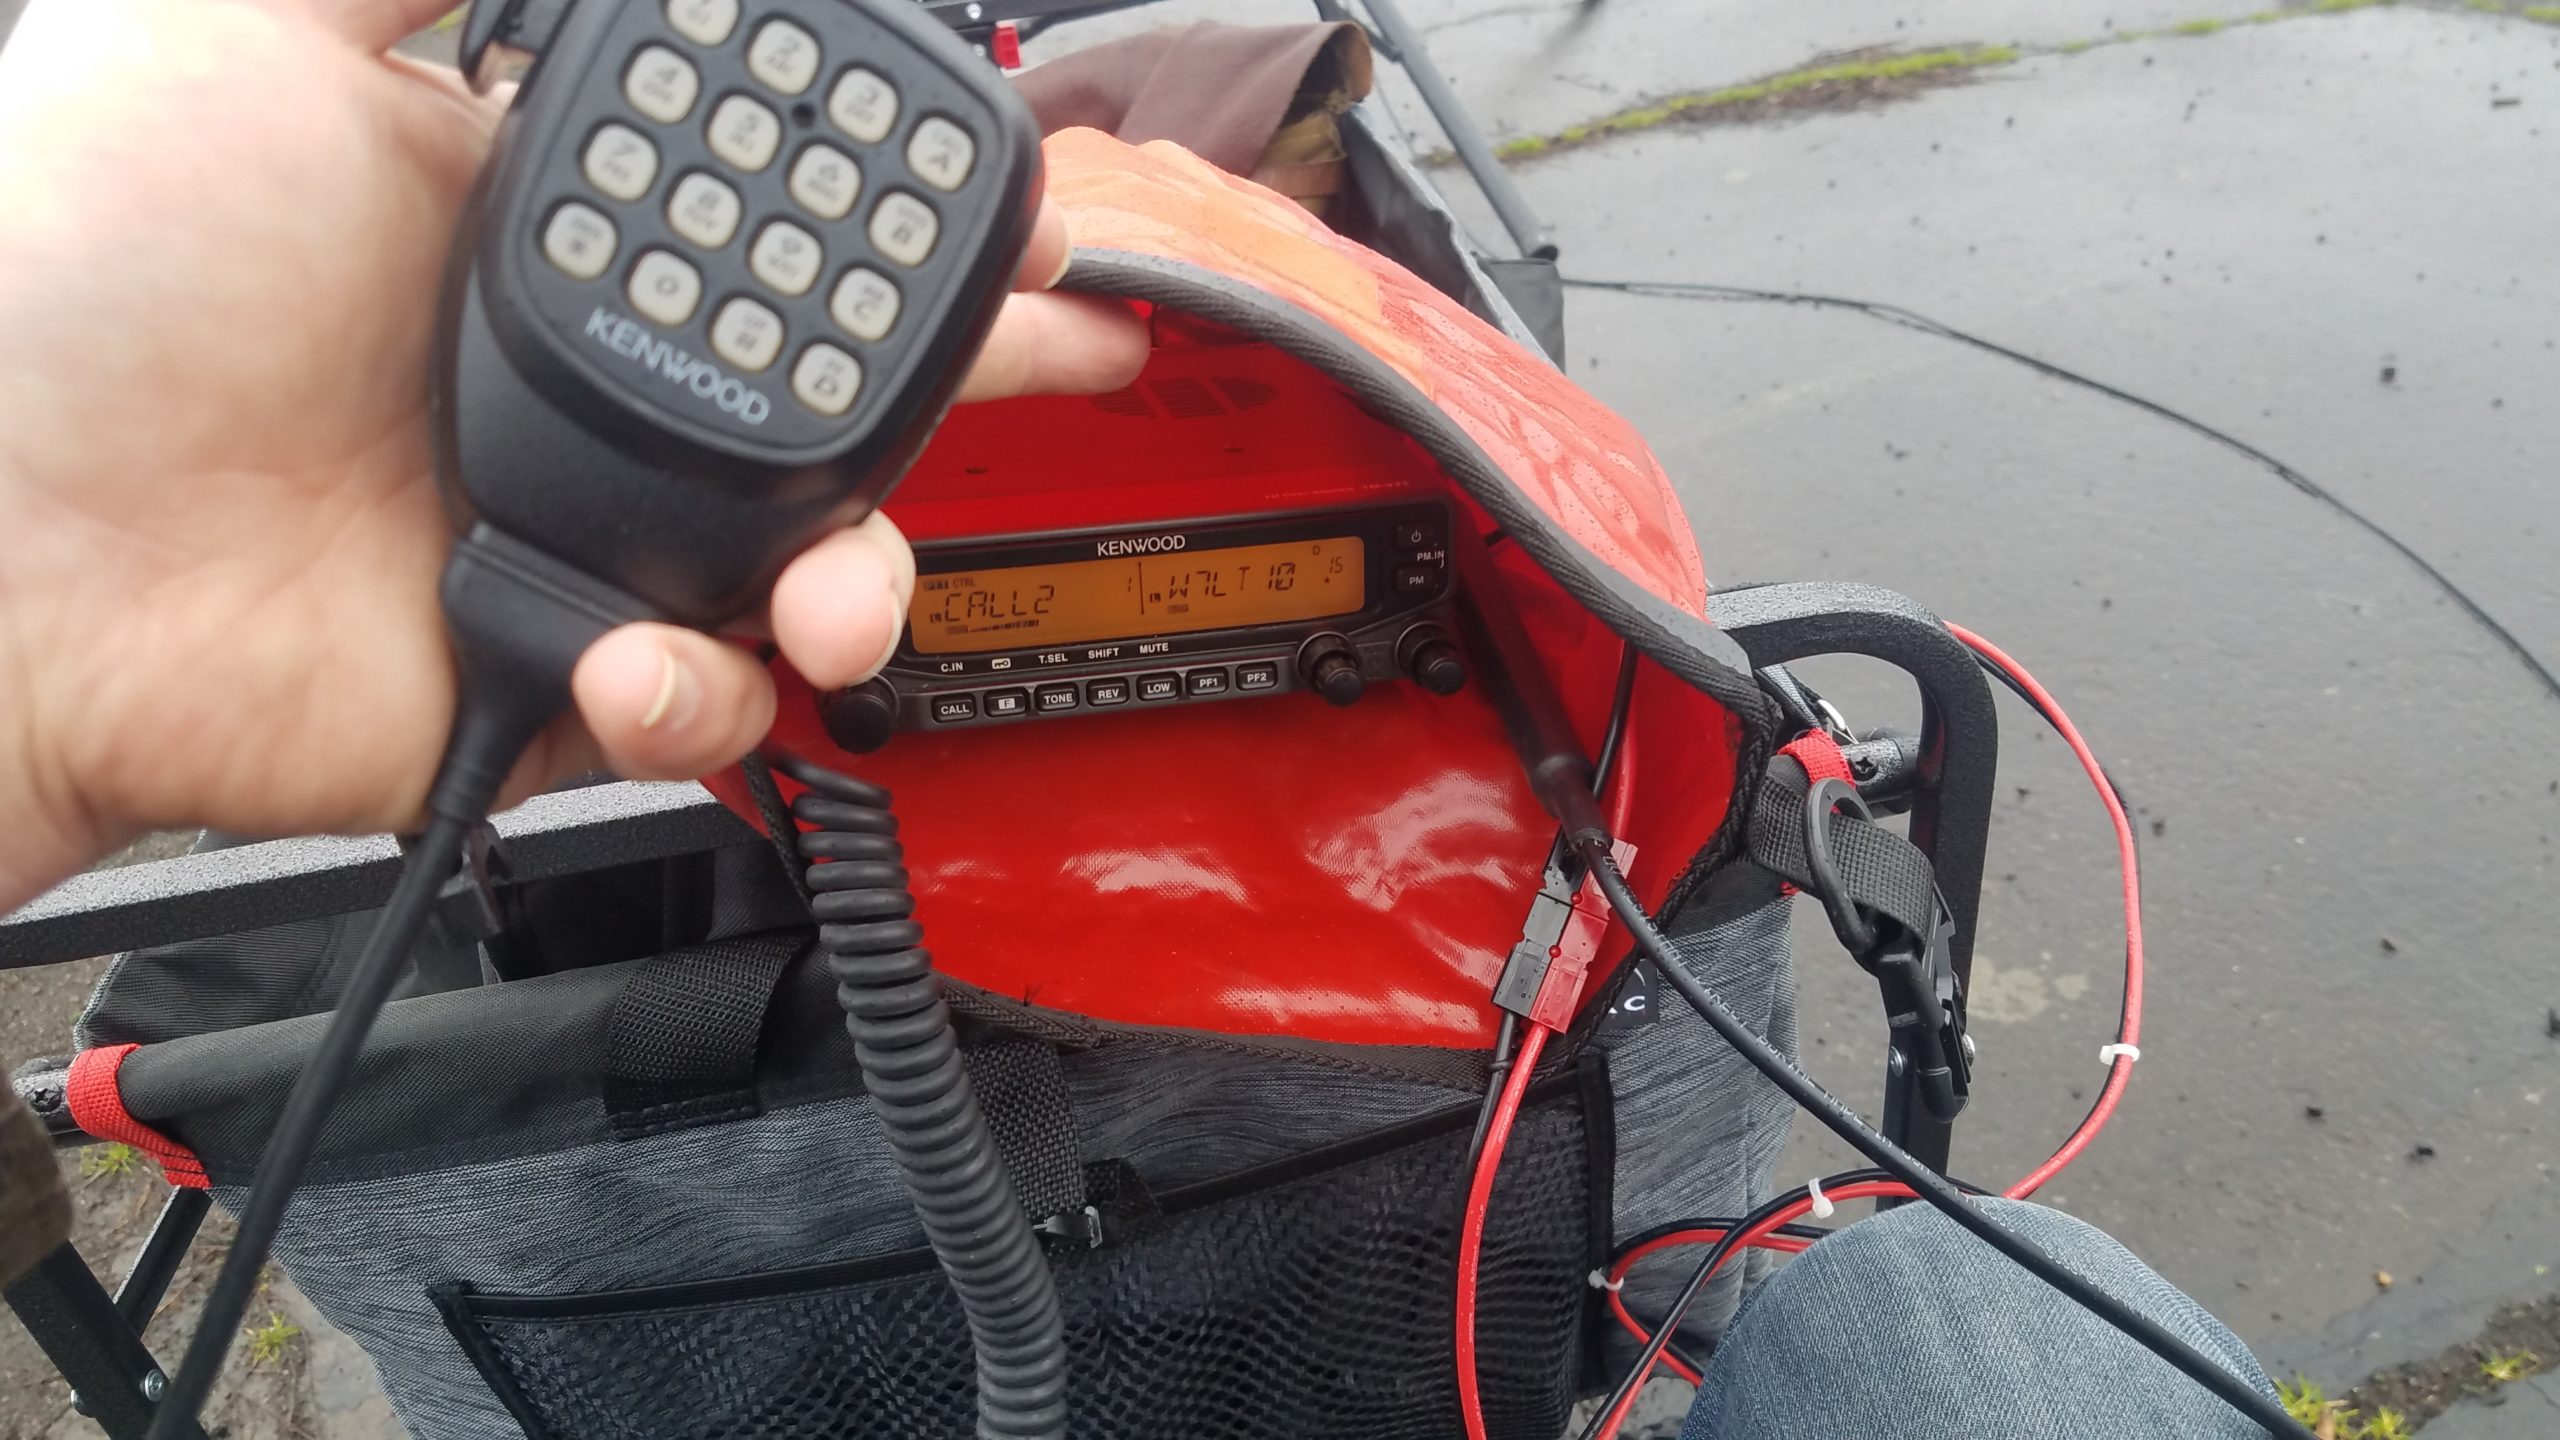
I wanted to add an update with another example of operating the radio in reasonable conditions doing a specific task that isn’t entirely theoretical, or just on-the-bench testing. Tonight I was net control for the Portland Neighborhood Emergency Team chat net, and I also participated in the Portland NET net as well. For most of the nets I was running two LED lights and I topped the last 25% of my tablet’s power off. I ran my Kenwood TM-V71A at 5w which drew about 3A when transmitting and 0.55A receiving. Both of the LED lights were set on low and consumed 0.1A apiece. The charger’s power usage varied depending on the part of the charging cycle the tablet was in, but at the end of 3 hours of running the radio, and about 2 hours of running both lights I used a total of 3.42AH of battery capacity. The battery I was using has a rated capacity of 40AH, so I used about 8.6% of its capacity (3.42AH used / 40AH of battery capacity = 0.086) doing both nets and listening on the first net’s frequency for an hour before it began. The first net that I was transmitting more on used the majority of the capacity, about 2.3AH. During the second net I only used about 1.1AH because I spent the vast majority of it listening as we ran lights and the tablet charger.

Tying it all together

By the end of this blog post I hope you came away with a good understanding of how I approach understanding and estimating my power usage and right-sizing my equipment for specific uses. This approach also helps inform how I operate when I don’t expect to have reliable power or when my situation changes and I’m not able to recharge batteries, etc. It can also show you how big of a difference it can make when you transmit less or when you add or drop devices from your setup.

This pattern can potentially be applied to other equipment like medical devices that can be run on battery. I’ve used the same method to profile my partner’s CPAP machine’s power consumption with various settings. I’ve been able to determine what sort of battery and charging system that will be required to keep it running when grid power fails or is unavailable (hint: turning off the humidifier and tube heater really saves a lot of power).

Notes after the fact

On the advice of Kevin, N6KVN I’m going to add a note about batteries. While this bit of the post is a bit out of scope it’s important to touch of the strengths and limitations of various battery technologies. Some batteries can be damaged by discharging them to 50% and others can be discharged to 20% or possibly lower before damage occurs. It’s important to understand the characteristics of the equipment you’re running. If you’ve read other posts of mine you’ll notice that I field a lot of LiFePO4 batteries. One of the reasons (apart from weight and other safety factors) that I tend to use them is because they can be discharged to a depth of 20% of remaining capacity before they’re permanently damaged. Most common lead-acid battery tech (think car batteries) can only be discharged to 50% before permanent damage to the cells occurs, but they are much cheaper than lithium batteries. Comparisons of various battery types is an entire post of its own, but these things are worth mentioning as you size your system and plan for the amount of energy you expect to discharge or plan to use. As an example my 100AH battery really has a usable capacity of 80AH because if I were to discharge the battery to 20%, or 20AH it would cause permanent damage to the battery (100AH capacity * 20% limit = 20AH, 100AH capacity – 20AH limit = 80AH of discharge before damage). This information should be listed by the battery manufacturer. If it’s not included I’d recommend reaching out to their support team.

Modified Ed Fong roll-up dual band J-pole antenna kit

Plastic bag containing a roll-up J-pole antenna and various adapters
Ed Fong roll-up J-pole kit

Howdy y’all! This is my second post for today. I wanted to explain my modified Ed Fong roll-up J-pole antenna and kit. This is the stock Ed Fong DBJ-2 (ham) dual band roll up antenna kit with a twist and an extended adapter pack. The antenna itself is pretty great, but I noticed while using it that there were a couple issues regarding setup. I had trouble hanging it in bushes and trees without carrying some extra materials like paracord. In addition to that sometimes the antenna would snag and you’d need to pull on the attached feed line to get it down which could damage the antenna by weakening connections between the feed line and ladder line or separating them entirely! The antenna comes with a wire tie attached to the end which could be used to hang it from a small object, but it didn’t work well because unless you were hanging it from a small metal object like a nail. Using a J-pole with metal objects near them and above the bottom of the antenna can detune them, and likely increasing the the SWR of your setup. Here’s how I solved both of those problems and set the kit up for a number of radios I and other friends have just in case we needed to hook something different up to it. It has come in handy already.

Unrolled j-pole antenna on a wooden table
Unrolled J-pole antenna

Solving the ease-of-hanging and snagging issues turned out to be the same solution – creative use of inexpensive paracord and heat shrink tubing. The ladder line that serves as the antenna’s radiator has convenient slots that one can weave paracord through. If you tie the paracord to the top of the antenna and weave the paracord through the slots in the antenna you can take a long end and throw it over a branch or tie it to some overhead structure, and also use it as a more rugged line to pull a stuck antenna down with. My initial setup didn’t have enough paracord on the bottom to pull the antenna down when it was up higher and stuck so I added the bright red line to give it more length to retrieve it from a higher location. The bright red length of paracord with a reflective 3M strip woven in also makes it more visible in low light or when you’re looking for the end with a flash light. We can now hang and retrieve our antenna easily and prevent damage to it if there’s a snag you need to apply more pulling force. Here are some more detailed pictures of how the paracord is tied on, woven, and secured by heat shrink tubing.

paracord tied to the antenna with the knot covered by heat shring tubing.
Paracord tied to the top of the antenna and the knot is covered by heat shrink tubing
View of the paracord woven through the antenna and secured by intermittently placed pieces of heat shrink tubing.
Paracord woven through the antenna and intermittently secured by heat shrink tubing
The bottom of the antenna secured with heat shrink tubing and the two sections of the recovery end are tied together

At this point we should probably talk abut the kit in its entirety. The modified antenna is obviously a critical component, but being able to connect the antenna to various radios is also very important. For that we’ll start with an exploded view of the kit.

Plastic bags, cables, adapters, and the cable arranged on a wooden table.
All components of the kit arranged on the table

This kit isn’t anything really fancy. It comes with the stock antenna and male-to-female extended BNC cable. The antenna itself has a BNC end, but not every radio has a BNC connector. I’ve used this antenna with a number of radios including dual-band Kenwood mobile radios, a Baofeng UV-5R, a Yaesu FT3DR, and a Yaesu FT-857D. The two of those radios have a PL-239/SO-239 connector, one has a male SMA, and one has a female SMA connection. This adapter kit allows an operator to connect any radio with a BNC, SMA male, SMA female, or a PL-239/SO-239 connector to the antenna… additionally you can connect one or more pieces of coax with PL-239/SO-239 cables as well. This can be handy if the antenna is up high or if the radio is far from the antenna. Here’s a list of the parts in the graphic top to bottom, left to right:

  • Medium sized heavy plastic zip-loc bag to hold the kit
  • Small heavy plastic zip-loc bag to hold small adapter parts
  • 6′ BNC male to female extension cable (originally came with the antenna)
  • 2x PL-239/SO-239 barrel connectors for both “changing the gender” (I’m not a fan of this terminology, but it’s what’s used broadly) of the BNC to PL-239/SO-239 adapter and for connecting two pieces of feed line together.
  • BNC to PL-239/SO-239 adapter
  • BNC to SMA male adapter with a wide-flanged connector (for my Yaesu HT)
  • BNC to SMA male adapter with a narrow spinning connector
  • BNC to SMA female adapter with a wide-flanged connector
  • BNC female barrel connector for use with the narrow spinning connector to adapt it to a male port
  • Rolled up J-pole antenna

With this set of adapters and cables we can connect this antenna to a wide variety of radios which might be handy in an emergency, or if you happen to forget another antenna. It’s also worth mentioning that this method could also be applied to other roll-up J-pole antennas, not just for ham bands.

Operating from a park for a couple hours

After a bit of a posting hiatus I thought I’d post a bit about some impromptu radio operation from a park on a fairly sunny weekend day. My partner had a meeting with some folks in our pod in Ladd’s Addition, a Portland neighborhood with a central park so I decided to set up my portable radio station and do some UHF/VHF work locally to see who I could reach from said park. The station I brought is based on a Kenwood TM-V71A and fits in a single bag along with a battery and a 20W folding solar panel. This is essentially the same setup I’d use for emergency communications with a larger antenna or solar panel.

Roll-up J-Pole antenna hung in a rose bush
Ed Fong roll up j-pole deployed in bush
A radio sitting on top of a backpack connected to a solar charger, solar panel, and battery.
Portable UHF/VHF radio and power setup.

I ended up putting my modified Ed Fong DBJ-1 roll-up j-pole antenna in a large rose bush and hooking it up to my TM-V71A, and hooking the battery, solar panel, and charge controller up. I started operating at medium power (10W) and was able to reach Roger, W7RC, in Battleground, WA without issue on the 2M calling frequency (146.520MHz). This is pretty typical as he runs a beam antenna with the capability of transmitting at 1.5KW and is something of a local fixture. He reported me coming in with full quieting at 10W, and when I dropped to 5W (low power) he heard me with a little static. I also made some additional contacts including one in the Council Crest area: Ed, WB2QHS. He was out for a walk with an HT and we were able to talk with perfect clarity and then some static as he moved around with me running 5 and 10W. His elevated position helped facilitate communications. In about 2.5 hours I used somewhere around 1.3Ah of battery power, but was able to recharge the battery completely from the solar panel by the time I left. Not bad! The radio draws about 0.6A idling, and the solar panel charged at a maximum rate of ~1.1A in more intense sunlight. When I was transmitting at 10W the radio drew ~5A and at 5W ~3.5A. All these power figures are as measured by my Buddipole Power Mini. The current model features a USB port where the one I’m running doesn’t. I should also mention I topped up my phone charge from the battery as well.

If the solar panel provides more power than is required for the radio’s operation and the battery is charged the radio doesn’t draw from the battery. In the event the solar panel isn’t providing enough power to cover the radio’s power needs it dips into the battery, and when the radio consumes less power than the solar panel provides the battery is charged with spare current.

Closed backpack on the groud with a folded solar panel in the attached cargo net.
UHF/VHF setup packed up in a single backpack.

As shown above the whole station packs into my backpack without issue. Were I not on call for my job and carrying a hotspot and laptop there would be some additional room in the bag.

Diagram depicting a solar panel and battery attached to a controller, the controller to a radio, and a radio to an antenna.
Portable radio station block diagram depicting the connections between various station components.

Successful Portland NET simplex exercise!

Hello radio enthusiasts, geeks, etc.! Tonight was my first exercise as a certified Portland NET (Neighborhood Emergency Team) ARO (Amature Radio Operator). We operated on simplex nets tonight throughout the city in order to practice communicating directly with each other and PBEM in the event city wide repeater networks failed during an incident.

I decided to test from my staging area tonight rather than operate from home… last time I was out I couldn’t get Pat Winlink going, and I have some new gear to test tonight: a legit collapsible table and a GoalZero LED lantern! There was supposed to be rain tonight, and the plan to cover myself and the top of the table in a tarp and work under it but alas it wasn’t necessary. The rain stayed away and I didn’t need to test my half-baked idea.

My partner and the doggo came out again and hung out with me as I operated. Most of the photos of the deployed setup and of me operating are hers taken for the blog. I should note that I don’t have her help me do any actual setup or tasks related to station operation. The idea is to make sure that I can manage all aspects of setting up, transporting, and tearing down the station without assistance.

Me sitting at a lamp-lit table with a radio on top at night, the antenna mast is in the background.
Set up at my staging area.

Setting up was pretty smooth today even in the dark. I unloaded the antenna mast and propped it up. The table was then set up and the J-pole was mounted on the non-conductive part of the mast. The second half of the 2m element was attached. After that the feedline was connected to the j-pole and the Kenwood TM-V71 was set up inside my weatherproof backpack along with the wireless access point, Winlink Pi, and 20Ah Bioenno LiFePo4 battery. With that and the ARO binder set up I powered the radio up and the resource net was just beginning.

I managed to check in just fine and the resource net controller and had an excellent signal at 5w (minimum power the radio can do). For this exercise the resource net did directed check-ins by call sign suffix. It was pretty smooth and orderly and net control did a good job. There were quite a few participants from various neighborhoods and I could hear almost every station. After all stations had checked in the subnet controller for each city region would announce their frequency and have all operators in that region move to their regional net as specified in the procedure that was sent out ahead of time. It should be mentioned that I uploaded the procedure for the exercise to the documentation server on the Raspberry Pi ahead of time as well. I was, however, missing the Multnomah County ARES frequency template. I need to make sure I have that on the document server.

Antenna mast made of a speaker stand with a wooden closet hanger deployed at the top. Open stub J-pole antenna is fixed at the top.
Antenna mast and antenna deployed

Once on the regional net we checked in using our tactical call signs. We exchanged signal reports and everyone on the net was a 5 (readability) to me which was very nice, and my signal was a 3 or above to everyone else. It looks like my staging area is pretty good in terms of connectivity to the other stations in my city region (Alameda South). Interestingly one of our operators that generally has a great signal to all stations had some trouble hearing the nearby subnet controller. I suspect there might be some multipath interference between that station and the subnet controller resulting in an unexpectedly poor signal.

Table top lit by LED lantern with a backpack containing a radio, a tablet, and zipped 3-ring binder with a partially filled form 8 and a pen on top.
Table setup with form 6 (ICS 309) in a binder, my tablet, and radio gear in a weather resistant backpack.

As we operated the radios we also filled out a form 6, or ICS 309 to track events and messages on our radios. These forms are used to document events and messages during an incident or exercise. When passing messages we fill out or voice form 8s (ICS 315), but we didn’t actually do one tonight.

Once we concluded talking on our regional nets we checked out of them using our tactical call signs, and then tuned back to the resource net and checked out there as well. It took a while to get checked out as there was a lot of doubling (more than one station transmits on the frequency at the same time interfering with other stations). It’s hard to coordinate stations by call sign suffix arriving on the resource net at random times even though the resource net controller was doing a great job.

Everything was good so far! Now it was time to attempt to send e-mail again after my last failed attempt. This time I managed to use the Winlink host and an Android tablet to send an e-mail to both OH8STN and a friend from my staging area over VHF. I had a lot of trouble sending e-mail at first. While the wifi network and applications worked just fine this time I had some challenges sending e-mail due to odd issues with the content. It seems that if the body of he e-mail or subject is too long there are protocol errors. After a few experiments I was able to finally get the messages out.

Time to break down and get some dinner! Breaking everything down was super-smooth this time around. There were no issues and everything packed away nicely! I just rolled the wagon back home and unloaded it!

Folding wagon with cloth sides loaded with equipment lit by street light. The collapsed antenna mast is  sticking from the back of the wagon.
The ham hauler loaded up on the way back home.

Lessons learned:

  • A table makes life a LOT easier when doing this sort of deployment.
  • The Goal Zero LED lantern wokred very well. The adjustable light level is very nice, and even with half the lantern on at the lowest possible power was more than enough for the vast majority of tasks I had to perform from setup to operating and filling forms to breaking down. I did increase the light level a couple times for specific tasks, but I didn’t need to keep the light level up.
  • Make sure you have all the documents you’ll need with you including frequency lists.
  • Having exercise-specific and general guides at your fingertips is a good idea. It helped in this exercise.
  • It takes 45 minutes from loading equipment to being on air for my staging area under more-or-less ideal conditions in the dark.
  • Some changes to the J-pole made it work a lot better in the field. I’ll post an entry the modifications I made.
  • My power cabling was really messy. I could do better.
  • It didn’t rain but I need to figure out a shelter that would protect the table top from wind and rain that can fit in the bag with the table.
  • The exercise seems to have gone well broadly. The check-in process was pretty efficient.
  • The check out process was a bit chaotic but maybe we could implement a system whereby net subnet controllers check into the resource net and once that happens the resource net controller adds that subnet controller’s region to a directed checkout by region. We could cycle through regions until all stations check out.

A successful-ish EMCOMM test deployment

Howdy everyone! I wanted to tell the tale of a short walk with a wagon in the rain followed by some radio tests. I decided I’d like to test moving to my staging area during a disaster response scenario. My goals were to test making contacts with my Yaesu FT3DR and do voice as well as Winlink with my Kenwood TM-V71 and portable Winlink setup. This will also be the first deployment of my Arrow OSJ 146/440 open stub dipole. This model has the split 2m element for easier transport.

Cloth-sided wagon containing various equipment and a backpack leaning against the side.
Wagon with the antenna, mast, and a couple folding chairs. Also pictured is my water resistant backpack with the radio gear and feedline.
Wing nuts installed on the antenna's pipe clamp.
Slightly modified Arrow OSJ 148/440. I replaced the stock hex nuts with 1/4″ 20 wing nuts to remove the requirement for a wrench to install the antenna in the field.

After arriving at my deployment site I removed the 1 5/8″ closet rod from the inside of the speaker stand. The long end of the closet rod stays inside the speaker stand tubing for easy transport. The stop for the closet rod is made from three eye screws that double as guy line connection points. The three eye screws are installed just above the top band of purple duct tape (reduces vibration and motion when the closet rod is installed in the end of the speaker stand).

J-pole mounted to a wooden closet rod resting against a speaker stand. The split 2m element is affixed for transport.
J-Pole with the second half of the 2m radiator threaded in place for transport.

The next step is to install the top portion of the open stub J-Pole.

J-pole mounted to a wooden closet rod resting against a speaker stand. The split 2m element is installed for transmission.
Open Stub J-pole atached to closet rod resting against the speaker stand with the 2m element fully assembled.

After the feedline is attached to the J-pole the closet rod with the antenna attached is installed in the speaker stand with the tape end of the closet rod in the top of the speaker stand. The closet rod is resting on the three eye screws that prevent it from slipping down inside the speaker stand tubing. The two telescoping sections of the speaker stand are fully extended and the locking pins are in place.

Fully extended speaker stand with closet rod and antenna attached. The wagon, my partner, and our dog are off to the side.
Antenna fully extended. Also present is my partner and our dog for moral support.
A picure of the feedline velcroed right above the tripod component of the speaker stand.
A velcro wire tie is used to anchor the feedline to the bottom of the antenna mast to prevent it from being pulled over from the top if someone trips on the cable.
Yaesu FT3DR connected to the feedline with the wagon and antenna stand in the background.
My Yaesu FT3DR attached to the feedline with a SMA to PL-259 pigtail.

I was able to make a couple contacts using the Yaesu HT at 5w and monitored APRS transmissions for a while. So far everything is good.

Hand holding microphone of Kenwood TM-V71. In the background the radio is in a dry bag and sitting on the wagon.
Kenwood TM-V71 connected to the feedline and battery in the backpack. It’s protected from rain by an Ortleib dry bag.

The Yaesu HT is stowed in its bag and the Kenwood mobile radio is connected to battery power and the feedline. It’s also protected from the rain by a 5L Ortleib dry bag. More contacts are made on 2m without issue. I was able to make contacts in Portland, OR, Aloa, OR, Washugal, WA, and Vancouver, WA at 5w. More good news!

Hand holding the Mobinlinkd TNC3 and Raspberry Pi Zero W connected to each other. Radio data connector is also set up.
Winlink host, TNC, and radio connected.

It was finally time to send and receive some e-mail! I connected the Winlink Raspbery Pi to the power supply and the Mobilinkd TNC3 to the data port on the TM-V71. I pulled my phone up, found the generated wireless network, joined it…. and nothing! It partially connects but doesn’t get an IP address. Strange, but no matter. I assigned a manual IP to my phone and tried to connect to the Pi via IP address. The connection still failed. I rebooted the Pi and tried again. The wifi network shows up, I join it, no DHCP IP address. Bummer! All my tests having either been complete or failed it was time to pack up and head home.

At home I boot the Pi and it joins the home wifi network with no issue. I SSH into the Pi and begin reviewing the configuration for Dnsmasq (DHCP/DNS server). Everything looks good and the configuration is valid. I then look at the autohotspot script. It has the default IP address that the script ships with set. Then the “aha!” moment strikes. As part of writing my Winlink host setup guide I re-ran the Autohotspot install script so I could make sure my documentation was right. The fix is now obvious: I just changed the IP address in the Autohotspot script, kicked the Winlink host off my wifi network and restarted it. I’m now able to connect, get an IP address, and connect to Winlink and the documentation server!

Lesson learned… always re-test your setup after you mess with it, and if you re-run a setup script you should verify that your setup runs properly afterward. Fortunately this was not a emergency deployment and was close to my QTH.

Other things I learned from today:

  • The wagon doesn’t negotiate steep curbs well without a bit of finesse.
  • The antenna mast should be lashed in place on the wagon during transport so it doesn’t move in the wagon.
  • The wing nuts on the J-pole can get over-tightened easily making it hard to dismantle the setup.
  • The allthread stub that connects the two parts of the 2m element on the J-pole can be unscrewed easily and lost when the element is being removed. I’ve dropped it 3 times in the first 48 hours of having the antenna. Some red or blue Loctite is probably a good idea to keep the end of the stub fixed in the removable portion of the 2m element. The red (permanent) Loctite will also keep moisture out of that joint.
  • Sometimes the telescoping tubes on the speaker stand stick.
  • I live in NW Oregon and figuring out a wind and rain shelter is probably a good idea.
  • The speaker stand is pretty stable and sturdy. It will probably work without guying in mild wind.