First time working 6m

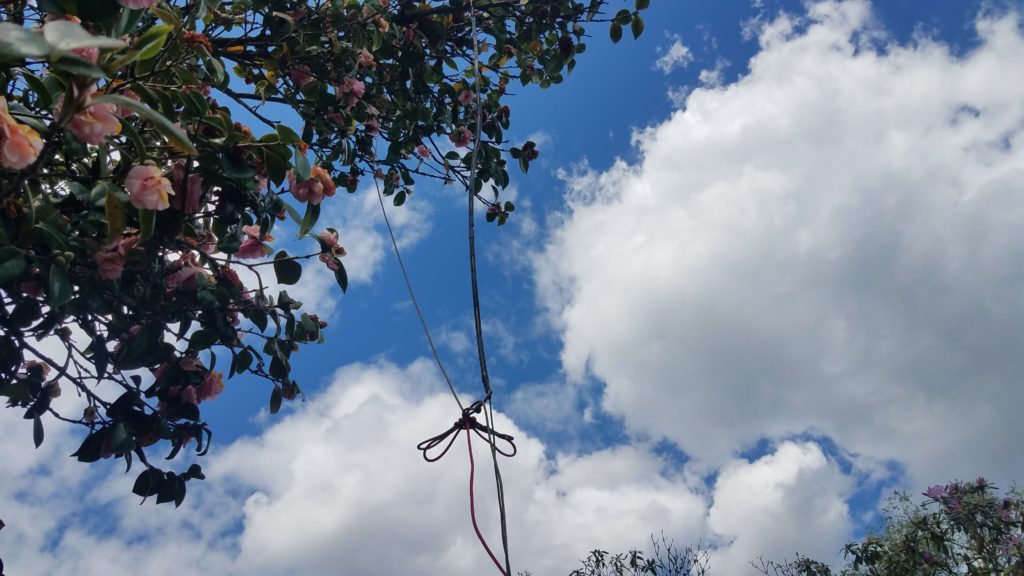
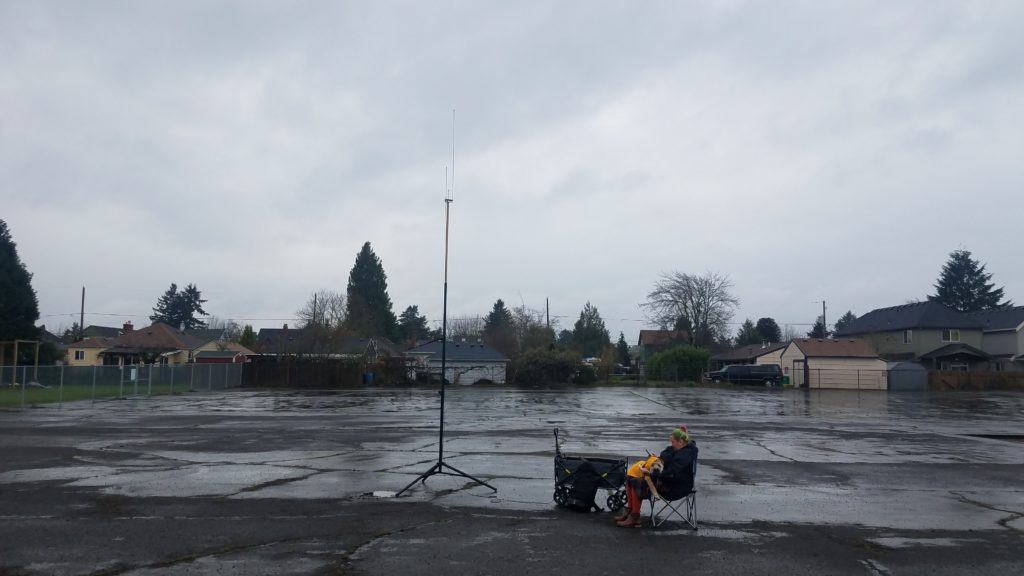
Speaker stand with wooden dowel set up in a yard with an endfed dipole antenna attached to a dowel in the top of the antenna with red paracord extending right out of frame.
6m endfed dipole attached to the portable speaker stand antenna mast.

Hello, long time and no post! Tonight I decided to test out an antenna a friend of mine, K7AJK, let me borrow which also enabled me to make my first attempt to work 6m! This antenna is a Par EndFedz 6m end-fed dipole, and it works on, you guessed it! The 6m (50-54MHz) band. This is my first attempt at working this band, and yet another attempt to make phone (voice) contacts with my Lab599 TX-500, a newer QRP rig which is capable of a maximum transmit power of 10W. With this antenna and band I decided to attempt to use single-sideband (SSB) for my phone contact as most of my digital communications and work use SSB. Since I’m working SSB instead of FM, the antenna should be oriented horizontally to ensure better signal propagation and better changes of making contact with other SSB stations. The kind of propagation I’m going for here is groundwave propagation, meaning I’m attempting to get my signal out over the ground to reach other stations rather than attempting to bounce it off the atmosphere as would be the case with other types of 6m propagation. To get the antenna up and off the ground away from the roof and gutters of the house I set my speaker stand antenna mast up with the “matchbox” end of the antenna connected to some guy wire eyelets on the dowel portion of the mast, and the other end attached to a post coming up from some raised garden beds. This got the antenna about 9-10′ off the ground and away from the gutters which is fine for a test run.

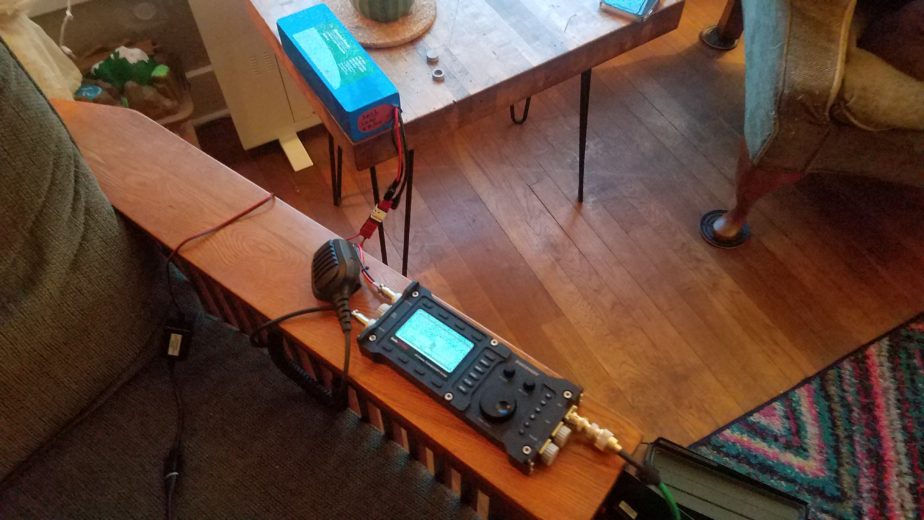
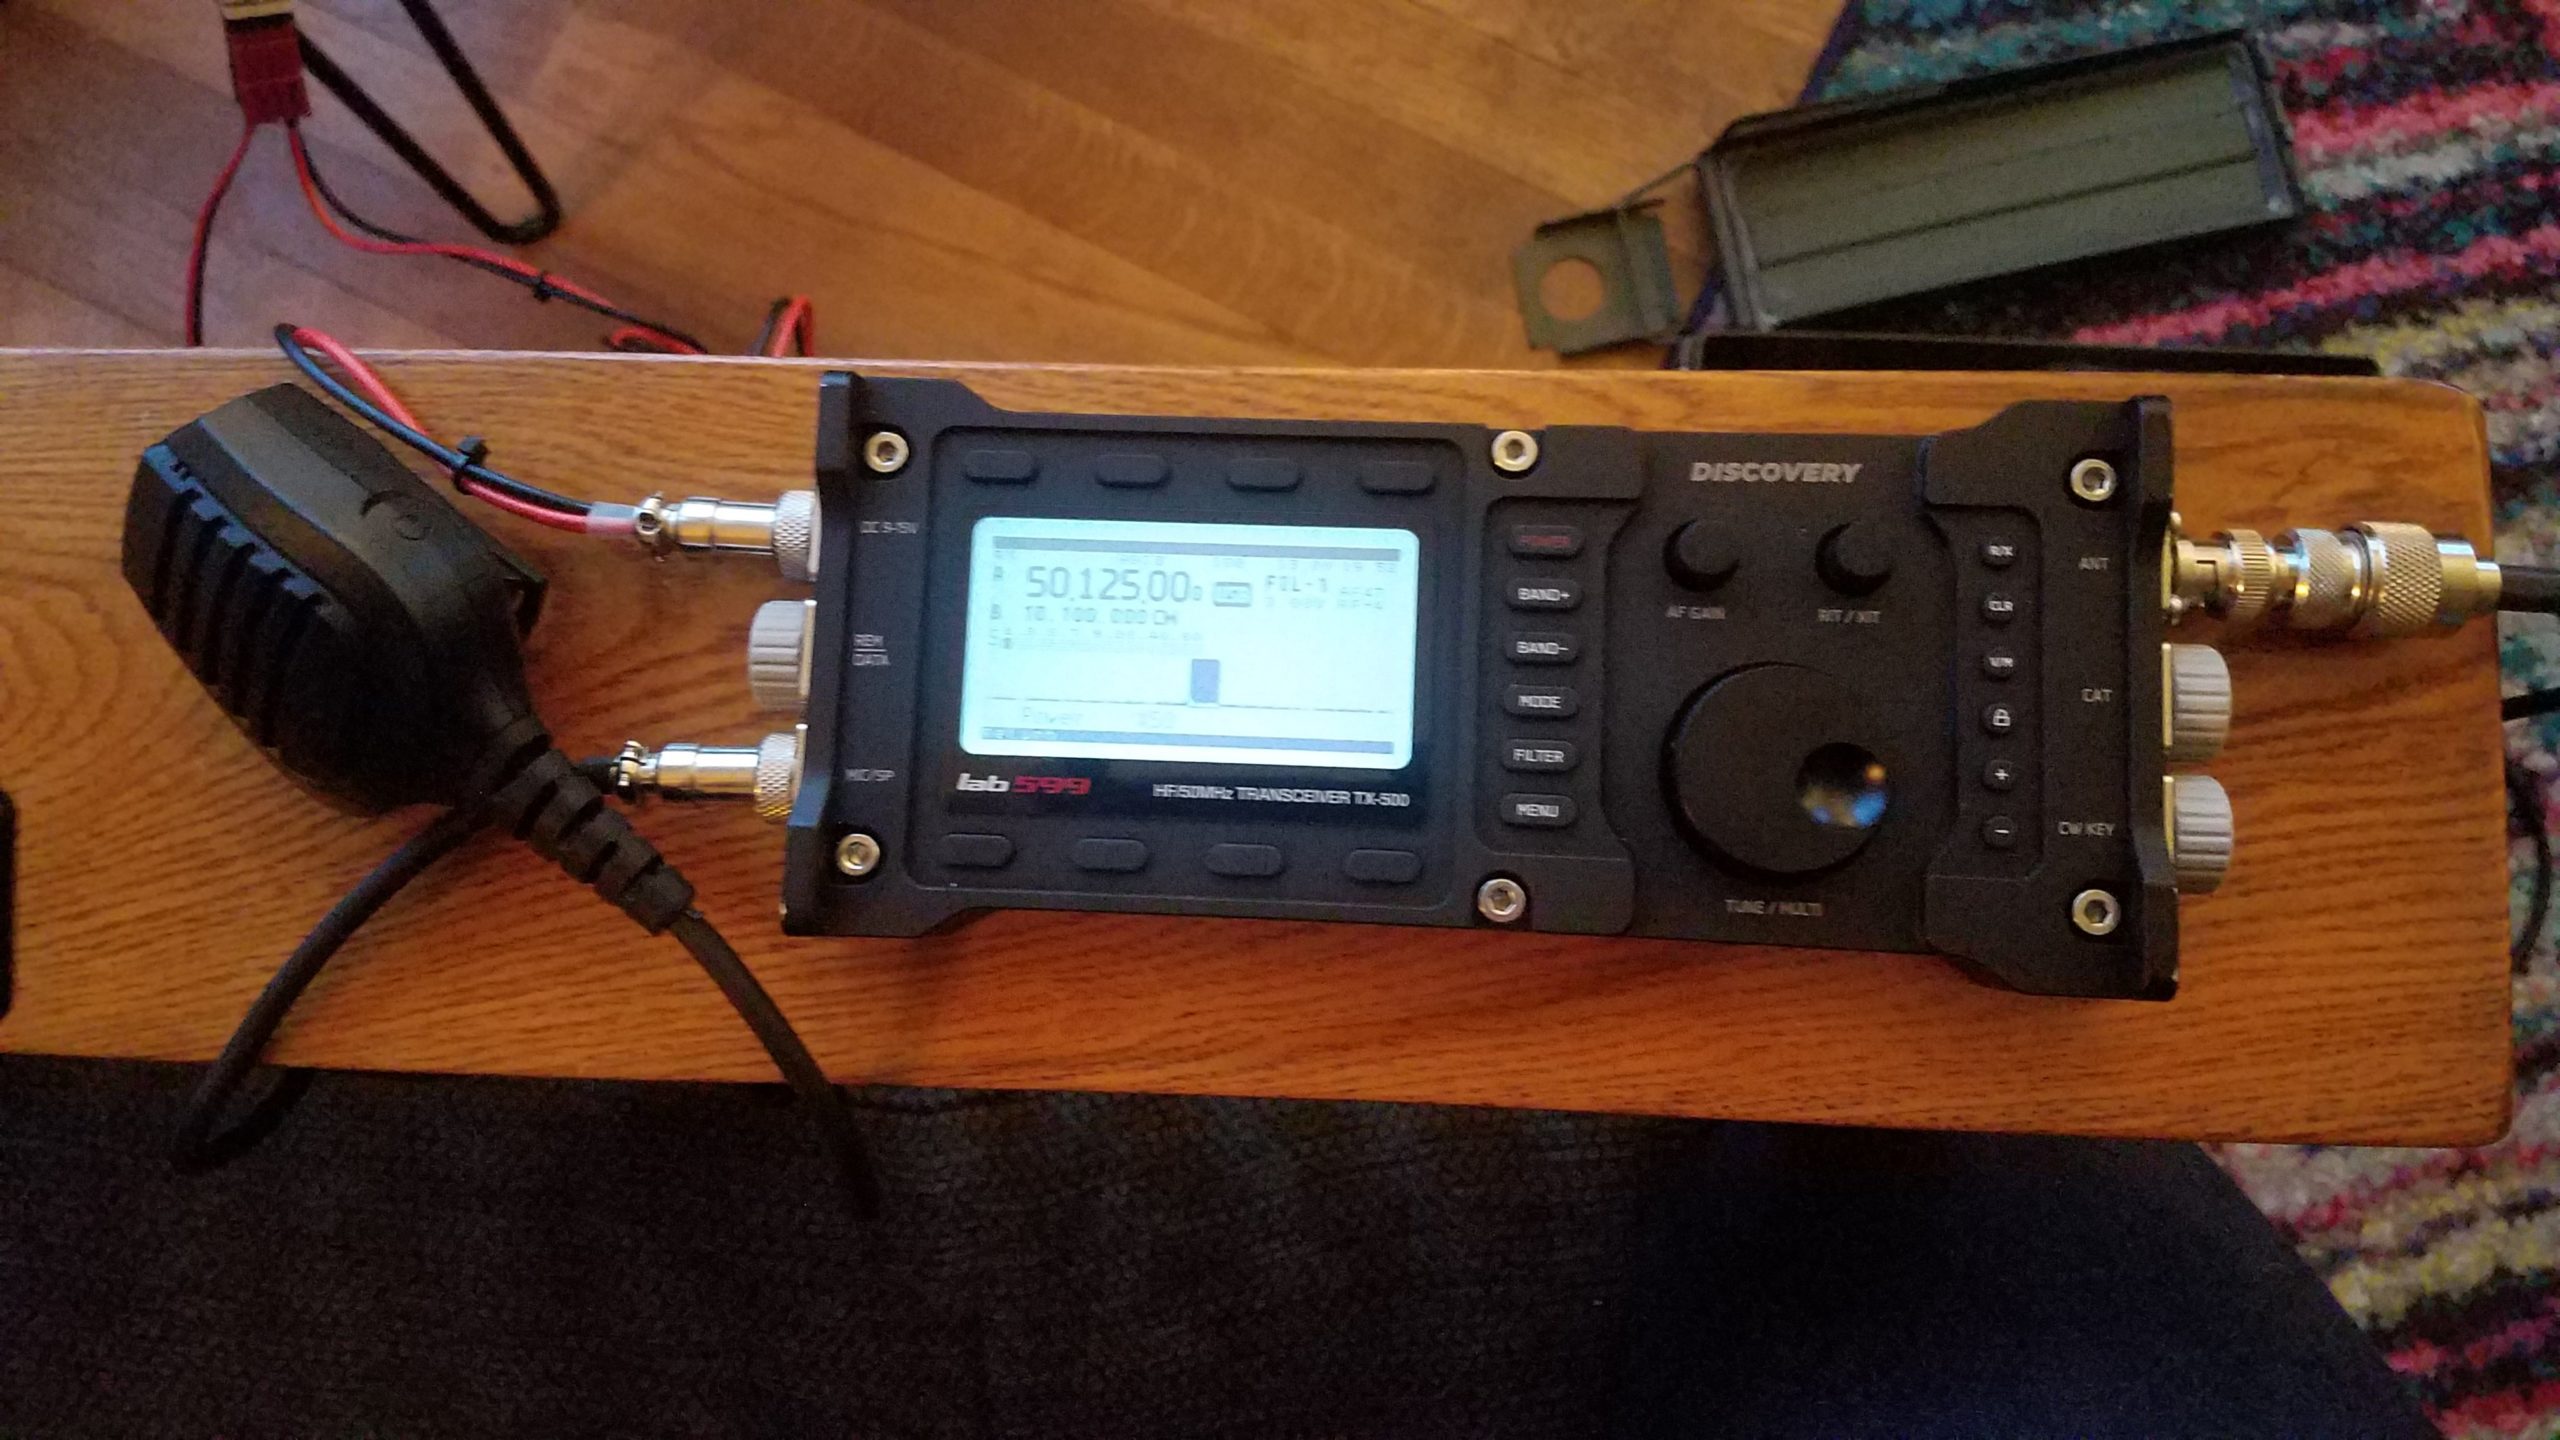
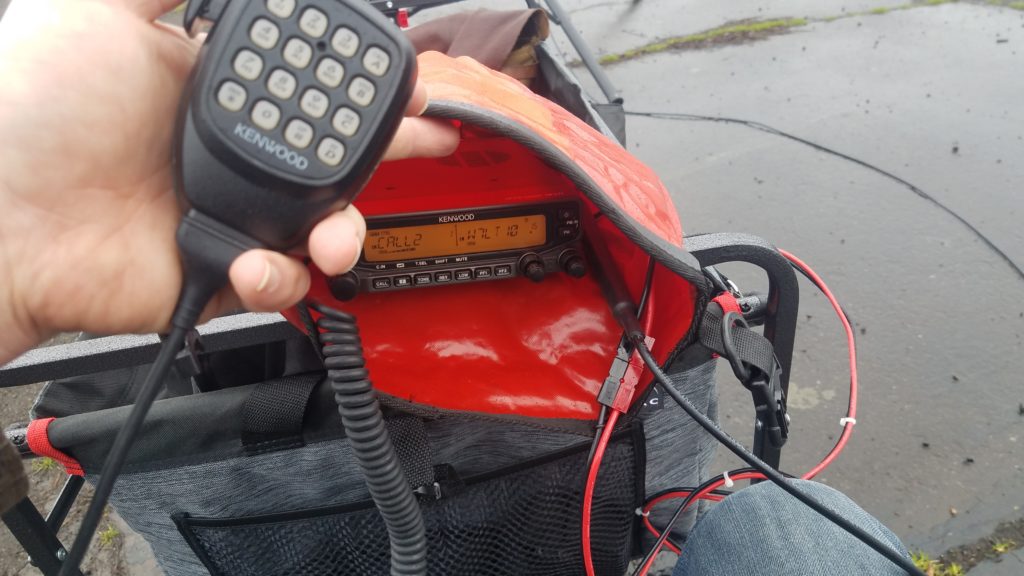
Lab599 TX-500 radio powered up and tuned to 50.125 MHz sitting on a chair arm along a microphone.
QRP radio tuned to the 6m calling frequency.

A good place to start when attempting to make contacts on a specific band is to choose that band’s calling frequency, or at least a region of the band that others using the mode you’ve chosen are likely to be. For 6m SSB the calling frequency is 50.125MHz, in the bottom half of the band. I use this handy chart by iCOM to keep track of what regions are used by operators, and to understand specific frequencies that have specific uses such as SSTV and calling frequencies. I parked on the 6m SSB calling frequency and called a few times with no answer. I enlisted the help of Kevin, K7AJK to see if he could use any antenna and tune his radio to the calling frequency. As I asked him to do that another station in Vancouver, WA that was about 10 miles away came in running 50W. As I began a QSO with the other station at 5W K7AJK’s station got the brunt of the power as it was nearby. Fortunately he had his attenuator on and even with a vertically polarized antenna it swamped the receiver. As that was happening I was able to drop power to 1W and then raise it to 2.5W. The station in WA was still able to read me at lower power levels, albeit I was scratchy. That bodes pretty well none the less. The radio also drew less than 1A at 5W of transmit power as measured with a Buddipole PowerMini that I hooked up. The radio drew about 0.13A receiving only.

Zoomed out view of a radio sitting on a chair arm connected to a 12v battery and a 12v USB phone charger.
QRP radio operating on a 12AH battery with an additional phone charger connected.

Operating from a park for a couple hours

After a bit of a posting hiatus I thought I’d post a bit about some impromptu radio operation from a park on a fairly sunny weekend day. My partner had a meeting with some folks in our pod in Ladd’s Addition, a Portland neighborhood with a central park so I decided to set up my portable radio station and do some UHF/VHF work locally to see who I could reach from said park. The station I brought is based on a Kenwood TM-V71A and fits in a single bag along with a battery and a 20W folding solar panel. This is essentially the same setup I’d use for emergency communications with a larger antenna or solar panel.

Roll-up J-Pole antenna hung in a rose bush
Ed Fong roll up j-pole deployed in bush
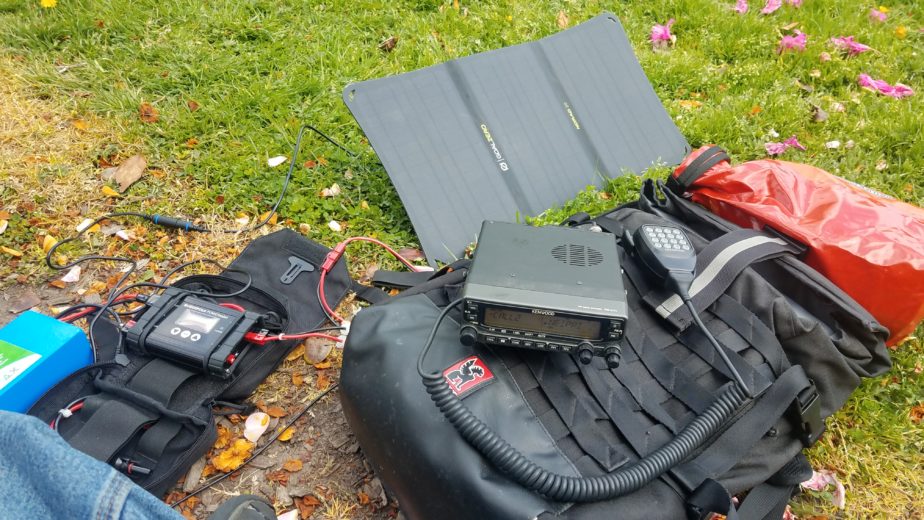
A radio sitting on top of a backpack connected to a solar charger, solar panel, and battery.
Portable UHF/VHF radio and power setup.

I ended up putting my modified Ed Fong DBJ-1 roll-up j-pole antenna in a large rose bush and hooking it up to my TM-V71A, and hooking the battery, solar panel, and charge controller up. I started operating at medium power (10W) and was able to reach Roger, W7RC, in Battleground, WA without issue on the 2M calling frequency (146.520MHz). This is pretty typical as he runs a beam antenna with the capability of transmitting at 1.5KW and is something of a local fixture. He reported me coming in with full quieting at 10W, and when I dropped to 5W (low power) he heard me with a little static. I also made some additional contacts including one in the Council Crest area: Ed, WB2QHS. He was out for a walk with an HT and we were able to talk with perfect clarity and then some static as he moved around with me running 5 and 10W. His elevated position helped facilitate communications. In about 2.5 hours I used somewhere around 1.3Ah of battery power, but was able to recharge the battery completely from the solar panel by the time I left. Not bad! The radio draws about 0.6A idling, and the solar panel charged at a maximum rate of ~1.1A in more intense sunlight. When I was transmitting at 10W the radio drew ~5A and at 5W ~3.5A. All these power figures are as measured by my Buddipole Power Mini. The current model features a USB port where the one I’m running doesn’t. I should also mention I topped up my phone charge from the battery as well.

If the solar panel provides more power than is required for the radio’s operation and the battery is charged the radio doesn’t draw from the battery. In the event the solar panel isn’t providing enough power to cover the radio’s power needs it dips into the battery, and when the radio consumes less power than the solar panel provides the battery is charged with spare current.

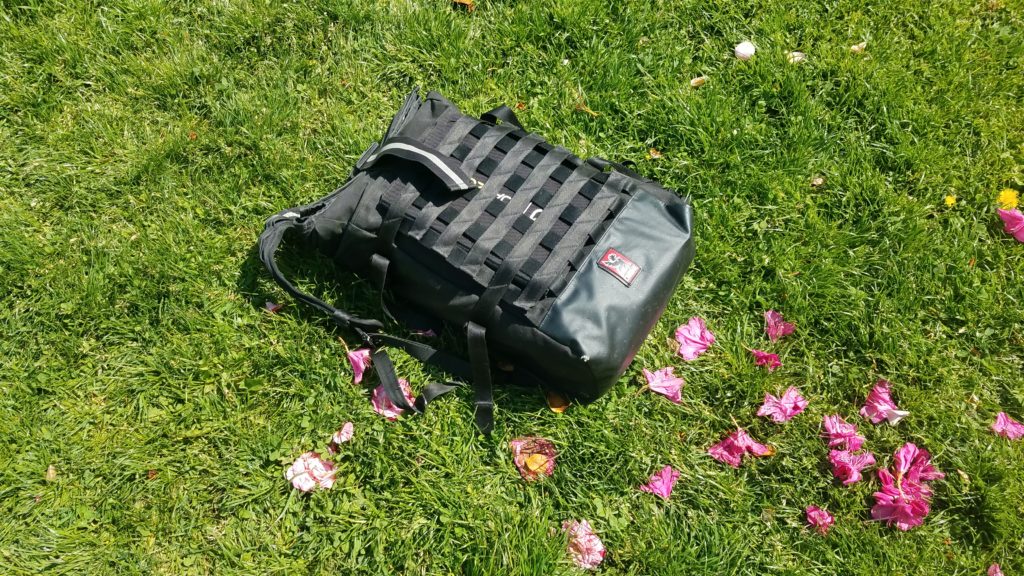
Closed backpack on the groud with a folded solar panel in the attached cargo net.
UHF/VHF setup packed up in a single backpack.

As shown above the whole station packs into my backpack without issue. Were I not on call for my job and carrying a hotspot and laptop there would be some additional room in the bag.

Diagram depicting a solar panel and battery attached to a controller, the controller to a radio, and a radio to an antenna.
Portable radio station block diagram depicting the connections between various station components.

Mt. Hood National Forest vehicle camping trip and comms

Hello all! It’s been a hot minute since I sat down and wrote about something! Today I’m writing about a car camping trip I took last weekend to Mt. Hood National Forest and some experiments with communications I did. Some of this is actually about cellular comms and some is about amateur radio fails. We spent the night at two spots – one at about 1,100 ft. and another around 3,500 ft. This becomes relevant mostly because of cell coverage, but also to some extent regarding stations I was able to receive doing SWL (shortwave listening).

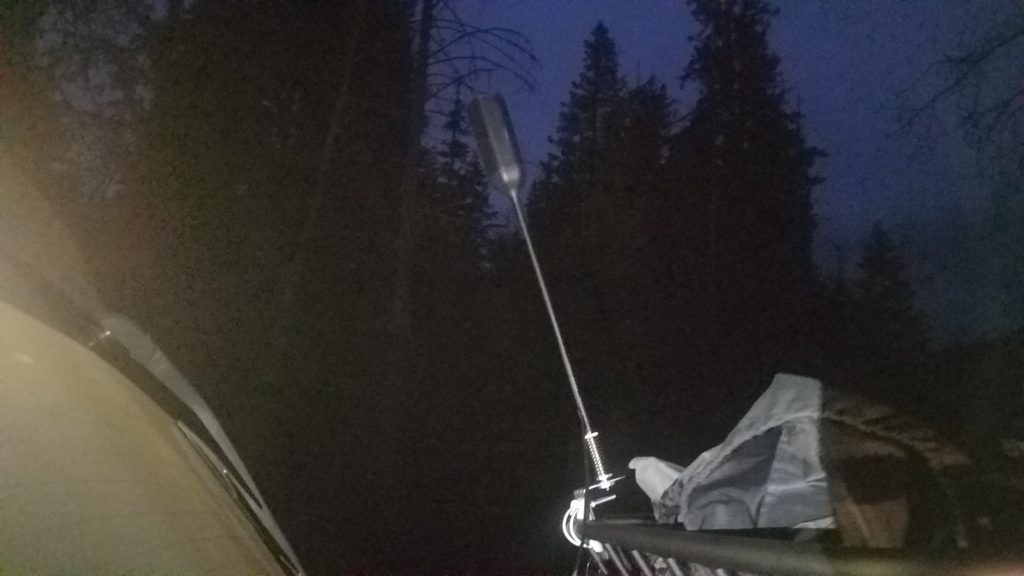
The first night we spent I didn’t get a chance to set the portable HF radio up, but I did test my new WeBoost Reach Drive RV. I had no cell service with Verizon at that location and decided to mount the WeBoost high gain antenna on the the cargo basket. I then attached the small low gain antenna and connected the setup to my 40AH Bioenno LiFePO4 battery. After cycling my phone into and out of airplane mode I had 1X and enough service for voice calls. I did a couple tests and was able to reach a couple people via telephone as a test. Not bad! The cell booster drew approximately 1A at 14v using the DC hardwire power supply which I fitted with Anderson PowerPole connectors in a “right hand red” configuration to match my off grid power setup.

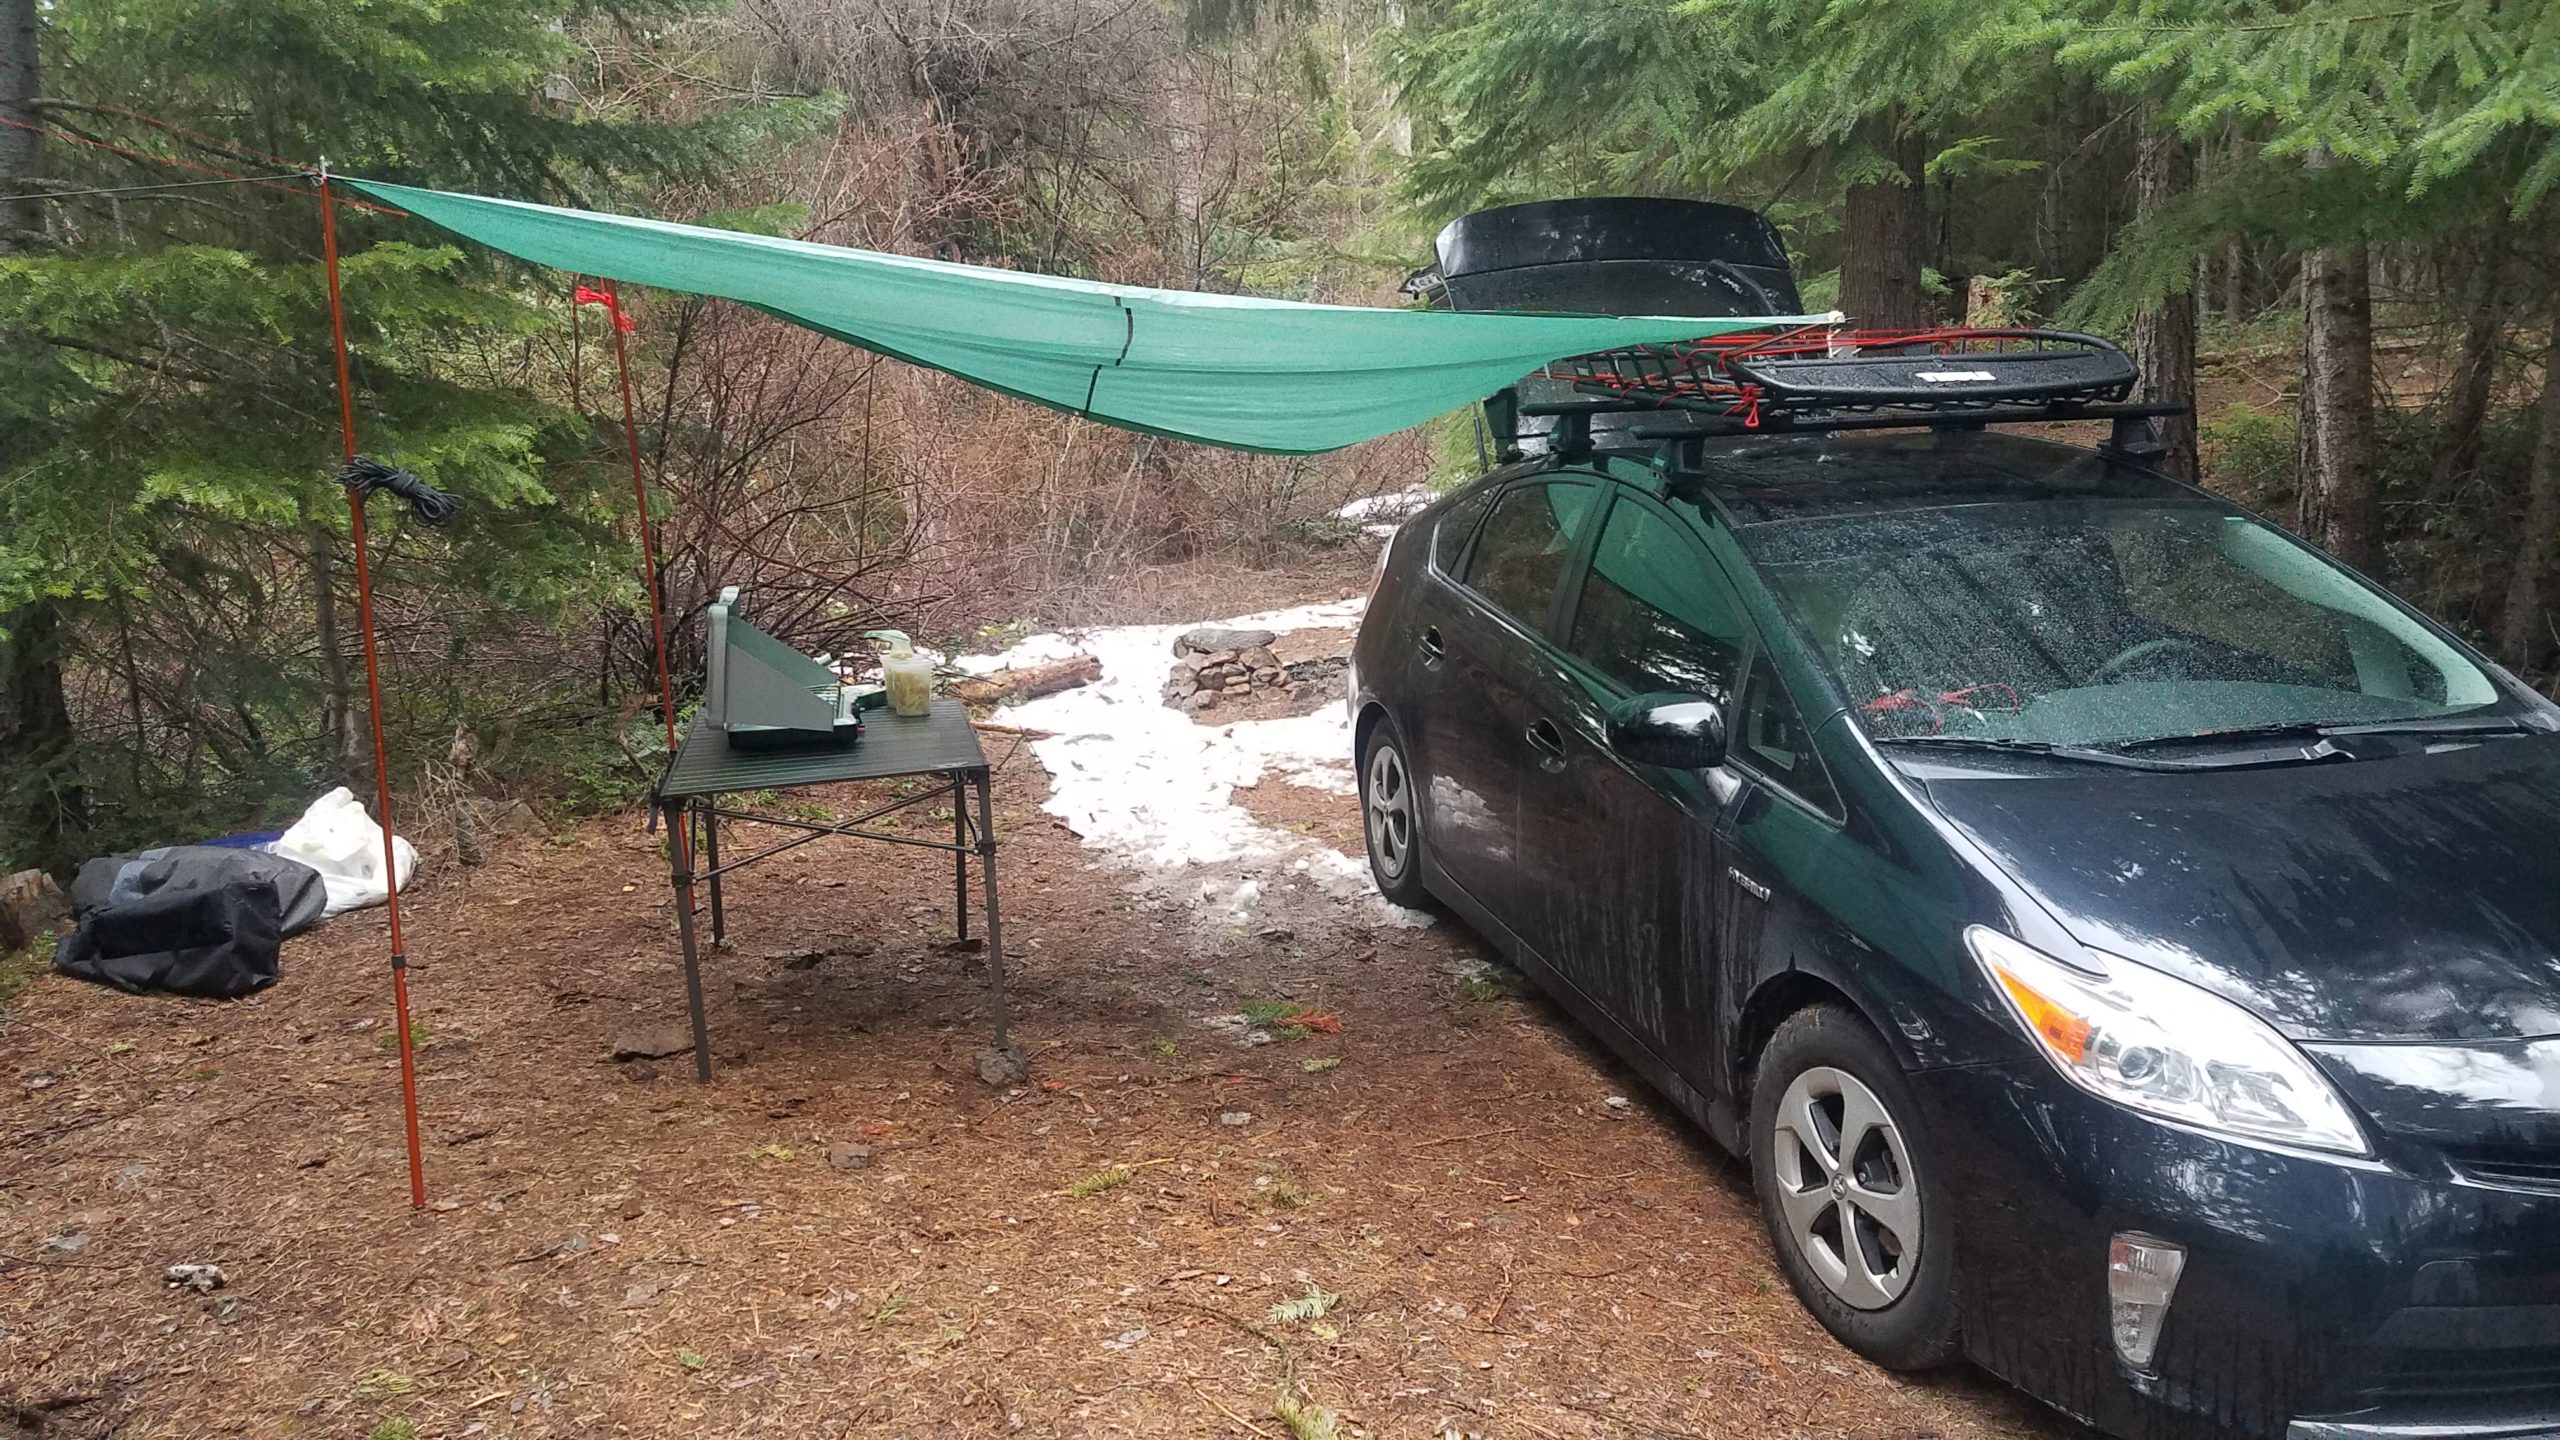
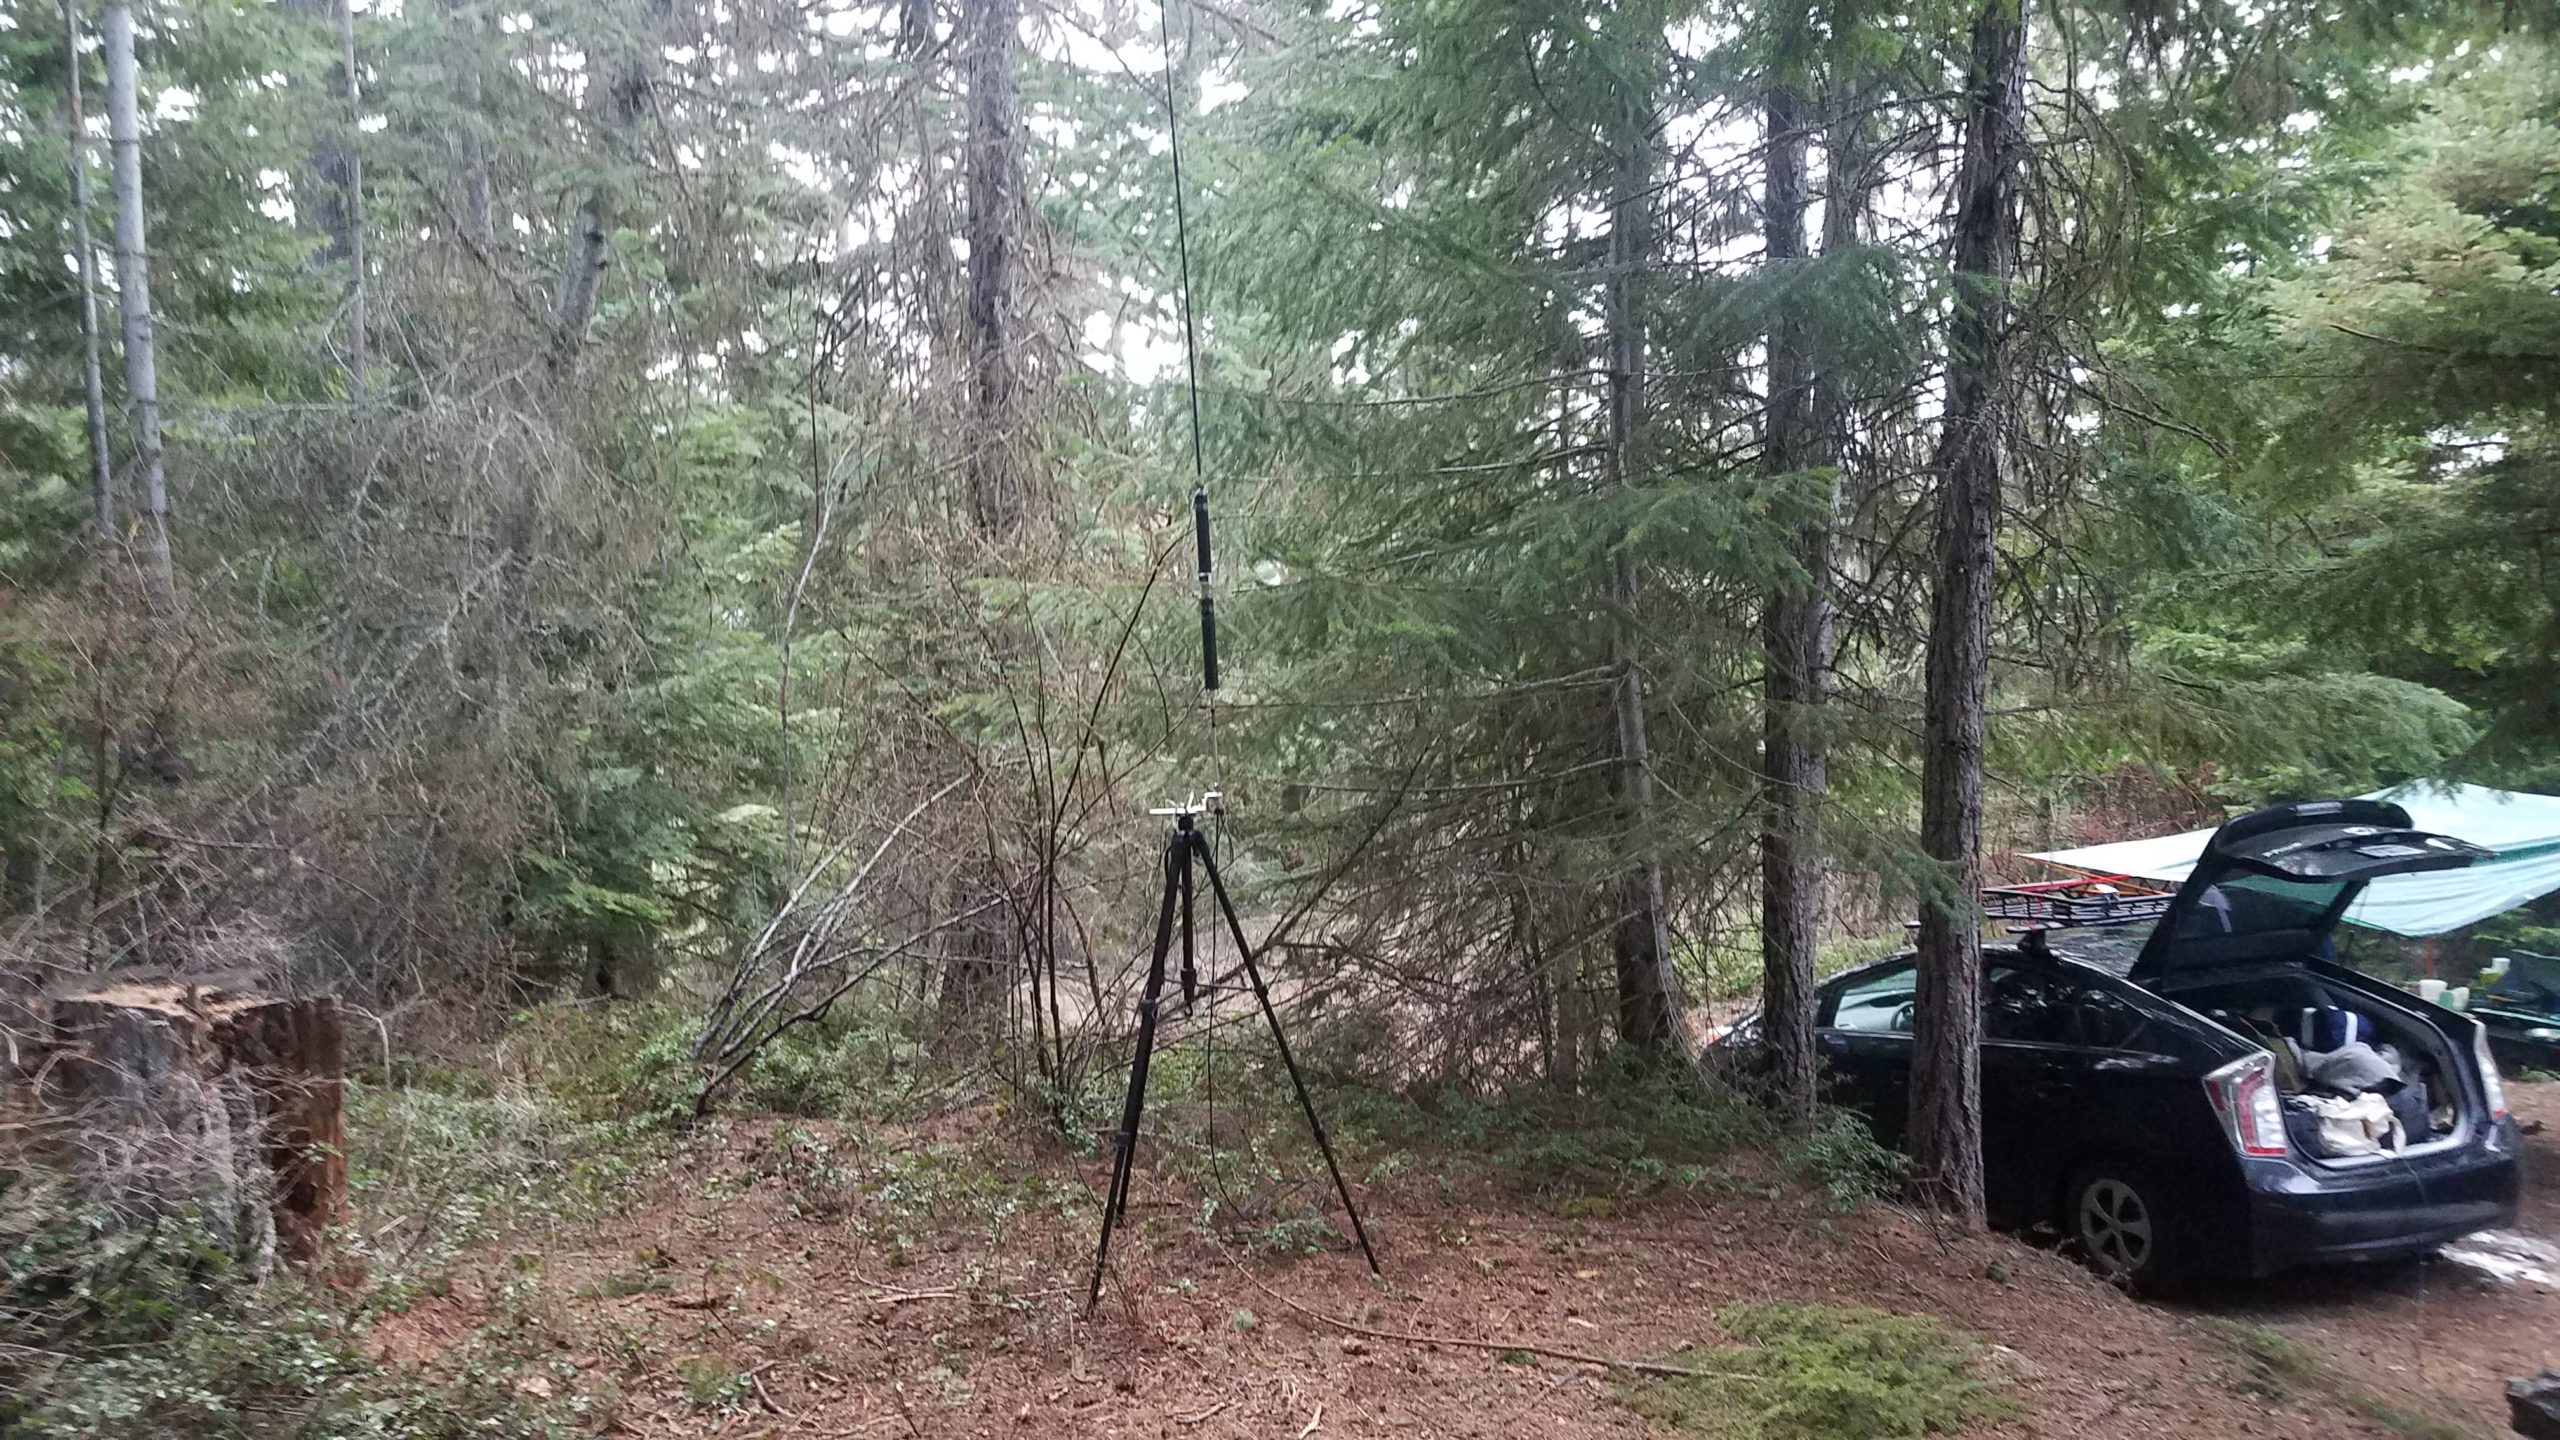
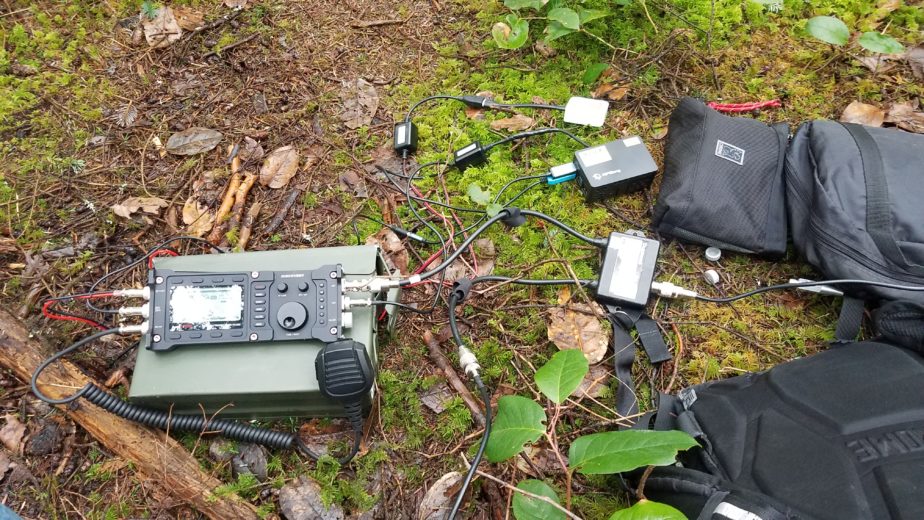
We found the second spot much earlier and had some daylight to set up. This spot was much higher in altitude than the first spot and was much colder. The weather was pretty rainy so we erected a shelter using a synthetic tarp, tarp poles, and some paracord that we keep around just for such an occasion. I intended to do some HF radio work but I couldn’t tune my hybrid Superantenna / Chameleon Mil Whip 2.0 setup to save my life so instead I figured I’d do some SWL later at night. In the mean time I decided to test the WeBoost again since the setup was fairly easy. I set it up again and cycled my phone into and out of airplane mode. I was getting a 3G signal at first with occasional bursts of 4G before I fired the system up, and after it was all said and done I had fairly solid 4G service with a decent speed test of 7Mbps. Even though I wasn’t able to tune my antenna on 20 or 40m I was able to do some excellent shortwave listening with the Lab599 TX-500. I was able to get the BBC World Service shortwave broadcast discussing the current COVID-19 situation in India on 6005KHz out of Ascension Island. I heard another station broadcasting in Arabic and playing music that I couldn’t find in listings. Both stations had some QSB, but the station in Arabic was significantly more faint with more significant QSB (irregular signal fading that occurs as a signal reflects off of the ionosphere). I suspect the higher elevation I was at helped me get stations much further away than I’d normally be able to in the metro Portland area. I’ve been able to pick up Radio Havana, Radio New Zealand Int’l, occasional Japanese stations, and lots of Chinese stations (if I’m up at 4 AM) in Portland. A good resource for finding shortwave stations is https://short-wave.info. I’ve also been able to reliably pick up a Russian numbers station designated M12 as well which broadcasts from Khabarovsk Russia.

Car camping for the weekend

So, we decided to go car camping this weekend and naturally I decided I’d bring my QRP rig and HT (handheld transceiver). The goal was to sleep in the back of our car and cook using a propane camp stove while not paying for a camping spot. I also wanted to see how well my QRP setup worked with fewer resources including charging and little space to store the setup and supporting equipment. For this I picked my Superantenna/Chameleon Mil Whip 2.0 kit and Lab599 TX-500 kit. Neither kit includes feed line. Keep that in mind while reading…

A burning camp stove sitting in the back of a vehicle with its hatch back open in the dark. The stove has a pot on one burner with an avacado and knife roll near it. A woman stands to the left with a head lamp helping prepare food.
Cooking after we arrived at our chosen spot.

On a Friday after work we packed the car and left. A couple hours later we made it to our spot on the Oregon coast with some decent moonlight between spurts of rain. We made dinner in a fairly heavy wind out of the back of the car. We could hear the relaxing sound of crashing waves against rocks that we could barely see. After having some dinner we set up the folding mattress in the car and settled in for the night.

Waves on the Pacific ocean are visible beyond a chainlink fence with wooden posts with a gray sky. A bird can be seen flying by and the inside of an out-of-focus and open car door is visible on the left side of the frame. The sky is gray and cloudy.
View waking up from the car

After waking up and getting ready we made some breakfast and coffee on a nearby park table. We had to wait till the rain stopped to make food but I was able to make some coffee in the rain without issue. I was half way through my coffee and food when I realized I didn’t pack any feed line! Fortunately we were close to a town that happened to have a store open that morning which had a box of left over parts labeled “CB Radio Parts”. There was a small RG-58 coax cable with PL-239 ends and thus my problem was solved! I purchased the cable and got underway for our hike.
A radio sitting on top of an ammo can attached by cable to a duplexer and, Raspberry Pi 4 in a case. A small travel router is also attached by power cable to the ammo can. A number of small bags and a backpack are visible in and partially in frame. The ground is a forest floor with branches, sticks, lichens, and leaves on the ground.
Radios set up with a duplexer for VHF and HF operation

We did a short hike and as we neared the end of the hike we found a small but well worn trail leading off the main path, so we took it in search of a spot where my partner could water color and I could set up and operate. Not too far down the offshoot trail we found a fairly open patch of moss with a fallen tree that I could use as a bench. I set up the Superantenna using the ground spike for simultaneous HF and 2m operation using the Superantenna MC2 and MP1C, topping the loading coils with my Chameleon Mil Whip 2.0 for increased SWR bandwidth over the titanium whip that comes with the Superantenna kit. Unfortunately the photo I took of the deployed antenna was corrupted by the time I got to uploading it. The UHF/VHF side of the Comet CF-706 duplexer was connected to my Yaesu FT3D so I could attempt contacts on the 2m calling frequency (146.520Mhz) and monitor/send 2m APRS packets.

I tuned the antenna using my NanoVNA for 20m and started working SSB phone. I attempted to respond to a number of calls and tried calling to no avail. After 40 minutes of trying between 5 and 8.5W I decided to switch to JS8Call. I have yet to make a phone contact on my Lab599 TX-500 on any band. I’m hoping I can just chalk this up to being run over by higher power stations. As I was setting my station up for digital comms I noticed something unexpected – the maidenhead coordinates in JS8Call hadn’t been updated automatically as js8cli would normally do, and I also noticed the time on the Pi varied by a minute from my cellphone. That’s highly unusual as the GPS unit typically corrects any RTC drift that might occur. The next step was to check my GPS unit’s LED through the vent holes in the case. It’s flashing one second on, and one off. For the specific Adafruit Ultimate GPS board I run that means the GPS hasn’t acquired a lock. I waited a few more minutes and found that it still hadn’t acquired a lock and decided to check the board for any broken or loose connections. Since the entire setup allows me to disassemble it without tools I did to inspect it. I found no loose connections or other apparent issues. It was time to reboot by fully removing power as had worked sometimes in the past. Still no luck following a full power down / power up sequence! I then leveraged my phone and tablet GPS units to get a position. My phone eventually got a location and grid square using the HamGPS application, but my phone had been on and tracking satellites for the entire hike. My Pi and tablet had been off. This is interesting because I had an OK view of the sky despite the very tall trees surrounding the patch. I hoped my GPS unit wasn’t damaged or malfunctioning and decided to manually set my JS8Call location from my phone, automatically acquire a timing offset from other stations in JS8Call and move on. I had a couple stations hear my heartbeats but couldn’t make contact with any operators directly. I also attempted to send an SMS message to a friend but alas no one was hearing my transmissions as the band seemed to have closed. Overall not the best luck, but it was time to head back to the trail head so we had daylight to drive out and make camp.

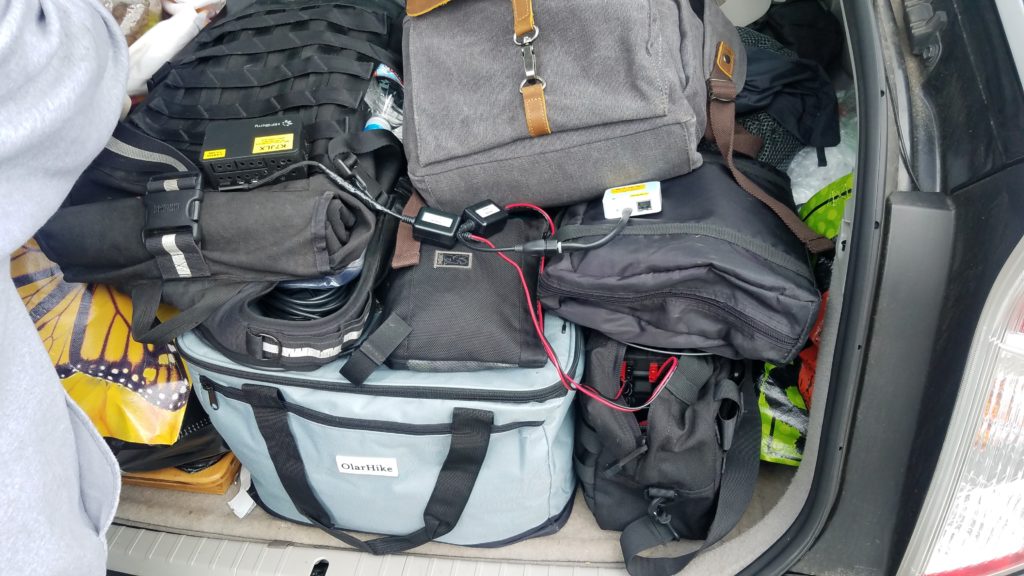
An open hatch back of a vehicle loaded with bags. There is a Raspberry Pi in a case and travel wireless router attached to a battery in a bag.
Hooking the Raspberry Pi and wireless access point up for testing after the hike
Successful test of the GPS from the car without the trees overhead

I decided to hook the gear up in the back of the car as my partner got the dog ready to head out in order to determine if my GPS unit was actually broken. I hooked everything up to the big battery that was in the trunk and after a minute or so the GPS lock LED flashed once every several seconds. This indicated a lock, so I fired the tablet up, logged into the Pi, and checked the reports with cgps, a test GPS client provided by the gpsd-clients package. They lined up with where we were. Even though I could see sky clearly through gaps in the canopy the GPS unit wasn’t able to acquire satellites in the time we spent in the clearing.

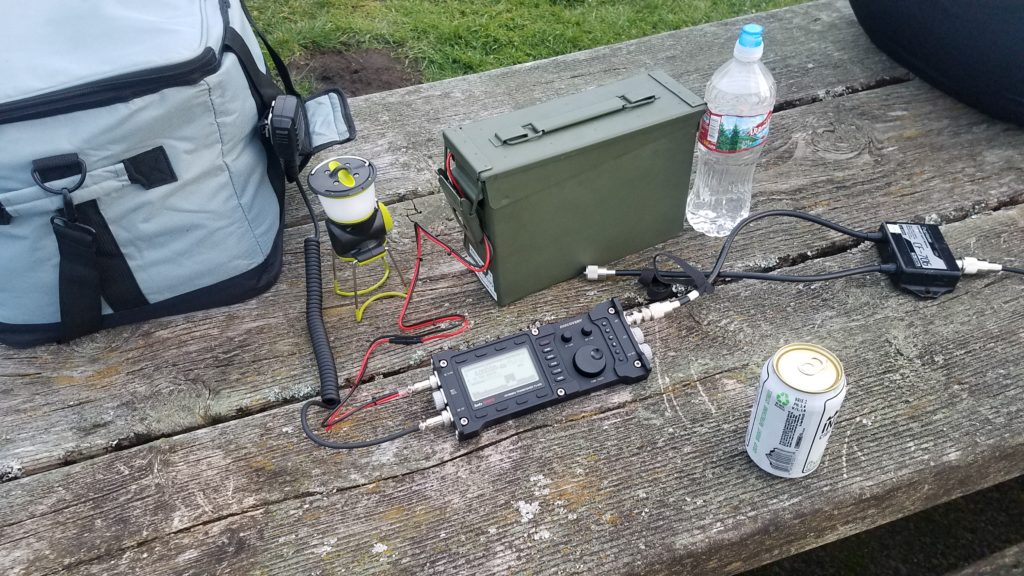
A soft-sided cooler, LED lantern, water bottle, beverage in a can, and a radio attached to an ammo can by a power cable and a duplexer sitting on top of a wooden park bench.
TX-500 set up for shortwave listening (SWL) and for 2m operation with my Yeasu FT3D

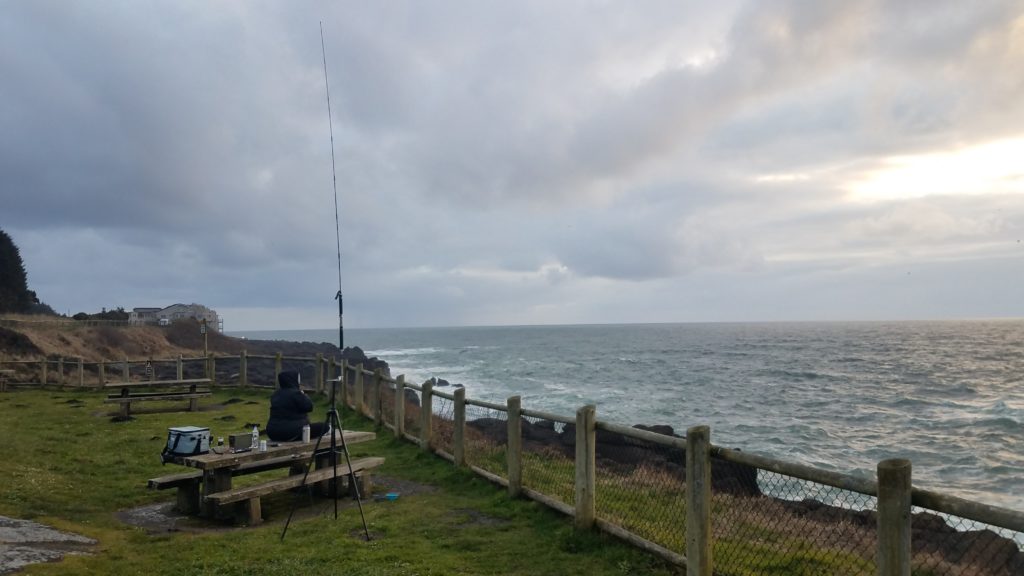
After arriving at camp and rigging the car for sleeping I set the radio up for shortwave listening and got my Yaesu FT3D connected to the duplexer after this photo was taken. It was a windy and chilly but great day. It was time for a beverage and some relaxing SWL and taking in the scenery before turning in for the night. I used the same setup as I did on the hike, except with a tripod for the antenna and no radials since I was receiving only. We were able to hear a number of stations, but settled on Radio Havana English (6.0MHz if I recall correctly) since they were playing music instead of the typical religious content with creepy-sounding voices you typically hear on US shortwave stations like WRMI in this part of the US.

An antenna is mounted on a tripod in the foreground. Directly behind it is a park bench with someone sitting on it and some radio equipment with a cooler. The background is a fenced-in green area and the Pacific ocean and steep rocks in the background.
View of the setup on the park bench

Lessons learned:
– Don’t forget your feed line. I got lucky enough that I could acquire some, but if this was a disaster or if I were on a hike/camping in a remote location I would have been unable to operate.
– Even though you can see a lot of sky in an area, it doesn’t mean your GPS can acquire satellites. Be prepared with some mechanism to acquire and set your location and time for something like JS8Call.
– When documenting something take a couple pictures in case one of them gets corrupted.

A new CLI utility and daemon for JS8Call!

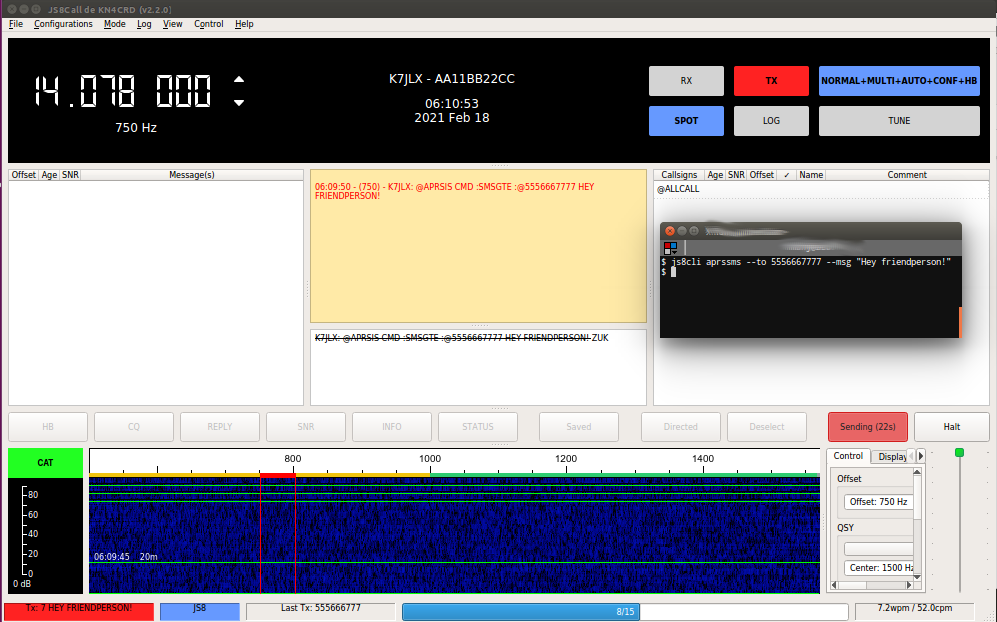
Hello all, I wrote a new utility for JS8Call. It can be found at https://github.com/ThreeSixes/js8cli. JS8CLI has been in the works and moving slowly for the last couple months. This new utility replaces the some of the functionality of the JS8CallTools GUI with command line functionality and can run as a daemon in the background. I also added a few features to this that probably should already be in JS8Call such as automatic GPS location support and the ability to update APRS position information via JS8Call automatically and periodically. This utility also allows you to send SMS messages via APRS from the console over JS8Call.

JS8Call sending a text message driven by js8cli being run in a command line window.
Screenshot of the CLI utility feeding JS8Call

This utility leverages JS8Call’s API and can run in either TCP or UDP mode. I also wrote a Python 3 class that can be used to interface with JS8Call’s API which isn’t really documented though it’s fairly simple to use (see mainwindow.cpp). It’s mostly just JSON sentences sent over a network stream to the application.

The JS8CLI application is also a good citizen and leverages GPSD to share the GPS with other applications rather than bogarting the serial port. This also makes it possible to get position information from another host on a network. This could be useful in fixed or networked applications or cases where a GPS needs to be remote. The SMS functionality doesn’t require GPS capabilities at all.

Cold weather backpack setup test

So, the weather in Portland has been pretty snowy which is a touch unusual! As most folks have been inside and not out attempting to drive on icy and snowy roads which are not plowed I decided I’d take my HT for a walk in the cold weather and test methods of keeping it warm enough to not have the battery fail as the temperature is dropping to ~18F with wind chill. My partner and I have been walking to the grocery store and taking our dog out so I decided to test an external antenna I’d built to mount on my backpack a year ago in the gnarly weather. I did some tests with APRS and some 5w FM phone as well. The theory here is that keeping the HT inside the fairly sealed bag would preserve some amount of air that’s warmer than the bag’s surroundings. It seemed to work as I was out with this setup for a few hours at a time and battery performance was within expectations.

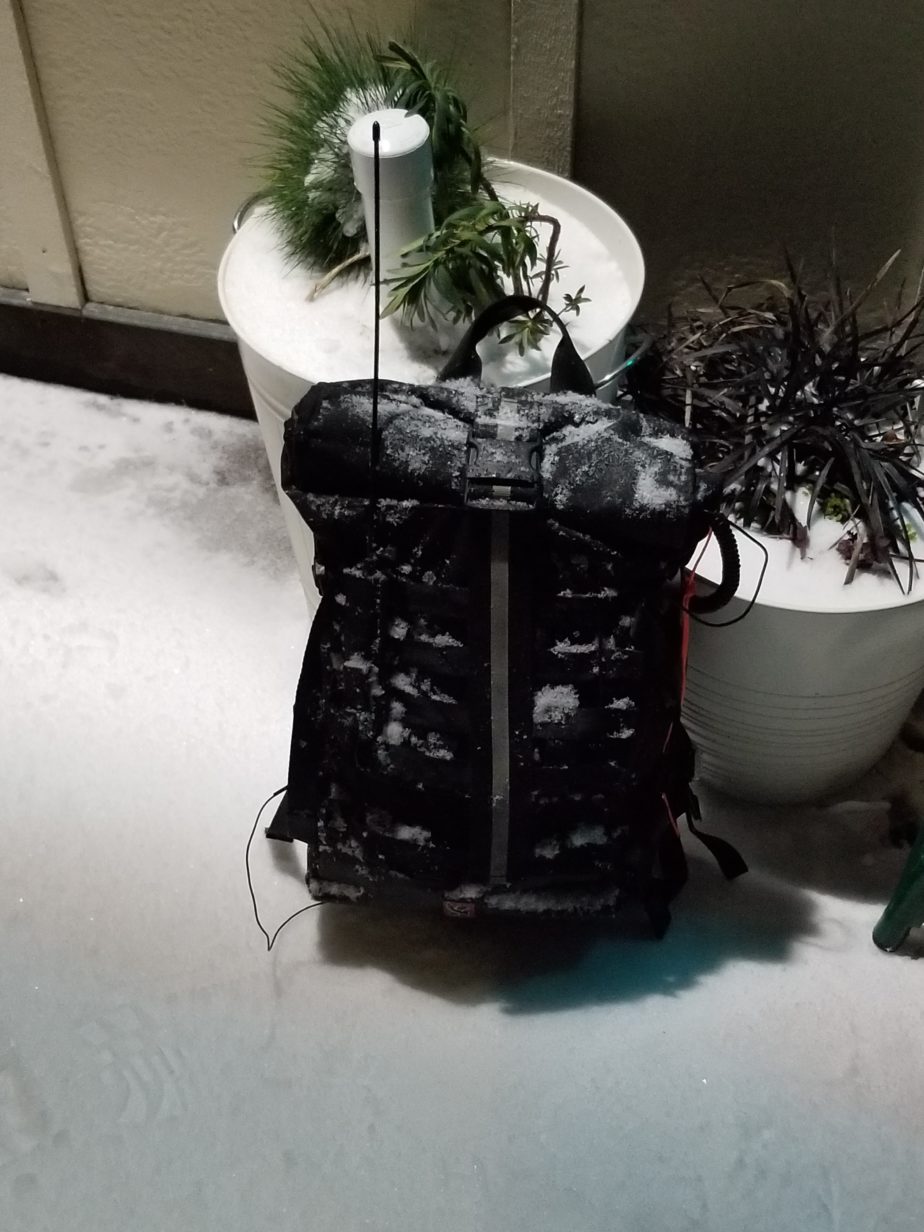
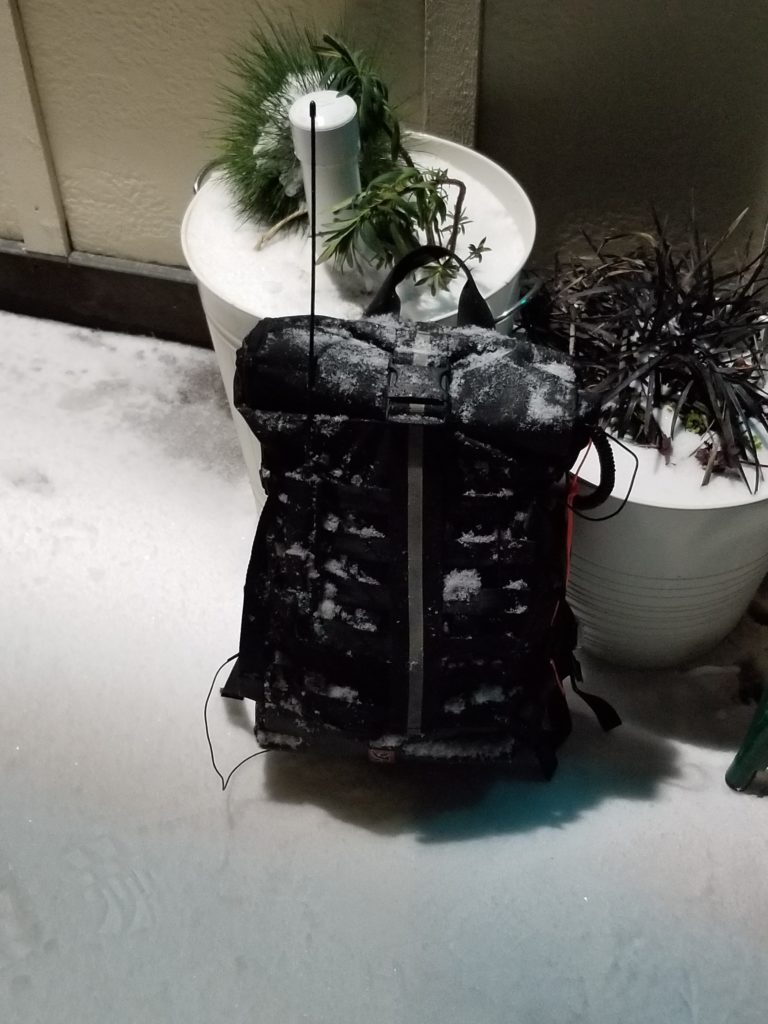
Snow and ice covered backpack set on a snow-covered sidewalk with counterpoise extending down and antenna extending up.
Setup covered in ice and snow.

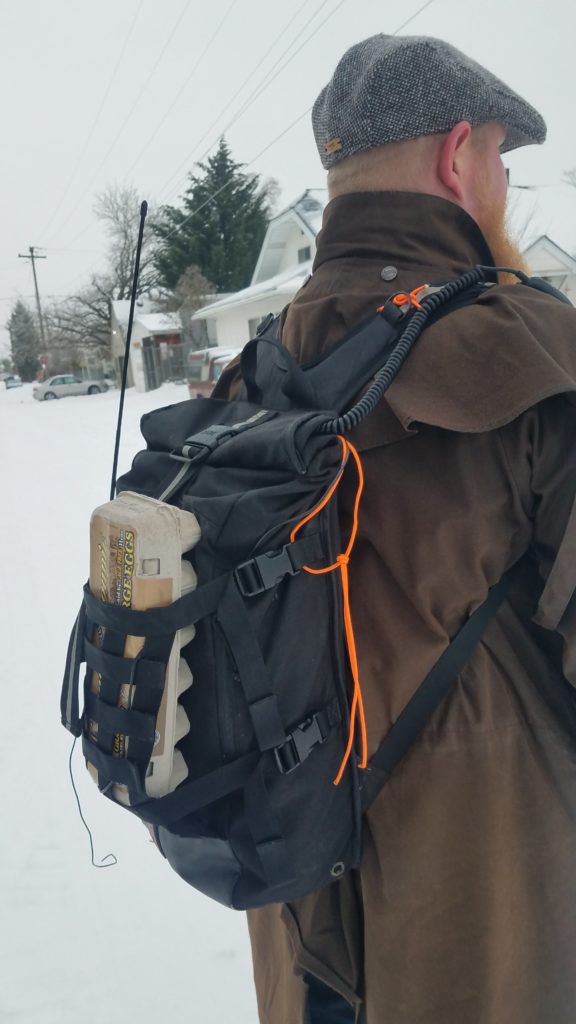
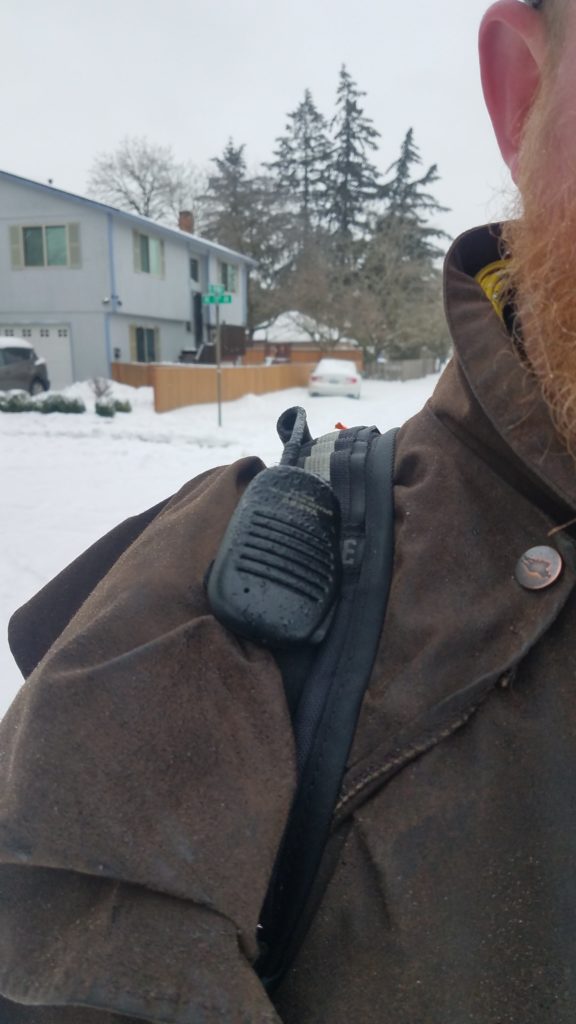
In order to not go stir crazy I’ve been taking walks with my partner and we’re close enough to a grocery store to just walk and pack our food in our bags which is very fortunate. I’ve taken the opportunity to test different ways of carrying the HT so it doesn’t get too cold, and to test a MOLLE antenna holder with a simple antenna and counterpoise setup. During the grocery store run pictured below I was able to reach stations in SE and NE Portland with a strong signal. I was between 2 and 9 S units into a station in Battelground, WA as well depending on structures around me. The antenna I’m using in this picture is a Nagoya NA-771. I used that instead of my Signal Stick because the signal stick doesn’t stay rigid in cold temperatures and will curve and lay over giving poorer performance. The speaker mic was used as both a speaker that I could hear outside the bag and as a sacrificial component in the event something gets too wet. A $30 speaker mic is much cheaper than a new HT. I did test the SWR on this setup and 2m performed very well near 1.2, but 70cm performance was poor with the SWR being near 2.8.

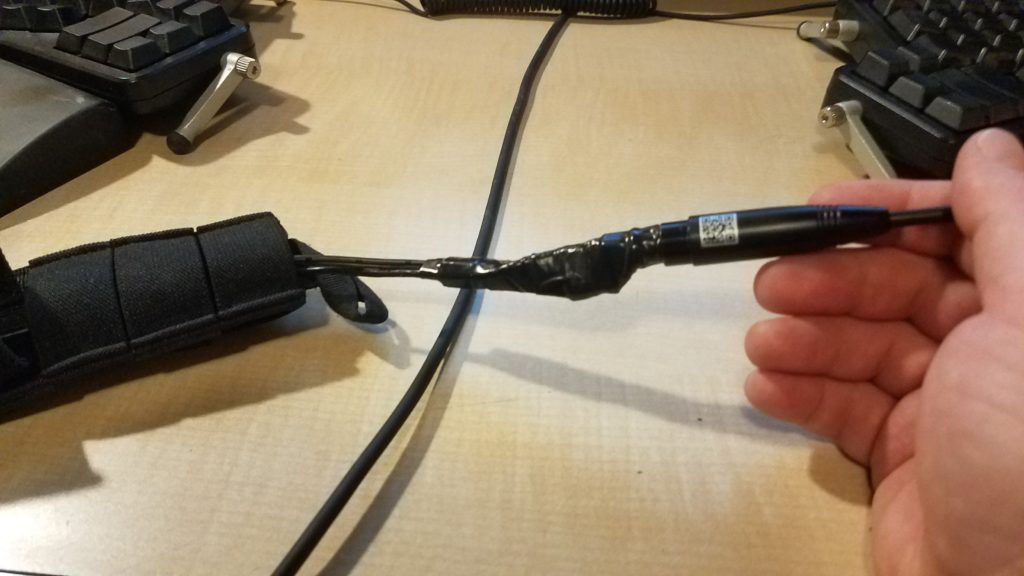
The small bit of orange paracord is used to secure the speaker mic for cable routing purposes. When the mic comes un-clipped intentionally or on accident this cord makes it easier to grab and replace or remove and use. The longer orange paracord holds the weight of the HT in side the bag so the antenna cable and speaker mic don’t hold it up. It’s also necessary to hold it up in the bag to make sure there’s enough speaker mic cable to reach outside the bag and to my shoulder.

HT in the bag suspended by paracord.

The HT holder inside the bag is suspended by the longer bit of paracord that runs through a loop on the HT holder. This suspension system also makes it easy to load the bottom of the bag with heavier items that might otherwise crush the HT or damage connectors.

The above gallery shows the antenna assembly set up but not mounted to the webbing on the backpack.

Sunday funday in the Tilamook State Forest

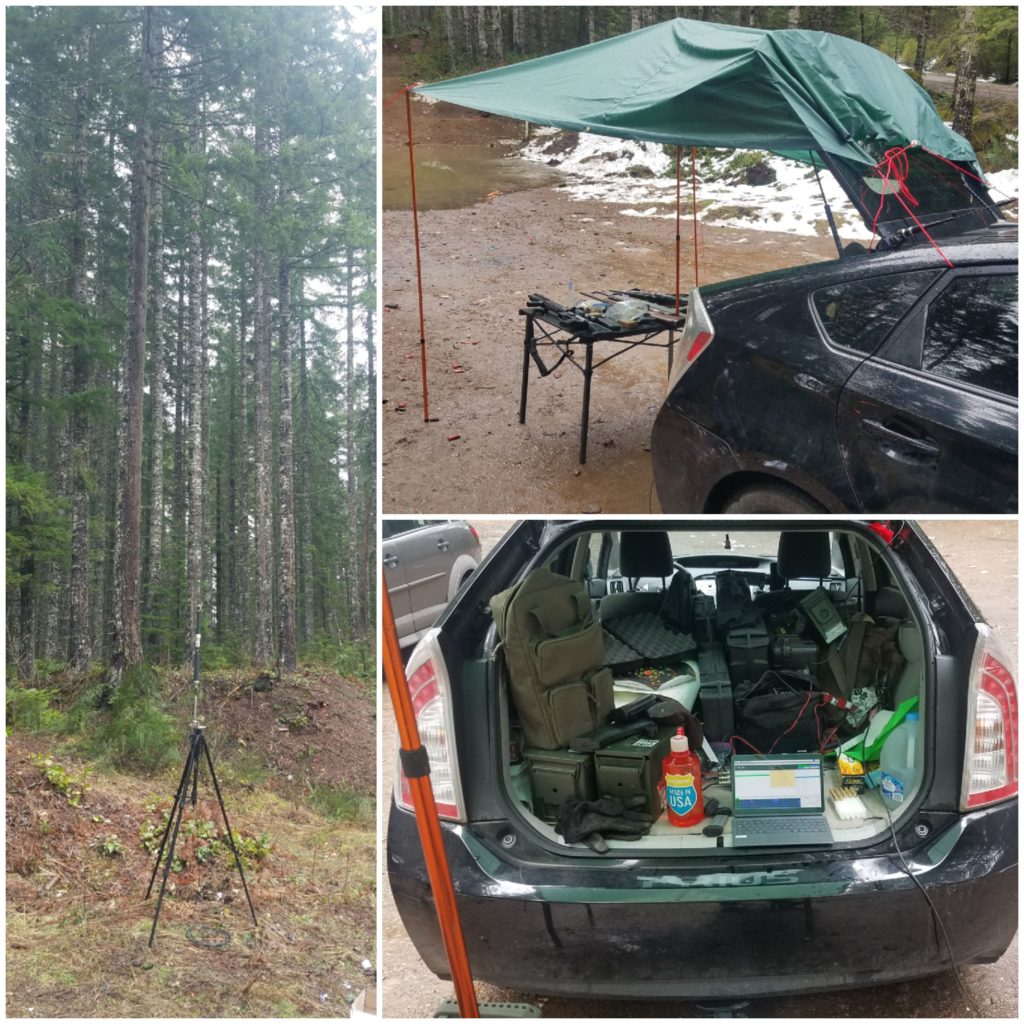
This is just a quick post about some light operating I did out in the forest today while getting some target practice in since I’m not really a sports person. The weather was fairly cold, between 35 and 40 degrees F with alternating rain and snow. This post is mostly about what running QRP in decent conditions can do. I set my Lab599 TX-500 up with my Superantenna / Chameleon Mil Whip 2.0 antenna combo and my offgrid Raspberry Pi and access point this morning to see how far I got out from the outdoor “range” we were at. I powered the whole setup with my Bioenno 40Ah LiFePO4 battery and threw my GoalZero Nomad 20 folding solar panel on just to take some of the load from the battery as it’s just a standard practice I engage in.

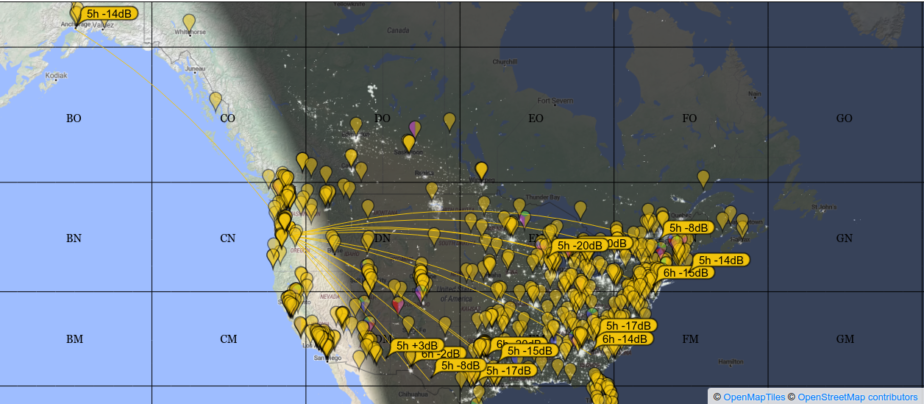
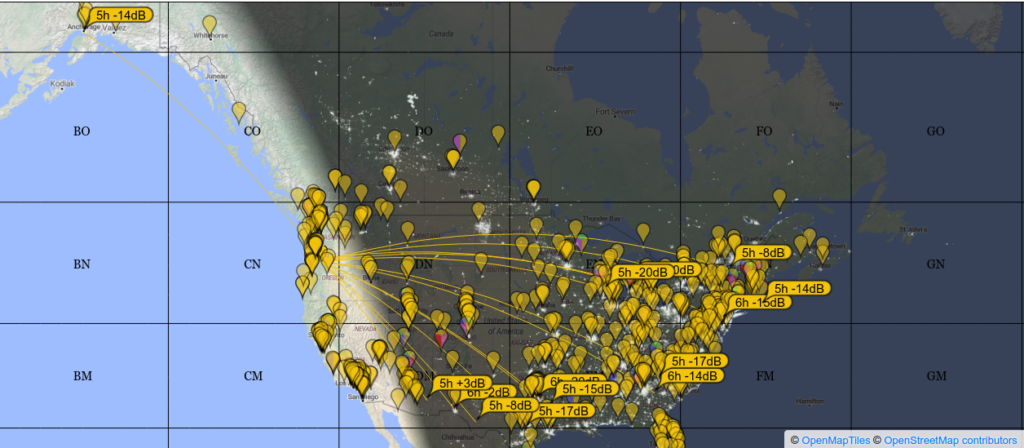
Map showing connections from my station to others in the continental US and AK.
Screenshot of my signal reports from https://pskreporter.info
Map showing distance between my station in OR and an east coast US station.
Map showing distance between my station and KC1GTU. Generated by https://www.karhukoti.com/Maidenhead-Grid-Square-Locator

The idea was that I was going to try to run JS8Call at QRP on 20m for a few hours. The power levels I ran were 1w, 5w, and 7.5w (for a couple minutes) throughout the day. I generally settled on 5w as I was heard from the southwest, south, along the east coast, midwest, and AK. Bumping the power to 7.5w didn’t really yield any additional responses to my heartbeats so I reduced power to 5w and stayed there for most of the day. My furthest contact via heartbeat and “QTH?” commands was KC1GTU at FN41 (about 2,250NM away at 5w).

Setup photos:

Collage of photos showing my antenna on the left. On the top right is a table covered by a tarp extended from the open hatch back of a Prius to two poles covering a table with a center support extended up from the table top. Various firearms are sitting on the table. On the bottom right is a view inside the open back of the vehicle with disorganized cases, and a radio setup with a tablet.
Very messy setup

Lessons learned:

  • Make sure you set your grid locator correctly in JS8Call. Anyone seeing my station would see me at CN85qm, about 45 miles away from where I really was at CN85hs. (Update: JS8CLI solves this problem.)
  • I could probably run this setup for a whole day on my 12Ah Bioenno LiFePO4 battery.
  • The Lab599 TX-500 continues to prove itself to be a great rig off grid!
  • Don’t bring too much gear even if you’re in a car.
  • The gear performed well below 40F.

Successful Portland NET simplex exercise!

Hello radio enthusiasts, geeks, etc.! Tonight was my first exercise as a certified Portland NET (Neighborhood Emergency Team) ARO (Amature Radio Operator). We operated on simplex nets tonight throughout the city in order to practice communicating directly with each other and PBEM in the event city wide repeater networks failed during an incident.

I decided to test from my staging area tonight rather than operate from home… last time I was out I couldn’t get Pat Winlink going, and I have some new gear to test tonight: a legit collapsible table and a GoalZero LED lantern! There was supposed to be rain tonight, and the plan to cover myself and the top of the table in a tarp and work under it but alas it wasn’t necessary. The rain stayed away and I didn’t need to test my half-baked idea.

My partner and the doggo came out again and hung out with me as I operated. Most of the photos of the deployed setup and of me operating are hers taken for the blog. I should note that I don’t have her help me do any actual setup or tasks related to station operation. The idea is to make sure that I can manage all aspects of setting up, transporting, and tearing down the station without assistance.

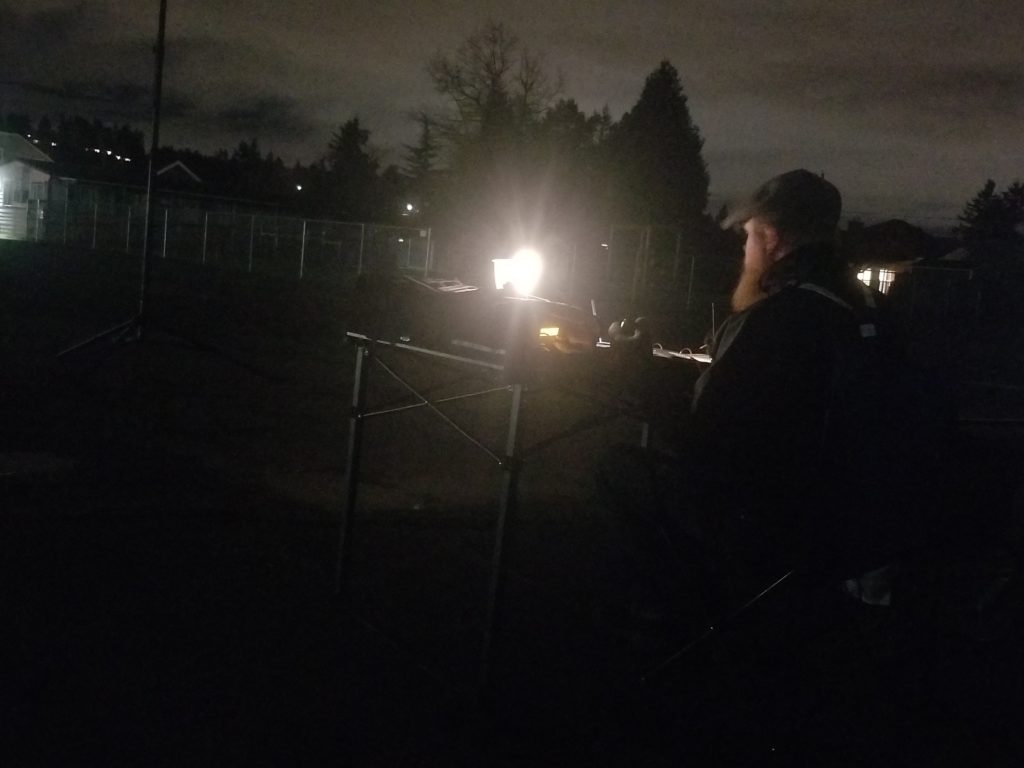
Me sitting at a lamp-lit table with a radio on top at night, the antenna mast is in the background.
Set up at my staging area.

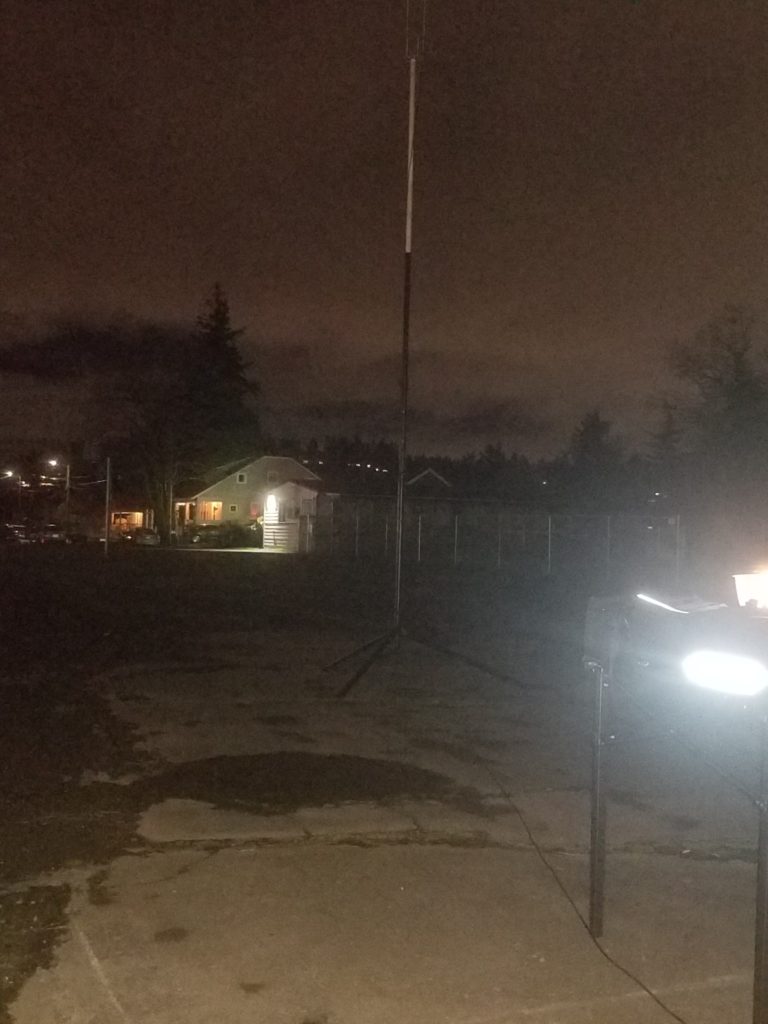
Setting up was pretty smooth today even in the dark. I unloaded the antenna mast and propped it up. The table was then set up and the J-pole was mounted on the non-conductive part of the mast. The second half of the 2m element was attached. After that the feedline was connected to the j-pole and the Kenwood TM-V71 was set up inside my weatherproof backpack along with the wireless access point, Winlink Pi, and 20Ah Bioenno LiFePo4 battery. With that and the ARO binder set up I powered the radio up and the resource net was just beginning.

I managed to check in just fine and the resource net controller and had an excellent signal at 5w (minimum power the radio can do). For this exercise the resource net did directed check-ins by call sign suffix. It was pretty smooth and orderly and net control did a good job. There were quite a few participants from various neighborhoods and I could hear almost every station. After all stations had checked in the subnet controller for each city region would announce their frequency and have all operators in that region move to their regional net as specified in the procedure that was sent out ahead of time. It should be mentioned that I uploaded the procedure for the exercise to the documentation server on the Raspberry Pi ahead of time as well. I was, however, missing the Multnomah County ARES frequency template. I need to make sure I have that on the document server.

Antenna mast made of a speaker stand with a wooden closet hanger deployed at the top. Open stub J-pole antenna is fixed at the top.
Antenna mast and antenna deployed

Once on the regional net we checked in using our tactical call signs. We exchanged signal reports and everyone on the net was a 5 (readability) to me which was very nice, and my signal was a 3 or above to everyone else. It looks like my staging area is pretty good in terms of connectivity to the other stations in my city region (Alameda South). Interestingly one of our operators that generally has a great signal to all stations had some trouble hearing the nearby subnet controller. I suspect there might be some multipath interference between that station and the subnet controller resulting in an unexpectedly poor signal.

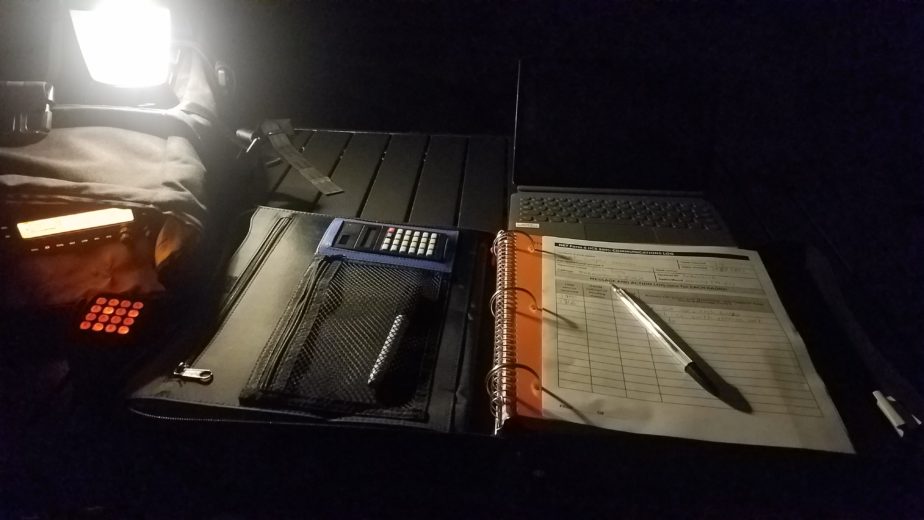
Table top lit by LED lantern with a backpack containing a radio, a tablet, and zipped 3-ring binder with a partially filled form 8 and a pen on top.
Table setup with form 6 (ICS 309) in a binder, my tablet, and radio gear in a weather resistant backpack.

As we operated the radios we also filled out a form 6, or ICS 309 to track events and messages on our radios. These forms are used to document events and messages during an incident or exercise. When passing messages we fill out or voice form 8s (ICS 315), but we didn’t actually do one tonight.

Once we concluded talking on our regional nets we checked out of them using our tactical call signs, and then tuned back to the resource net and checked out there as well. It took a while to get checked out as there was a lot of doubling (more than one station transmits on the frequency at the same time interfering with other stations). It’s hard to coordinate stations by call sign suffix arriving on the resource net at random times even though the resource net controller was doing a great job.

Everything was good so far! Now it was time to attempt to send e-mail again after my last failed attempt. This time I managed to use the Winlink host and an Android tablet to send an e-mail to both OH8STN and a friend from my staging area over VHF. I had a lot of trouble sending e-mail at first. While the wifi network and applications worked just fine this time I had some challenges sending e-mail due to odd issues with the content. It seems that if the body of he e-mail or subject is too long there are protocol errors. After a few experiments I was able to finally get the messages out.

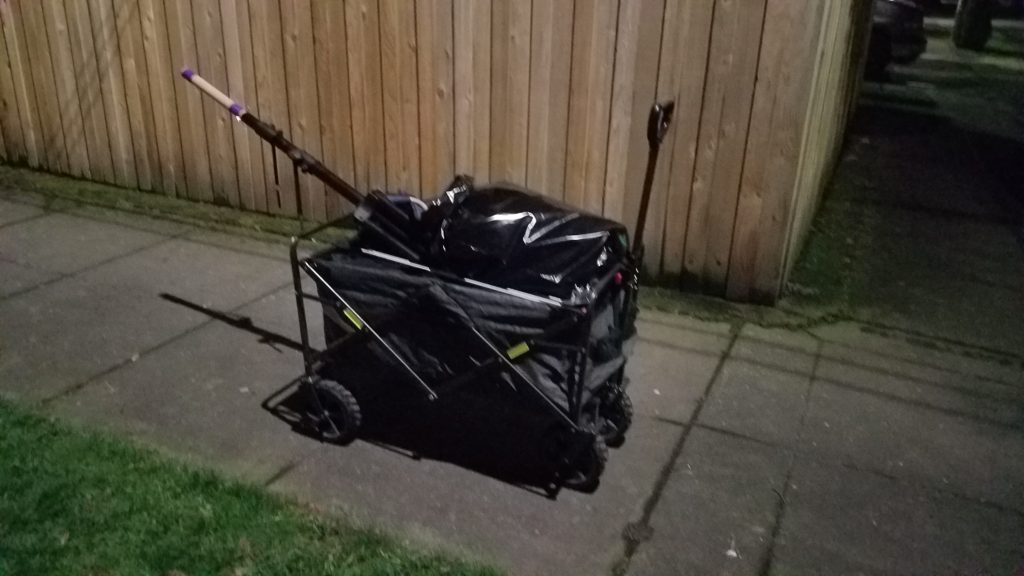
Time to break down and get some dinner! Breaking everything down was super-smooth this time around. There were no issues and everything packed away nicely! I just rolled the wagon back home and unloaded it!

Folding wagon with cloth sides loaded with equipment lit by street light. The collapsed antenna mast is  sticking from the back of the wagon.
The ham hauler loaded up on the way back home.

Lessons learned:

  • A table makes life a LOT easier when doing this sort of deployment.
  • The Goal Zero LED lantern wokred very well. The adjustable light level is very nice, and even with half the lantern on at the lowest possible power was more than enough for the vast majority of tasks I had to perform from setup to operating and filling forms to breaking down. I did increase the light level a couple times for specific tasks, but I didn’t need to keep the light level up.
  • Make sure you have all the documents you’ll need with you including frequency lists.
  • Having exercise-specific and general guides at your fingertips is a good idea. It helped in this exercise.
  • It takes 45 minutes from loading equipment to being on air for my staging area under more-or-less ideal conditions in the dark.
  • Some changes to the J-pole made it work a lot better in the field. I’ll post an entry the modifications I made.
  • My power cabling was really messy. I could do better.
  • It didn’t rain but I need to figure out a shelter that would protect the table top from wind and rain that can fit in the bag with the table.
  • The exercise seems to have gone well broadly. The check-in process was pretty efficient.
  • The check out process was a bit chaotic but maybe we could implement a system whereby net subnet controllers check into the resource net and once that happens the resource net controller adds that subnet controller’s region to a directed checkout by region. We could cycle through regions until all stations check out.

A successful-ish EMCOMM test deployment

Howdy everyone! I wanted to tell the tale of a short walk with a wagon in the rain followed by some radio tests. I decided I’d like to test moving to my staging area during a disaster response scenario. My goals were to test making contacts with my Yaesu FT3DR and do voice as well as Winlink with my Kenwood TM-V71 and portable Winlink setup. This will also be the first deployment of my Arrow OSJ 146/440 open stub dipole. This model has the split 2m element for easier transport.

Cloth-sided wagon containing various equipment and a backpack leaning against the side.
Wagon with the antenna, mast, and a couple folding chairs. Also pictured is my water resistant backpack with the radio gear and feedline.
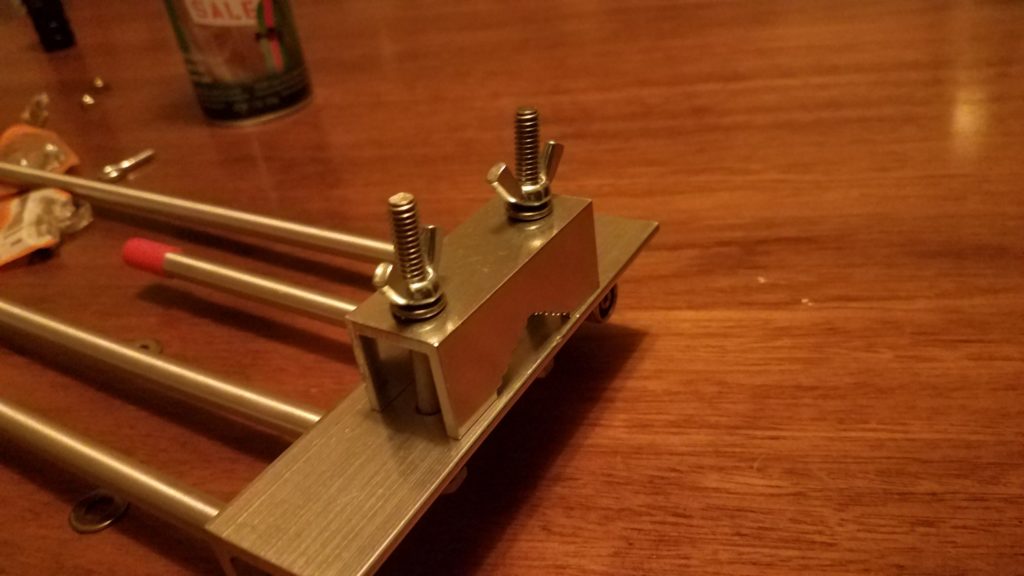
Wing nuts installed on the antenna's pipe clamp.
Slightly modified Arrow OSJ 148/440. I replaced the stock hex nuts with 1/4″ 20 wing nuts to remove the requirement for a wrench to install the antenna in the field.

After arriving at my deployment site I removed the 1 5/8″ closet rod from the inside of the speaker stand. The long end of the closet rod stays inside the speaker stand tubing for easy transport. The stop for the closet rod is made from three eye screws that double as guy line connection points. The three eye screws are installed just above the top band of purple duct tape (reduces vibration and motion when the closet rod is installed in the end of the speaker stand).

J-pole mounted to a wooden closet rod resting against a speaker stand. The split 2m element is affixed for transport.
J-Pole with the second half of the 2m radiator threaded in place for transport.

The next step is to install the top portion of the open stub J-Pole.

J-pole mounted to a wooden closet rod resting against a speaker stand. The split 2m element is installed for transmission.
Open Stub J-pole atached to closet rod resting against the speaker stand with the 2m element fully assembled.

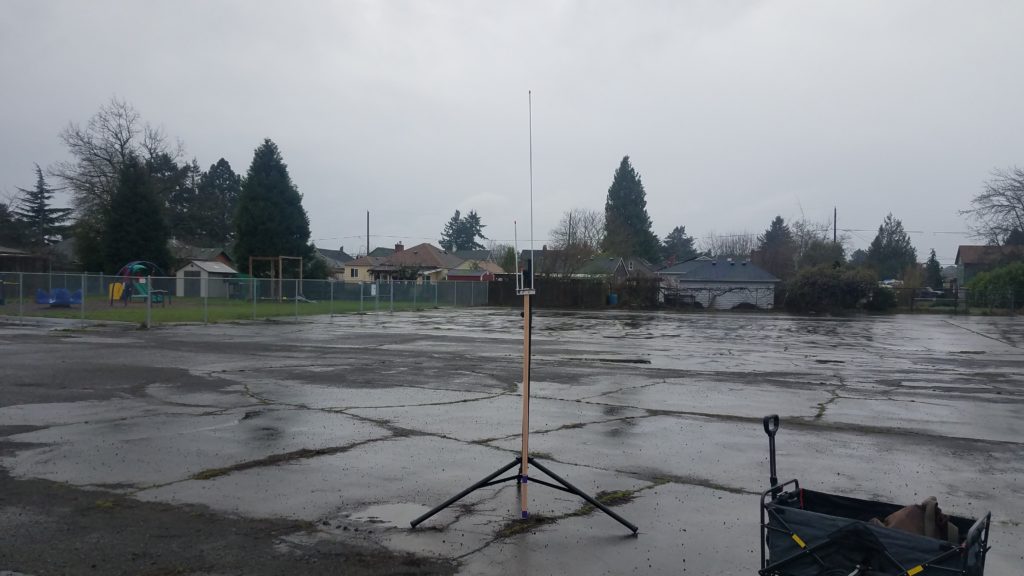
After the feedline is attached to the J-pole the closet rod with the antenna attached is installed in the speaker stand with the tape end of the closet rod in the top of the speaker stand. The closet rod is resting on the three eye screws that prevent it from slipping down inside the speaker stand tubing. The two telescoping sections of the speaker stand are fully extended and the locking pins are in place.

Fully extended speaker stand with closet rod and antenna attached. The wagon, my partner, and our dog are off to the side.
Antenna fully extended. Also present is my partner and our dog for moral support.
A picure of the feedline velcroed right above the tripod component of the speaker stand.
A velcro wire tie is used to anchor the feedline to the bottom of the antenna mast to prevent it from being pulled over from the top if someone trips on the cable.
Yaesu FT3DR connected to the feedline with the wagon and antenna stand in the background.
My Yaesu FT3DR attached to the feedline with a SMA to PL-259 pigtail.

I was able to make a couple contacts using the Yaesu HT at 5w and monitored APRS transmissions for a while. So far everything is good.

Hand holding microphone of Kenwood TM-V71. In the background the radio is in a dry bag and sitting on the wagon.
Kenwood TM-V71 connected to the feedline and battery in the backpack. It’s protected from rain by an Ortleib dry bag.

The Yaesu HT is stowed in its bag and the Kenwood mobile radio is connected to battery power and the feedline. It’s also protected from the rain by a 5L Ortleib dry bag. More contacts are made on 2m without issue. I was able to make contacts in Portland, OR, Aloa, OR, Washugal, WA, and Vancouver, WA at 5w. More good news!

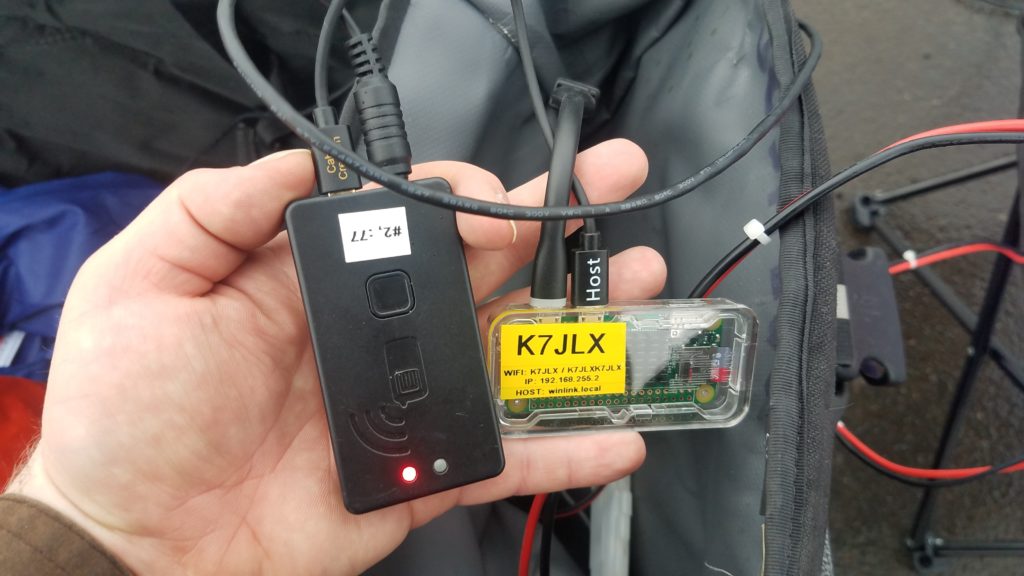
Hand holding the Mobinlinkd TNC3 and Raspberry Pi Zero W connected to each other. Radio data connector is also set up.
Winlink host, TNC, and radio connected.

It was finally time to send and receive some e-mail! I connected the Winlink Raspbery Pi to the power supply and the Mobilinkd TNC3 to the data port on the TM-V71. I pulled my phone up, found the generated wireless network, joined it…. and nothing! It partially connects but doesn’t get an IP address. Strange, but no matter. I assigned a manual IP to my phone and tried to connect to the Pi via IP address. The connection still failed. I rebooted the Pi and tried again. The wifi network shows up, I join it, no DHCP IP address. Bummer! All my tests having either been complete or failed it was time to pack up and head home.

At home I boot the Pi and it joins the home wifi network with no issue. I SSH into the Pi and begin reviewing the configuration for Dnsmasq (DHCP/DNS server). Everything looks good and the configuration is valid. I then look at the autohotspot script. It has the default IP address that the script ships with set. Then the “aha!” moment strikes. As part of writing my Winlink host setup guide I re-ran the Autohotspot install script so I could make sure my documentation was right. The fix is now obvious: I just changed the IP address in the Autohotspot script, kicked the Winlink host off my wifi network and restarted it. I’m now able to connect, get an IP address, and connect to Winlink and the documentation server!

Lesson learned… always re-test your setup after you mess with it, and if you re-run a setup script you should verify that your setup runs properly afterward. Fortunately this was not a emergency deployment and was close to my QTH.

Other things I learned from today:

  • The wagon doesn’t negotiate steep curbs well without a bit of finesse.
  • The antenna mast should be lashed in place on the wagon during transport so it doesn’t move in the wagon.
  • The wing nuts on the J-pole can get over-tightened easily making it hard to dismantle the setup.
  • The allthread stub that connects the two parts of the 2m element on the J-pole can be unscrewed easily and lost when the element is being removed. I’ve dropped it 3 times in the first 48 hours of having the antenna. Some red or blue Loctite is probably a good idea to keep the end of the stub fixed in the removable portion of the 2m element. The red (permanent) Loctite will also keep moisture out of that joint.
  • Sometimes the telescoping tubes on the speaker stand stick.
  • I live in NW Oregon and figuring out a wind and rain shelter is probably a good idea.
  • The speaker stand is pretty stable and sturdy. It will probably work without guying in mild wind.

Raspberry Pi document server

When operating in a grid down or off-grid scenario it is often important to have access to information, maps, manuals, forms, frequency plans, emergency plans, etc. This guide seeks to explain how to install and populate the document server with info.

First, using either SSH or the terminal application on your Pi install git.

sudo apt-get install git

Next, read the documentation for document-server. This will tell you how to install it and its dependencies.

Once installed you can copy any required documents to the pi user’s Documents folder. I strongly recommend you use PDF and text formats, and images rather than word documents or other formats that require more specialized applications to open. When you load the page using the Raspberry Pi’s hostname or IP address via http://<IP or hostname>. You’ll be presented with your documents! They can now be opened from any device that has a web browser and can open the files you stored.

As extra credit I also create a zip file with all my documents so you can download all the documents at once if need be. This can be useful when you want a copy of all documents so you don’t need the Pi to be powered on in order to read information.

Optional Avahi configuration

In order to advertise services to devices that support MDNS you can add the following configuration to /etc/avahi/services/documents.service and then restart Avahi: sudo systemctl restart avahi-daemon

<?xml version="1.0" standalone='no'?><!--*-nxml-*-->
<!DOCTYPE service-group SYSTEM "avahi-service.dtd">
<service-group>
  <name replace-wildcards="yes">%h Documents</name>
  <service>
    <type>_http._tcp</type>
    <port>80</port>
  </service>
</service-group>