Camping in the Tillamook State Forest (1/21-23/2022)

It’s been a while and this will be a big post! My partner and I were able to go camping over the weekend, and if you’ve read any of my blog posts you won’t be surprised that I took the opportunity to practice some comms and off grid operating. I wanted to work HF, do some shortwave listening, and see if I could do any UHF/VHF communications. Additionally I wanted to run off of the 100AH battery box for a couple days to see how well it held up under constant use. This is also the first camping trip I brought the speaker stand antenna mast setup on.

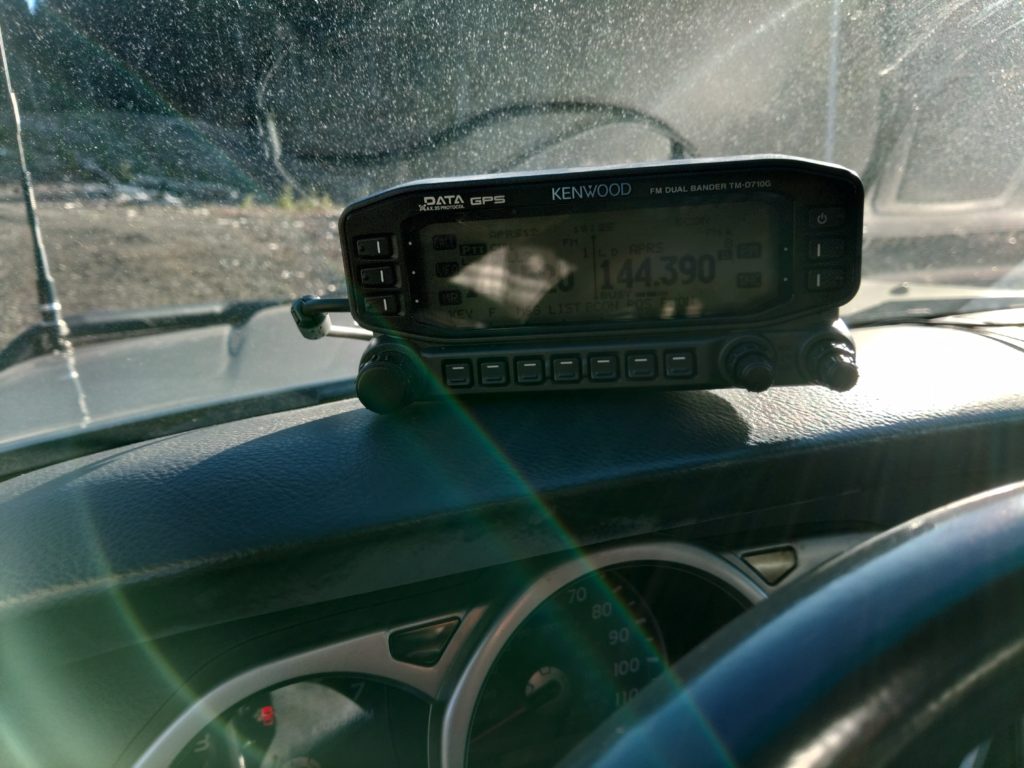
On the way out I ran APRS with the Kenwood TM-D710G and the COMET-NCG CA-2X4SR antenna that mounts on the hood of the 4Runner. I noticed that on the way out that I had APRS coverage nearly the whole way out.

The first night we arrived late so I did a bit of SWL. I mostly got Radio Havana Cuba, Radio Nikkei, a distant station broadcasting in Mandarin, and Radio New Zealand International.

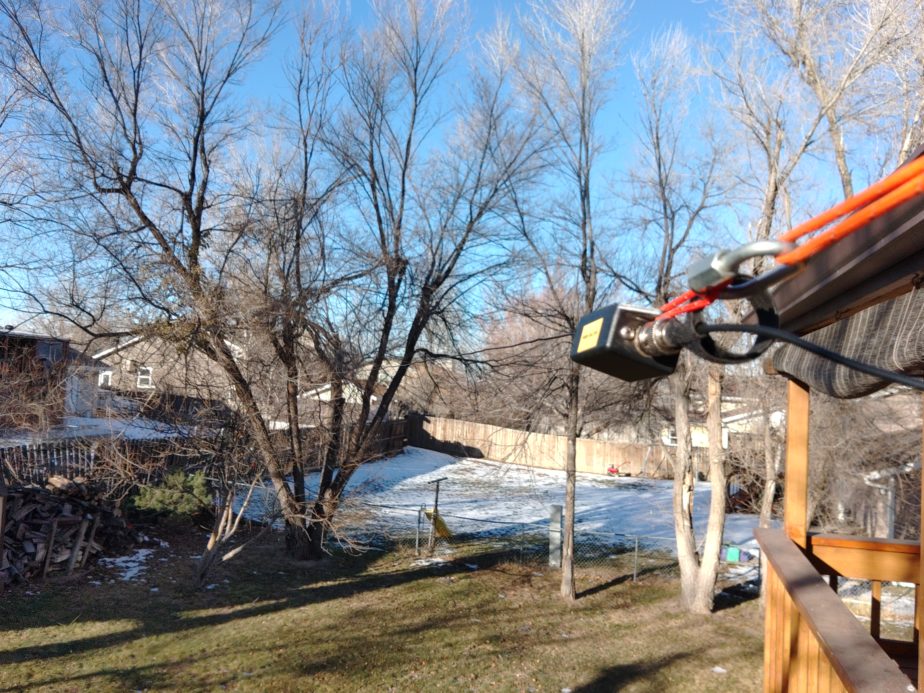
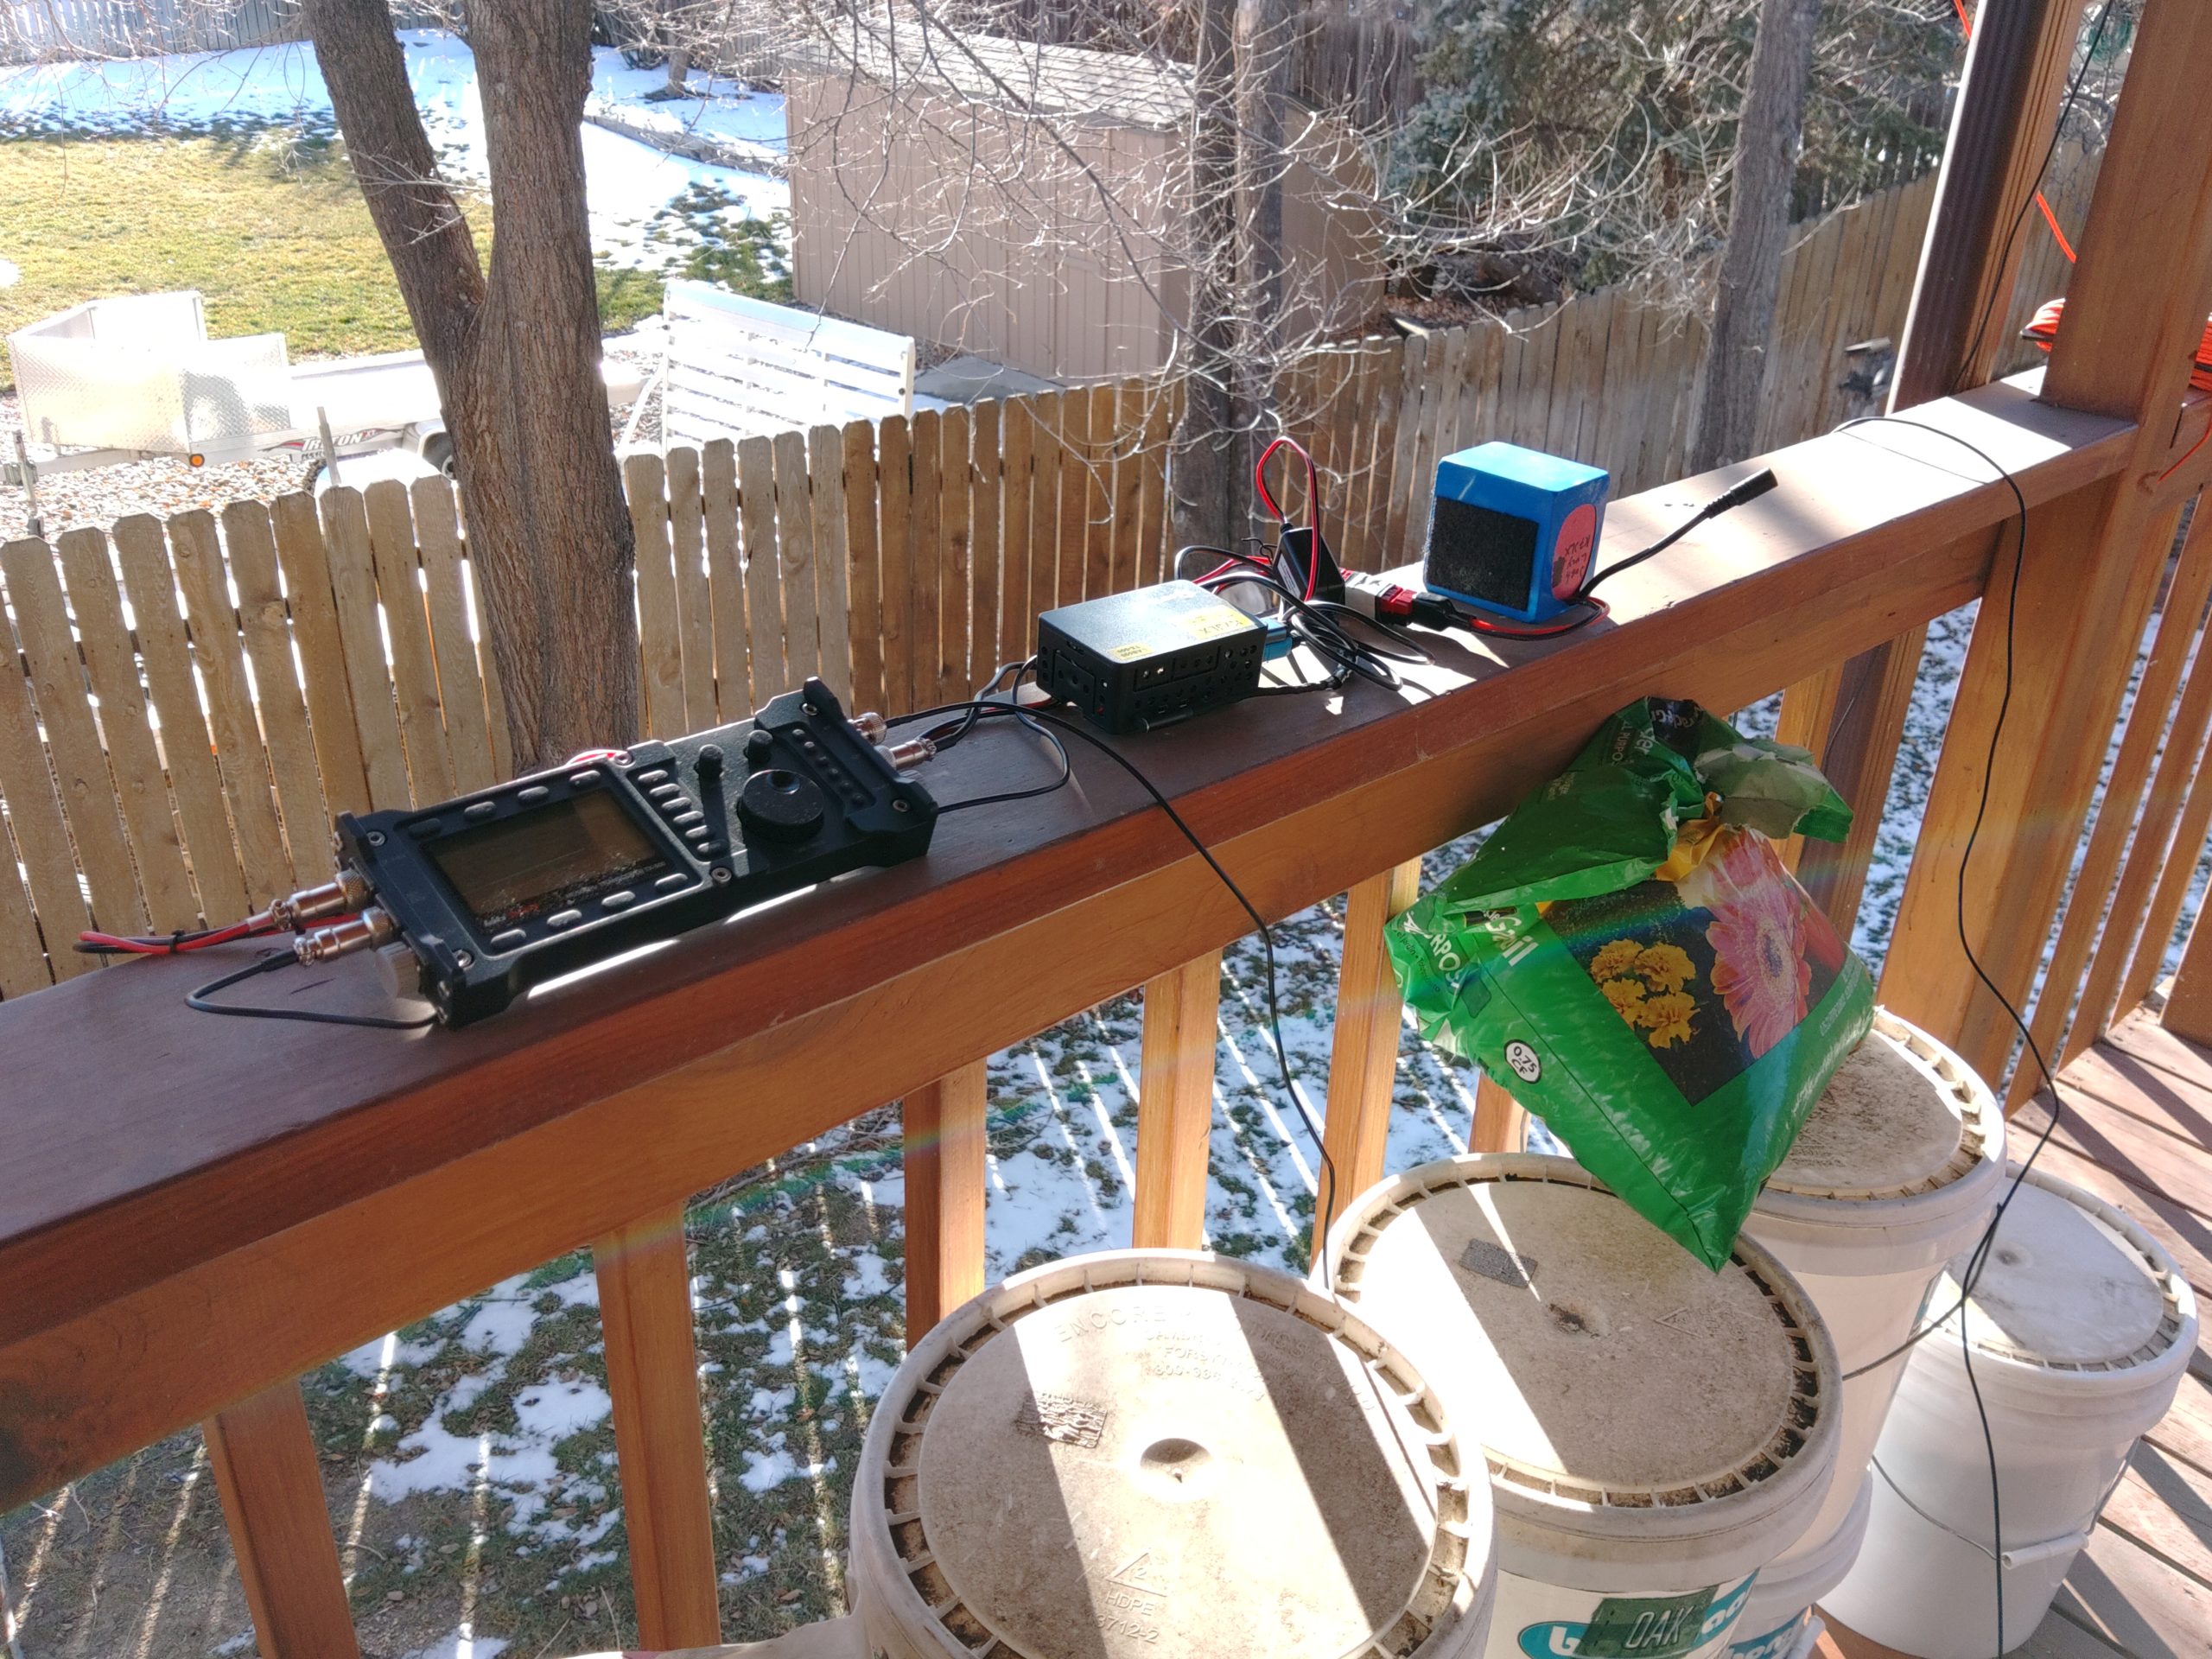
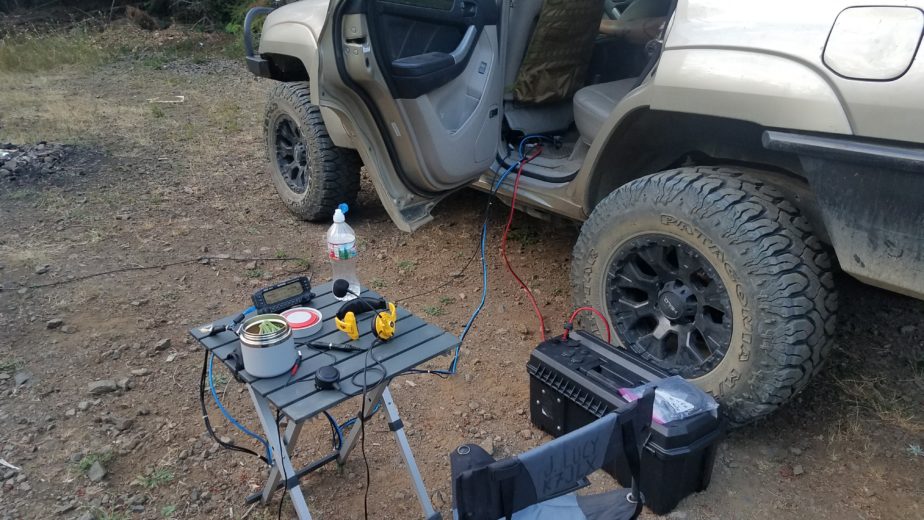
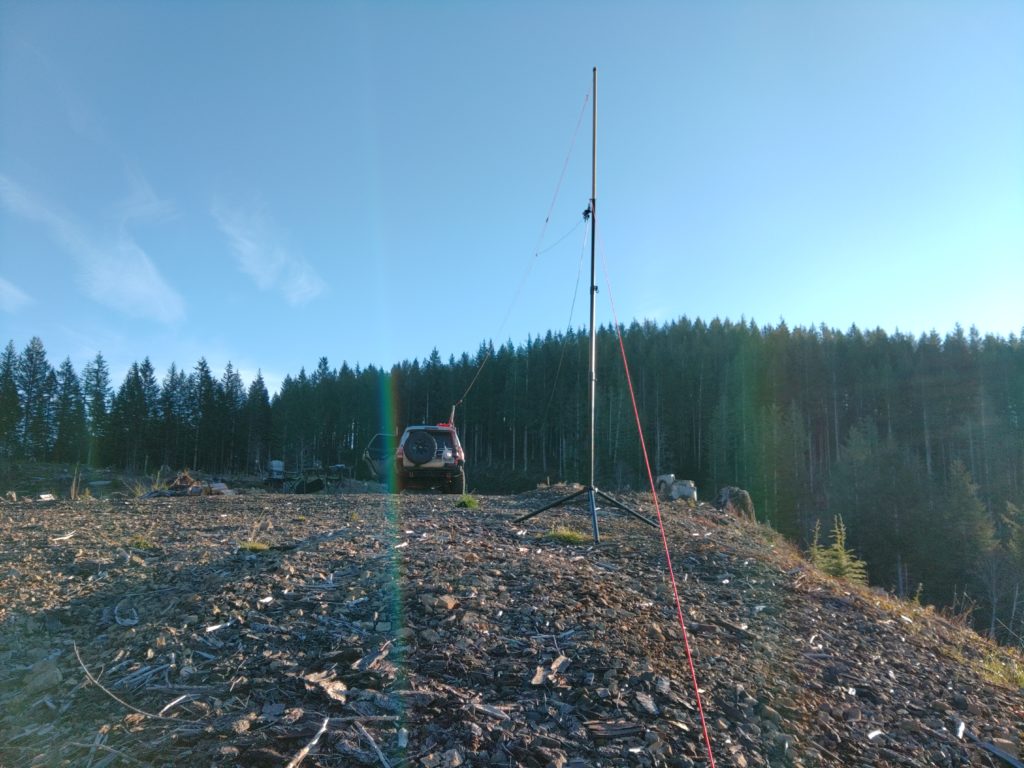
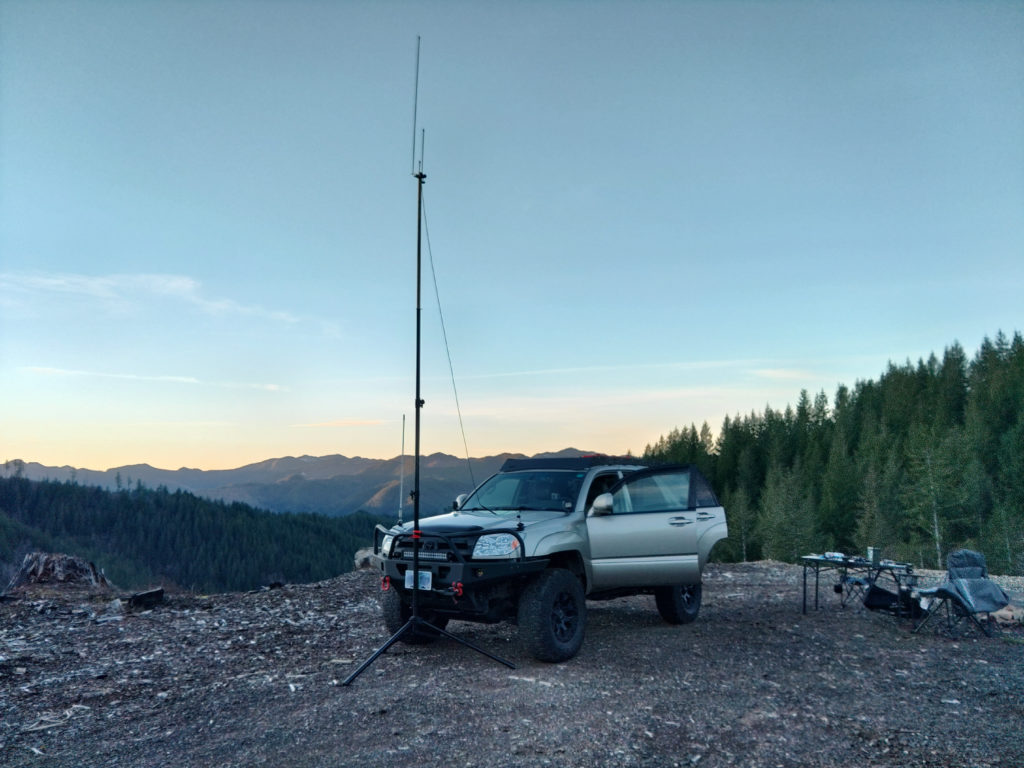
The next day I set the antenna up following a fun walk in the woods below the camp site. Most of my work on HF was done using the usual Endfedz Trail friendly 10/20/40m antenna. I strung it between the 4Runner and my portable antenna mast. I also added a 6m end fed dipole to the setup to see if I could reach Kevin, K7AJK from my camp site on the Lab599 TX-500. We had no luck. I wasn’t actually able to make any voice contacts on 20m with this setup even running at 10W, but there was a contest on the band so it was both congested and I suspect folks were running at fairly high power levels to make contacts. As you’ll be able to see from photographs I did a little hack with a stick I found to push the antenna higher off the ground on the truck side. It was especially helpful in preventing the hatch back from striking the antenna.

View of an antenna mast guyed to the ground and a line with an antenna running to a SUV in the background
Guyed antenna mast with two antennas added
View of an SUV with a piece of wood lashed to the roof rack holding some paracord off of the top of the vehicle.
Found piece of wood used to push the antenna higher off of the roof of the 4Runner
An antenna tied to paracord running from the upper-right corner of the photo to a mast several feet away on the edge of a hill. The transformer for the antenna is visible with feed line hanging down. Forest in the background.
The Trail Friendly Endfedz is strung along some paracord to prevent damage to the antenna if the mast blew over.

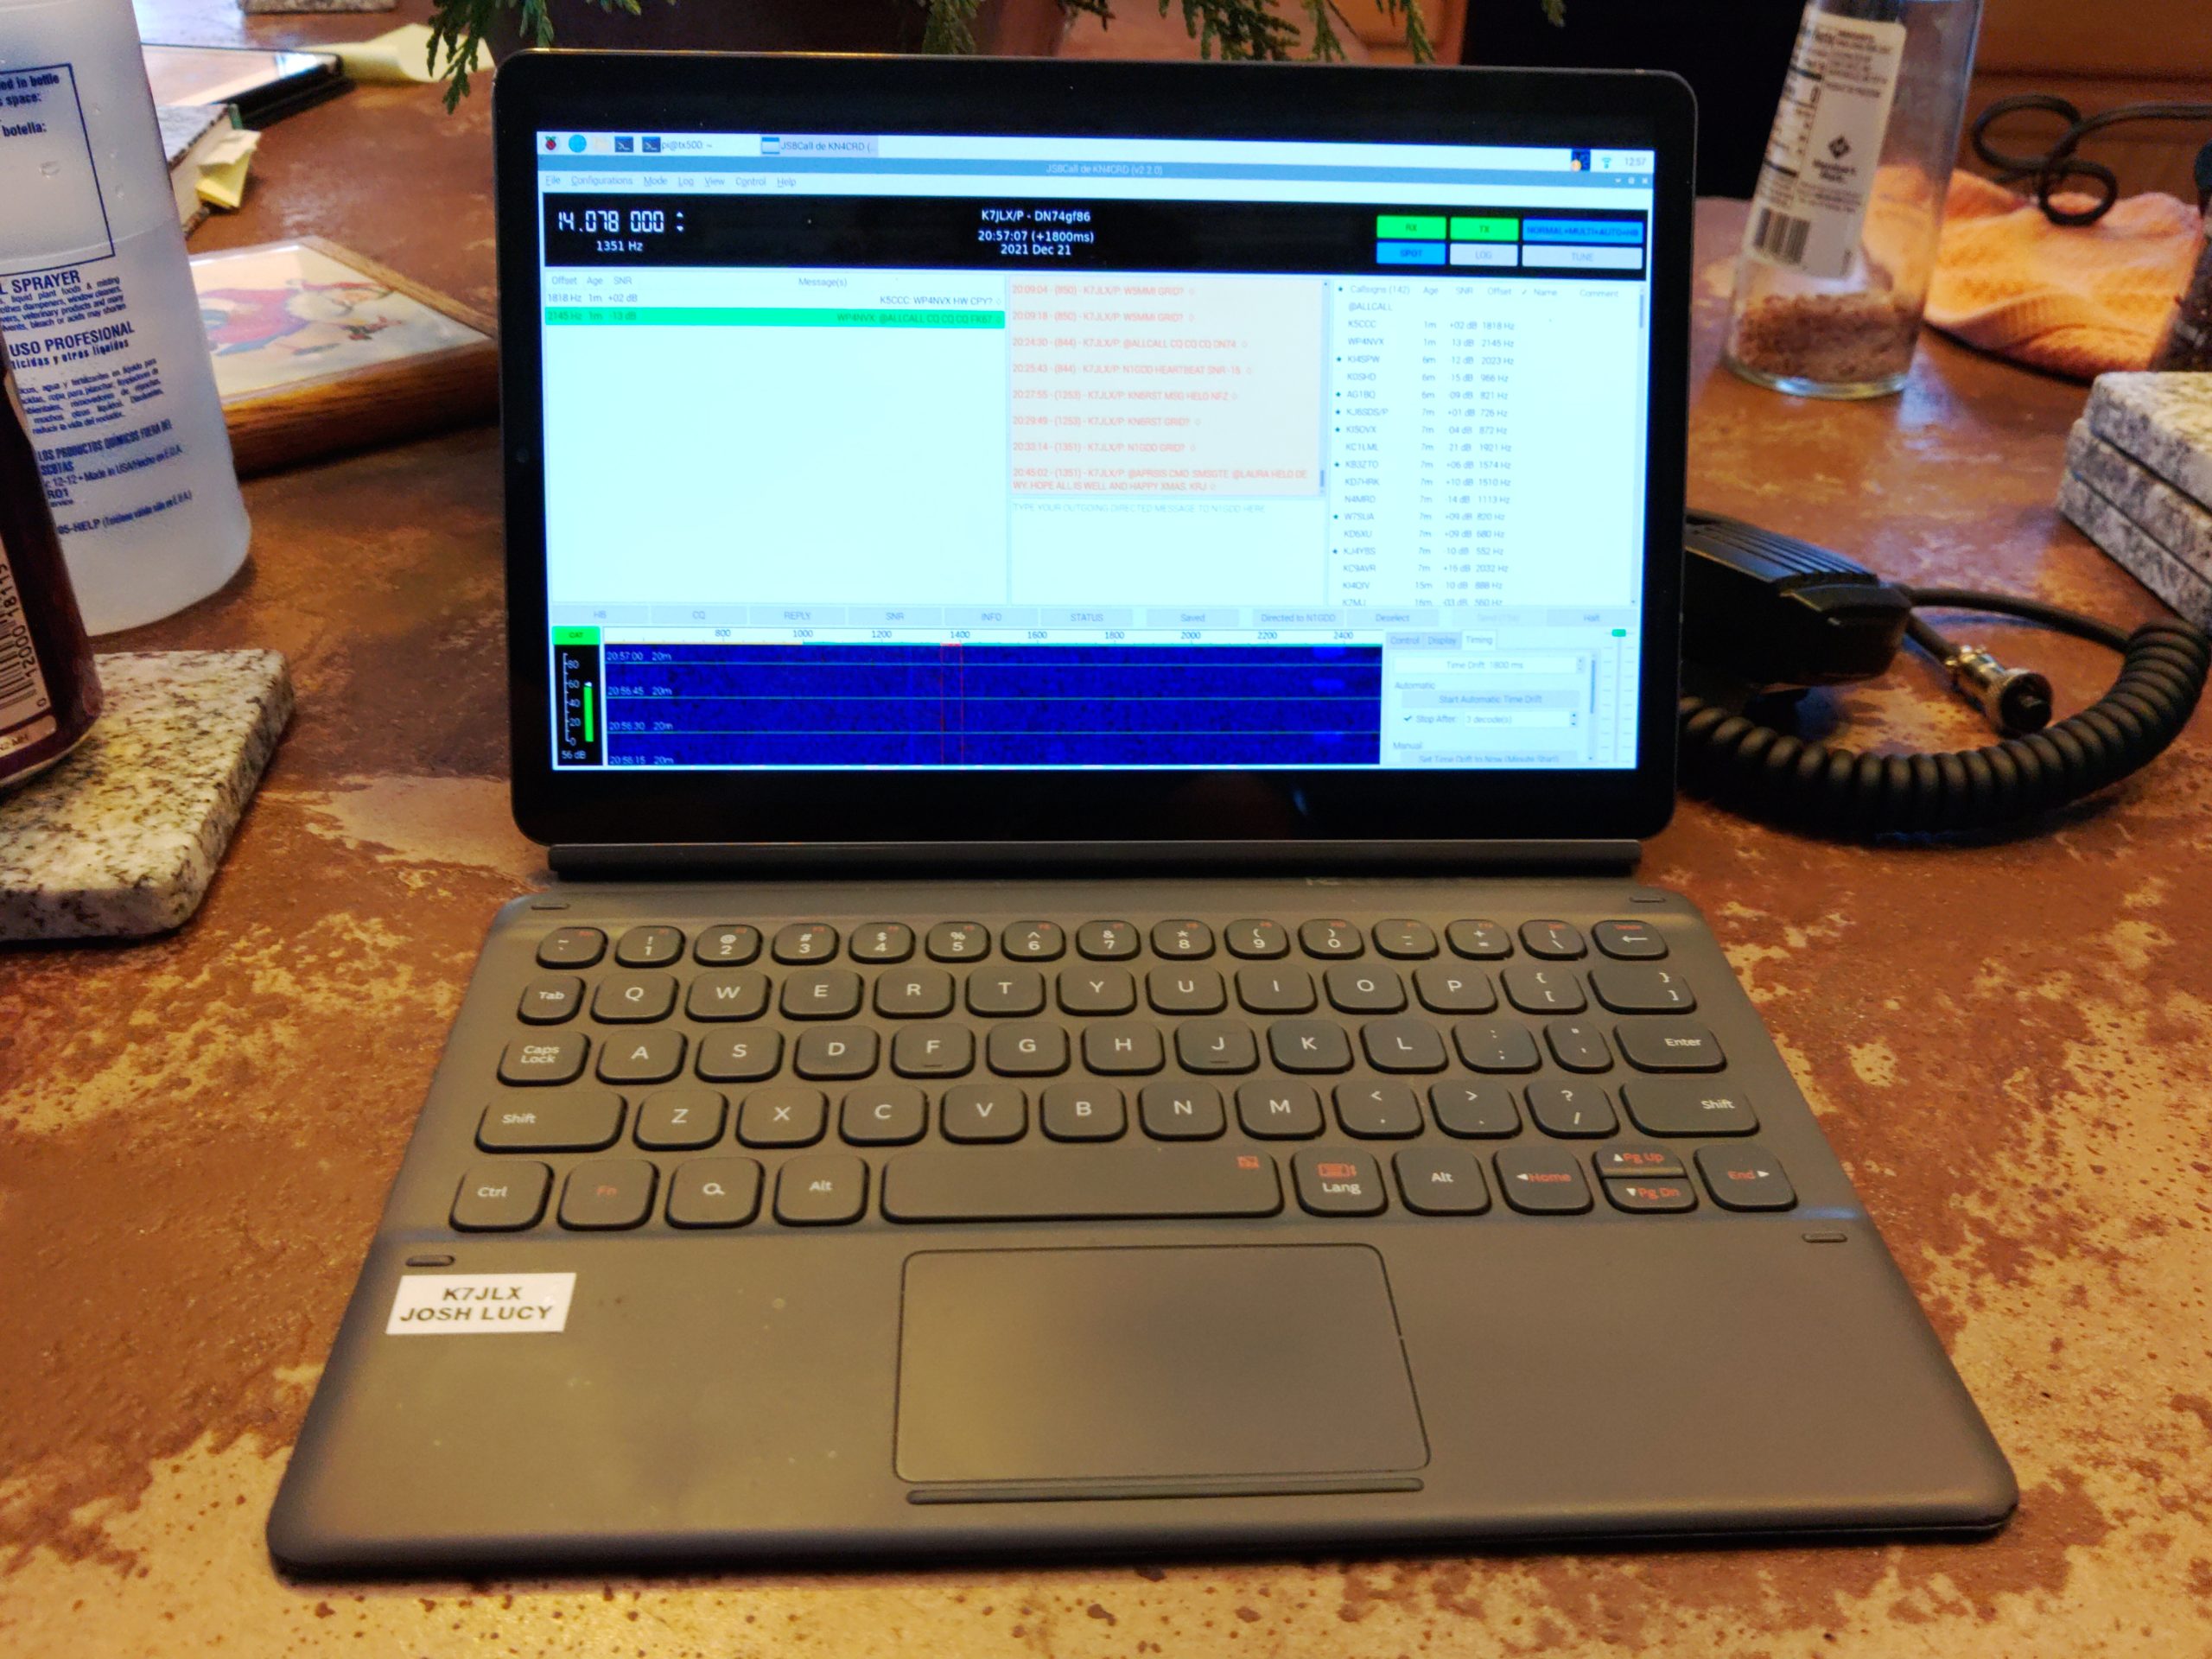
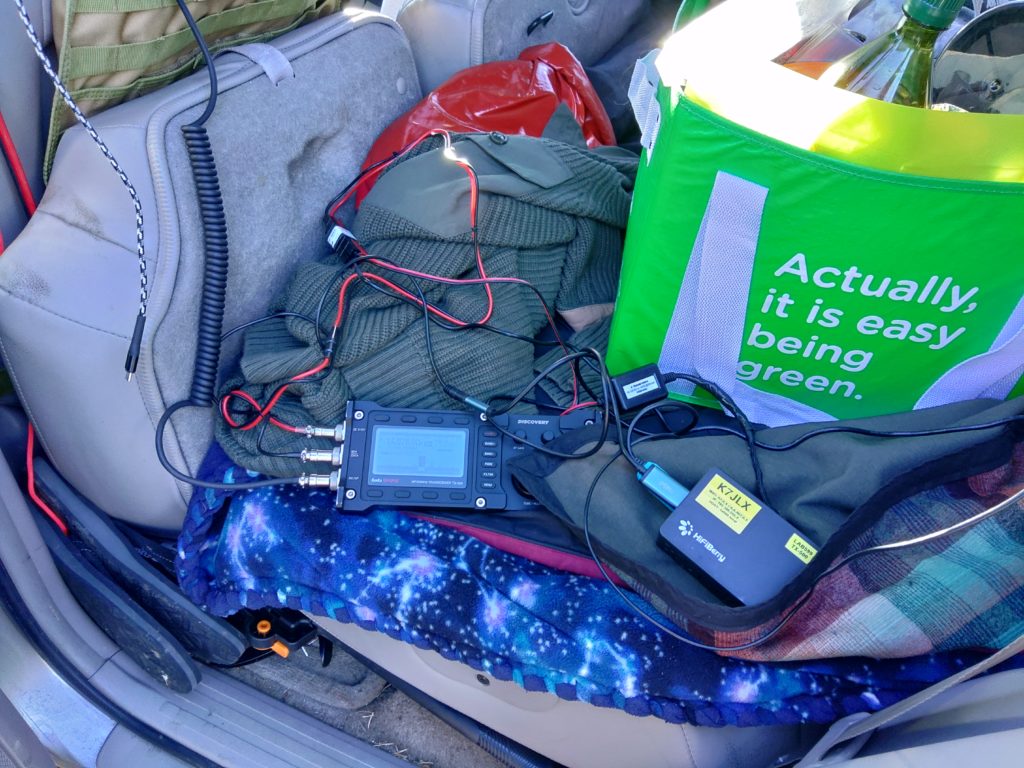
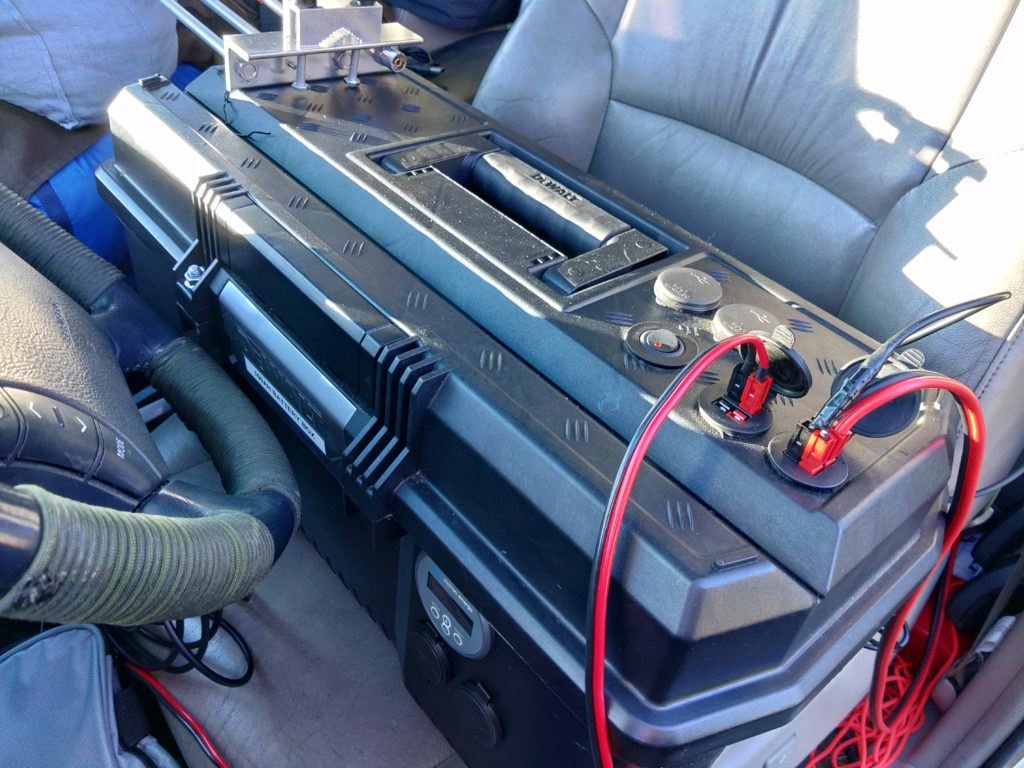
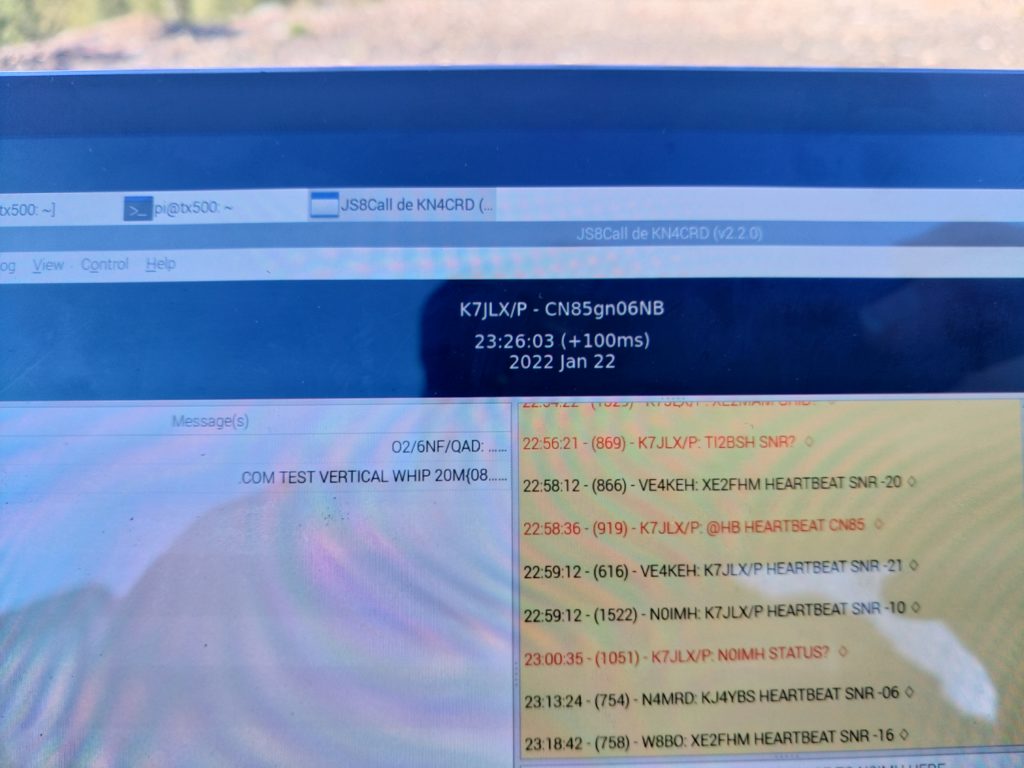
After a few hours of having no success running phone I decided to switch to packet. Moving the radio into the vehicle reduced the SWR and allowed me to run the entire setup from the 100AH battery since I had used the 4.5AH battery quite a bit for SWL already. I had also been simultaneously been running my 2m rig and APRSDroid on the tablet connected via Bluetooth to the mobile radio with a Mobilinkd TNC3+. I was able to send a number of text messages back and forth between friends using SMSGTE, which was nice given the complete lack of cell service. At this point I was still using the antenna on the truck.

A Raspberry Pi connected with a Lab599 TX-500 radio via two cables sitting in the back of a 4Runner.
Lab599 TX-500 connected to the off grid Raspberry Pi
A tablet sitting on a metal camping table running the JS8Call application.
Tablet running JS8Call
A toolbox with power connections running from it sitting in the front seat of a vehicle.
100AH battery box connected to the Kenwood TM-D710GA in the vehicle, the Lab599 TX-500, and some lighting.

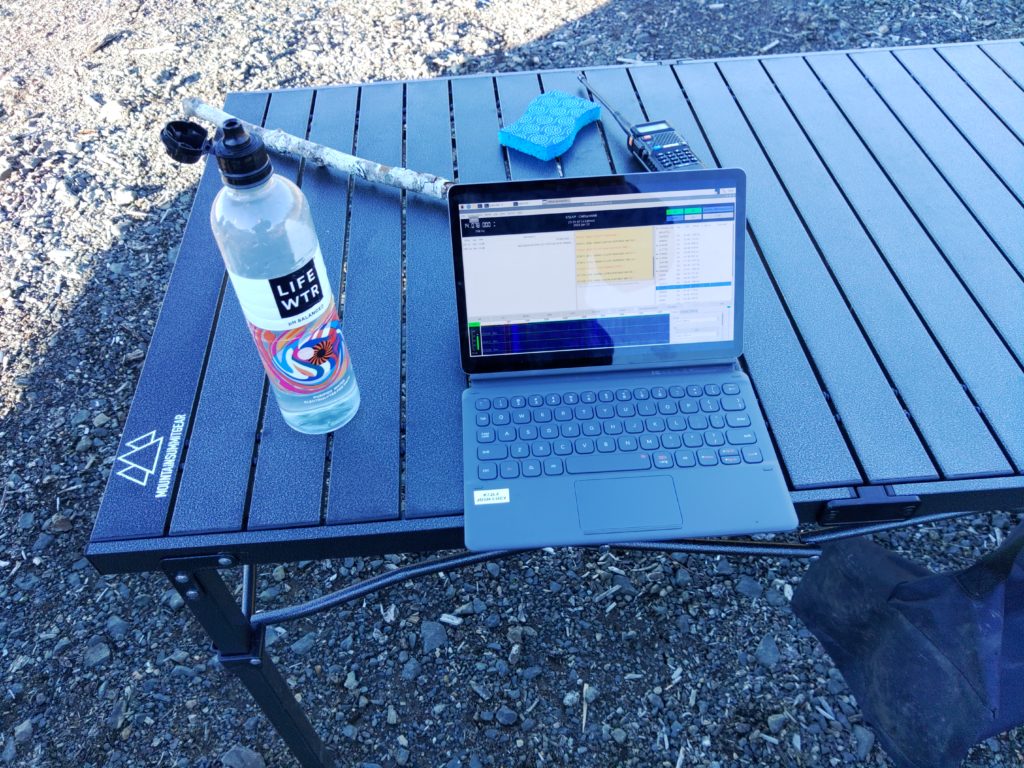
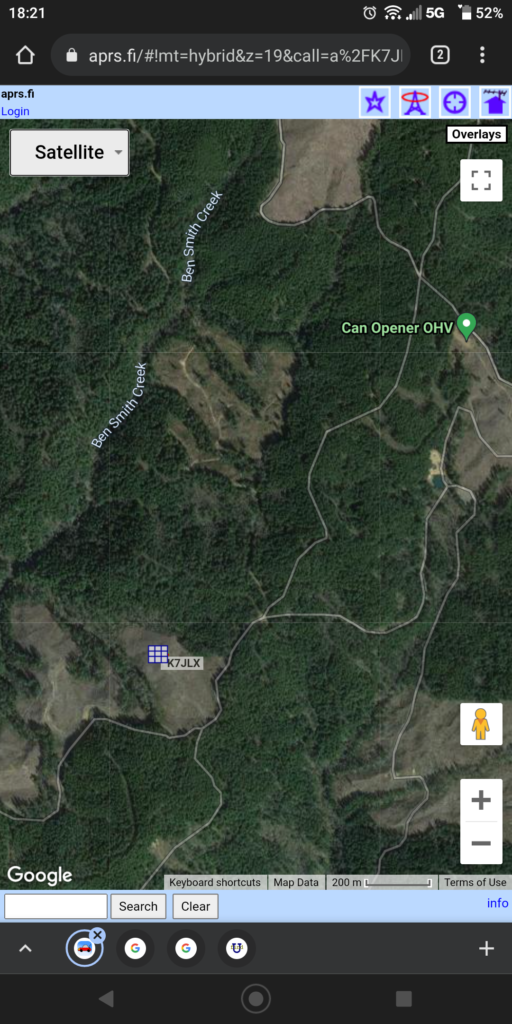
After quite some time operating on digital I decided to test some configuration changes I made to js8cli to increase the accuracy of maidenhead coordinates I was submitting to APRS-IS via Internet-connected stations running JS8Call. I had some pretty good luck as my position was accurately reported.

A photograph of the screen of a tablet showing the JS8Call application running. A callsign, timestamp, and 10-digit maidenhead coordinate are displayed prominently in the photo along with a screen showing contacts with other stations.
JS8Call screen shot showing a 5-level maidenhead position set via js8cli running an daemon mode
A screenshot of the website aprs.fi showing a Google satellite map with a rectangular marker for K7JLX placed in a clearing.
My position as displayed on aprs.fi

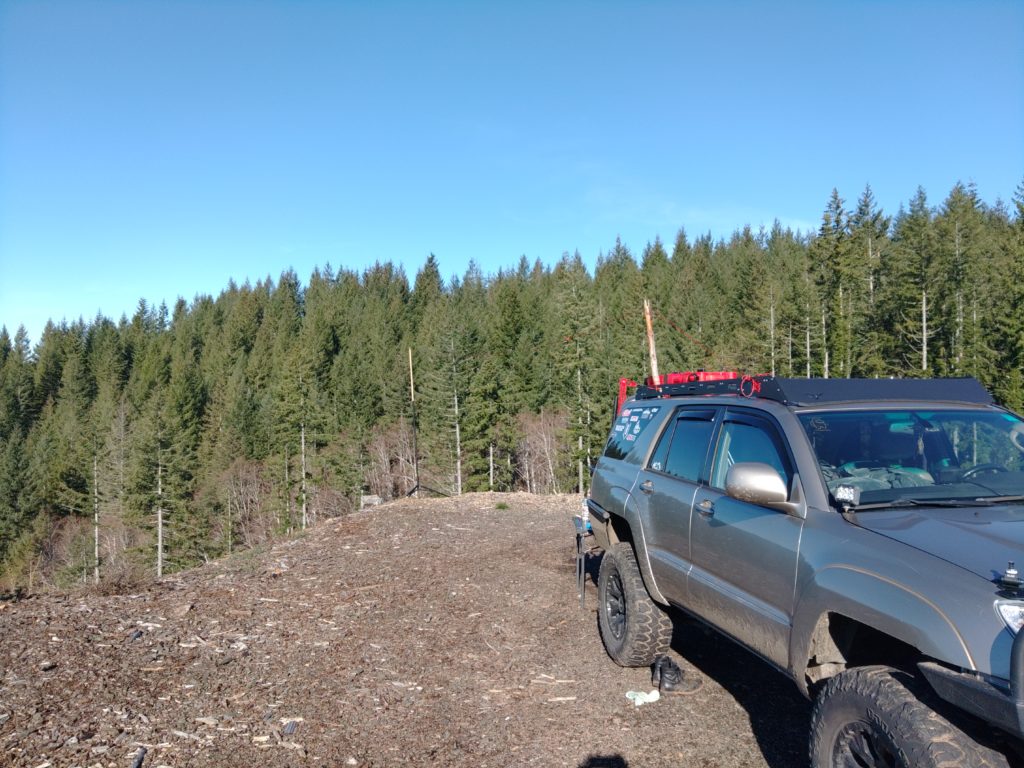
Apart from all the fun I had on HF, and walking around the forest with my HT (where I was reliably digipeated at 5w) I also figured I’d try to see if I could hit some of the repeaters in the Portland area, so I swapped the vertical antenna on the vehicle for my collapsable J-pole and speaker stand antenna mast. Much to my surprise I was actually able to get into the repeaters in the Portland area at 5w, but it was a bit sketchy as sometimes they wouldn’t key up. Apart form that I could get a bunch of APRS stations and digipeaters as well as some folks on the 2m calling frequency. I actually ended up having much better luck on 2m than on HF this time around.

The head unit of a Kenwood TM-D710GA radio placed on the dash of a vehicle.
Kenwood TM-D710GA on the dash of the 4Runner
A 4Runner with an antenna mast tied to the front bumper and connected to the vehicle with feedline. There's a camping table and chairs to one side and in the background are trees, a valley and a mountain on the other side of the valley.
The 4Runner antenna hood antenna swapped for an elevated J-Pole on the speaker stand mast.
Close-up of paracord tying the the antenna mast to steel tubing on an offroading bumper.
Using paracord to lash the antenna to the bumper of the truck

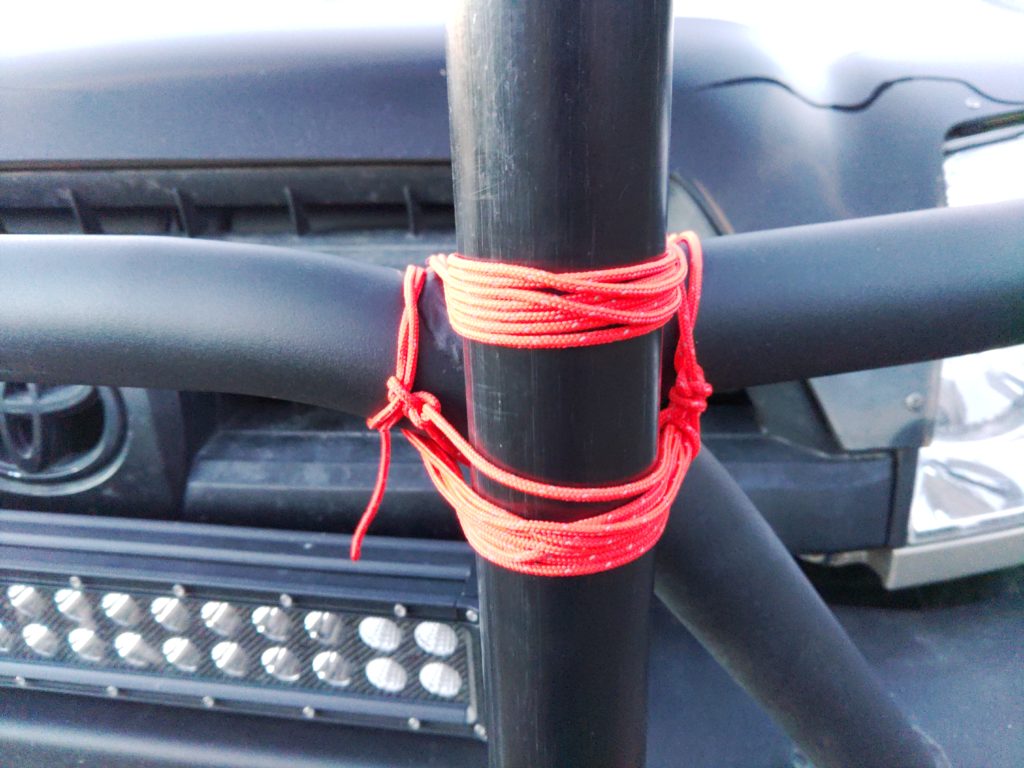
As you might have noticed from the pictures above I ended up moving the antenna because winds were getting higher and I was afraid the antenna might move side-to-side on the bumper’s tubing. I ended up shifting it toward the driver’s side where I could secure it to both the tube running horizontally and to the spot where the tube split, meaning the mast wouldn’t shift from side to size because it was secured with the paracord on both axes. since the antenna mount on the vehicle uses the same connector as most of my coax and the J-pole I was able to just connect the J-pole directly to the existing cabling in the 4Runner. Easy!

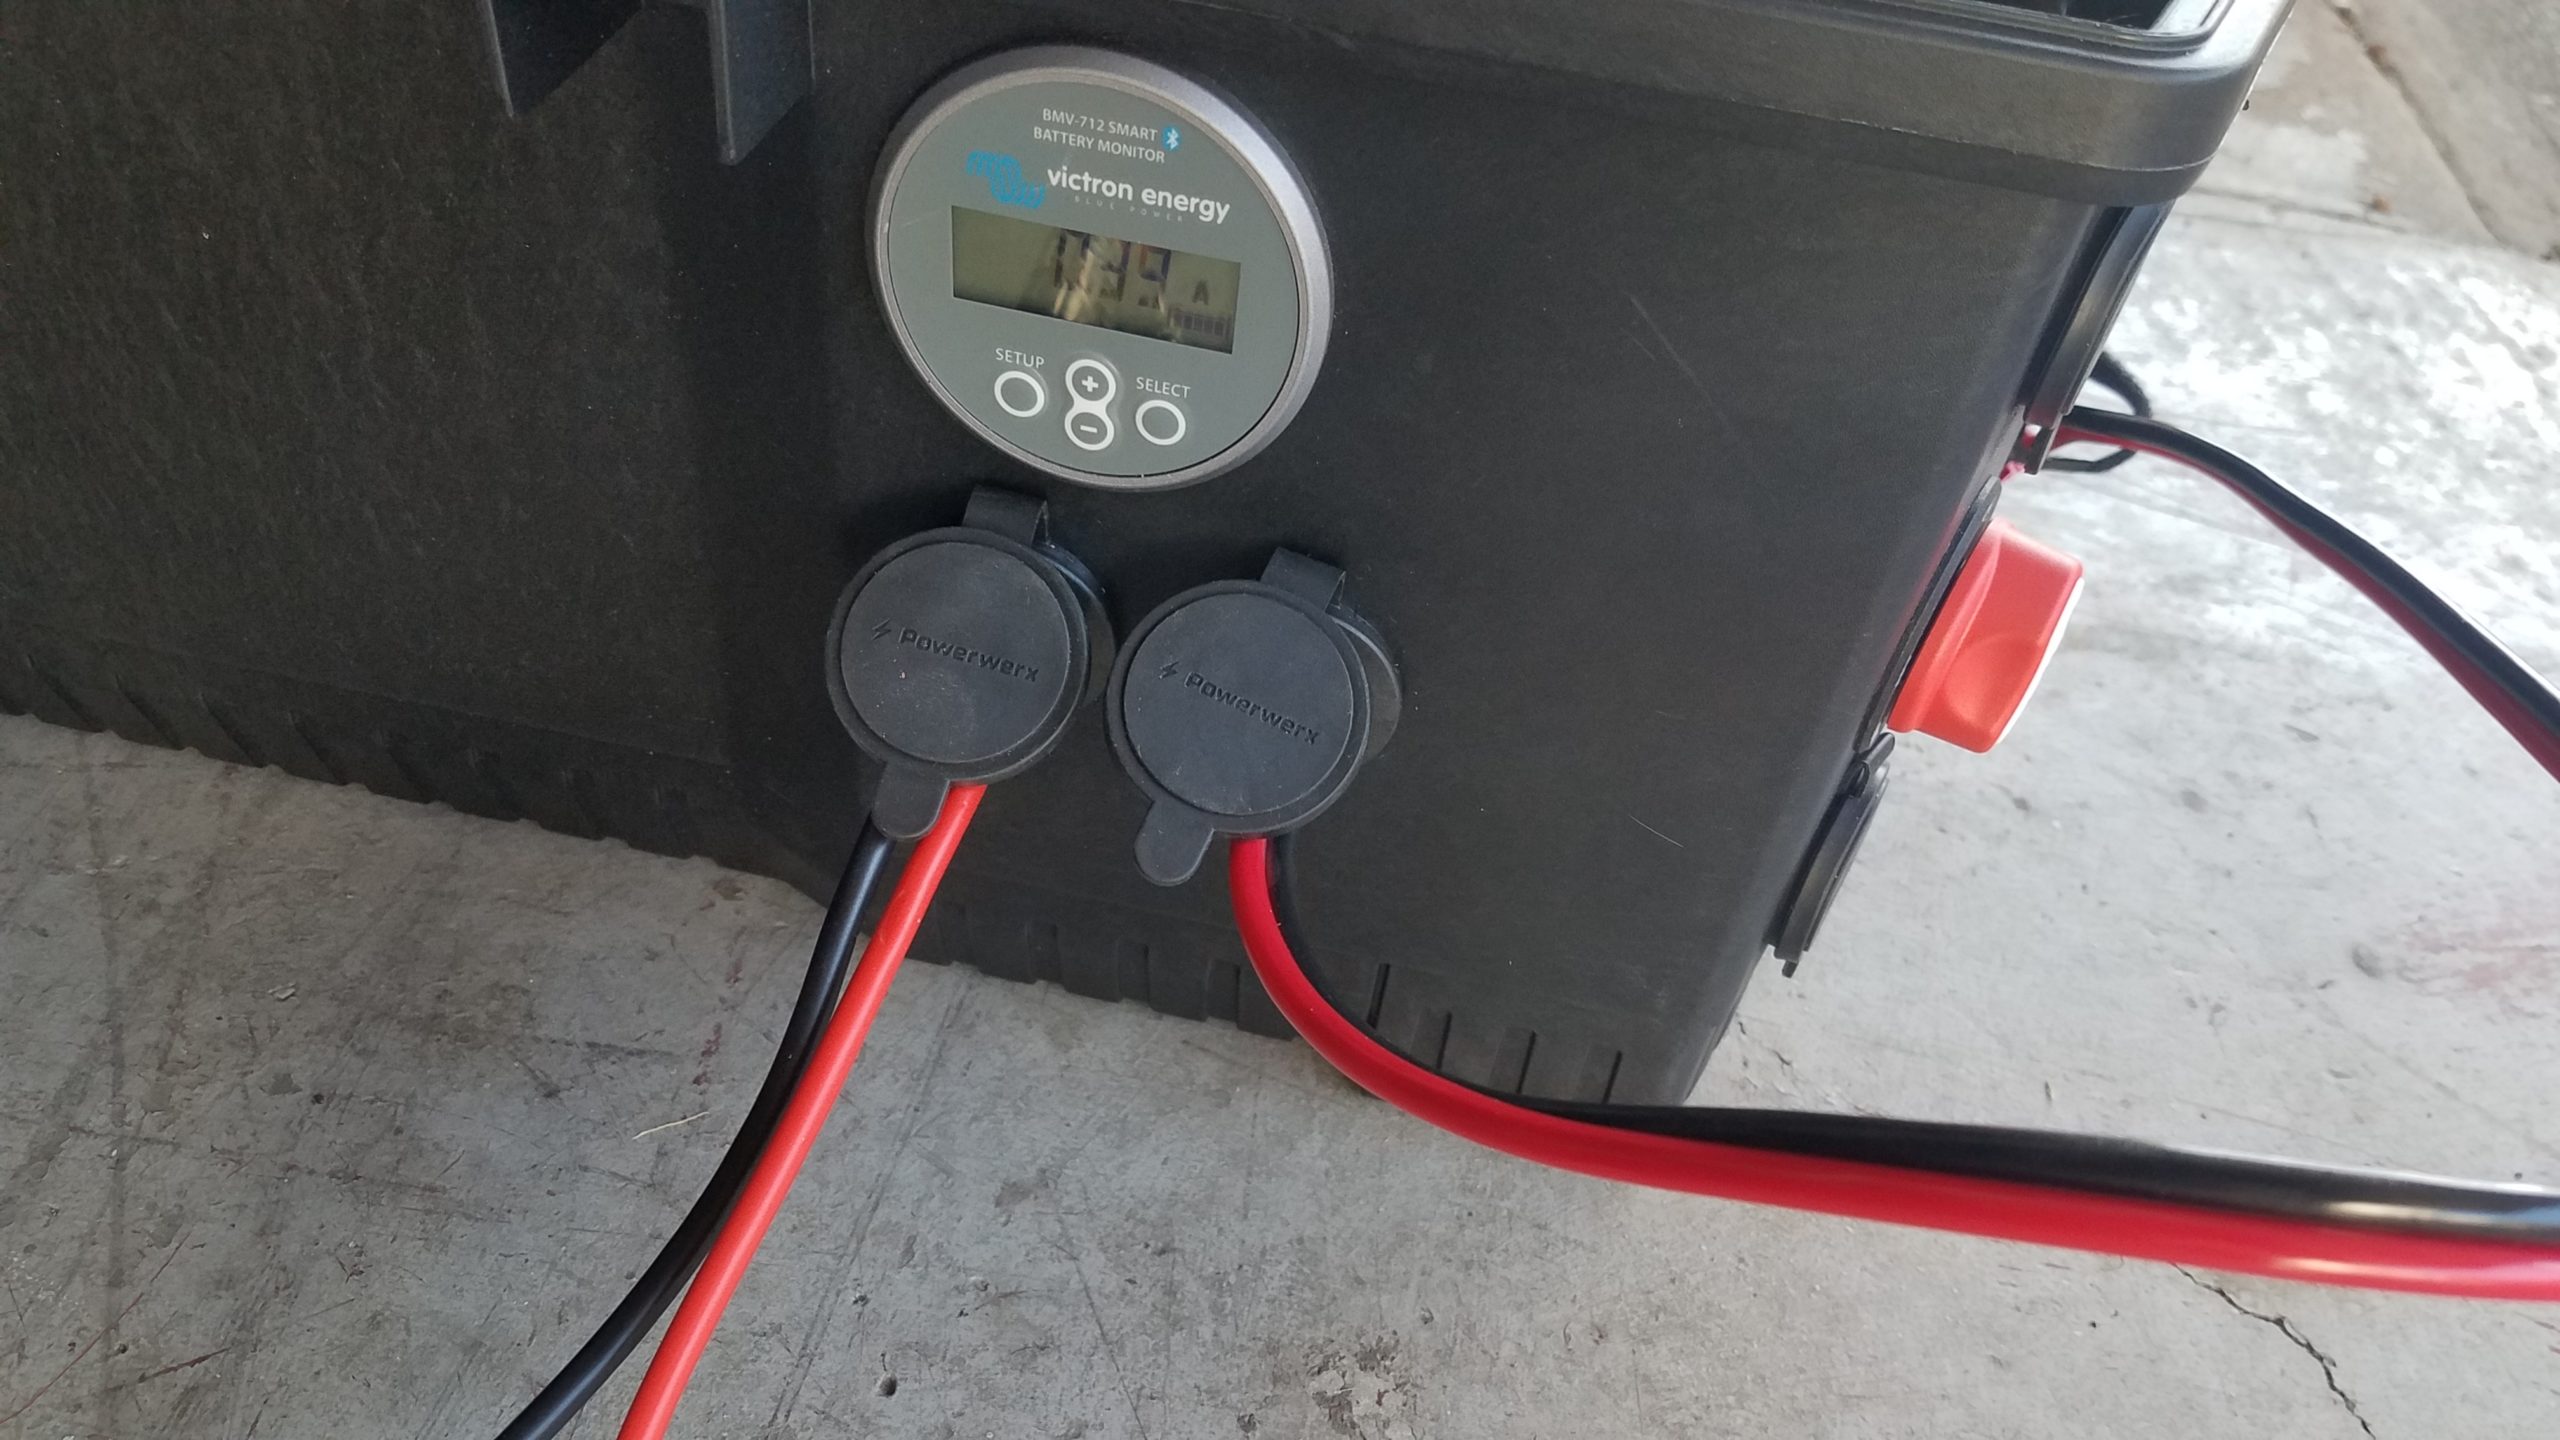
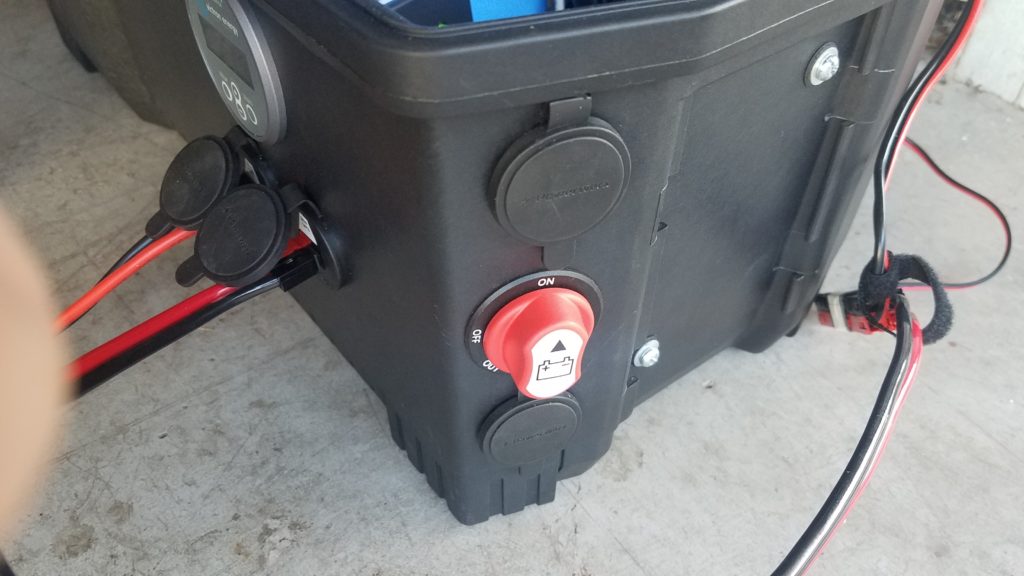
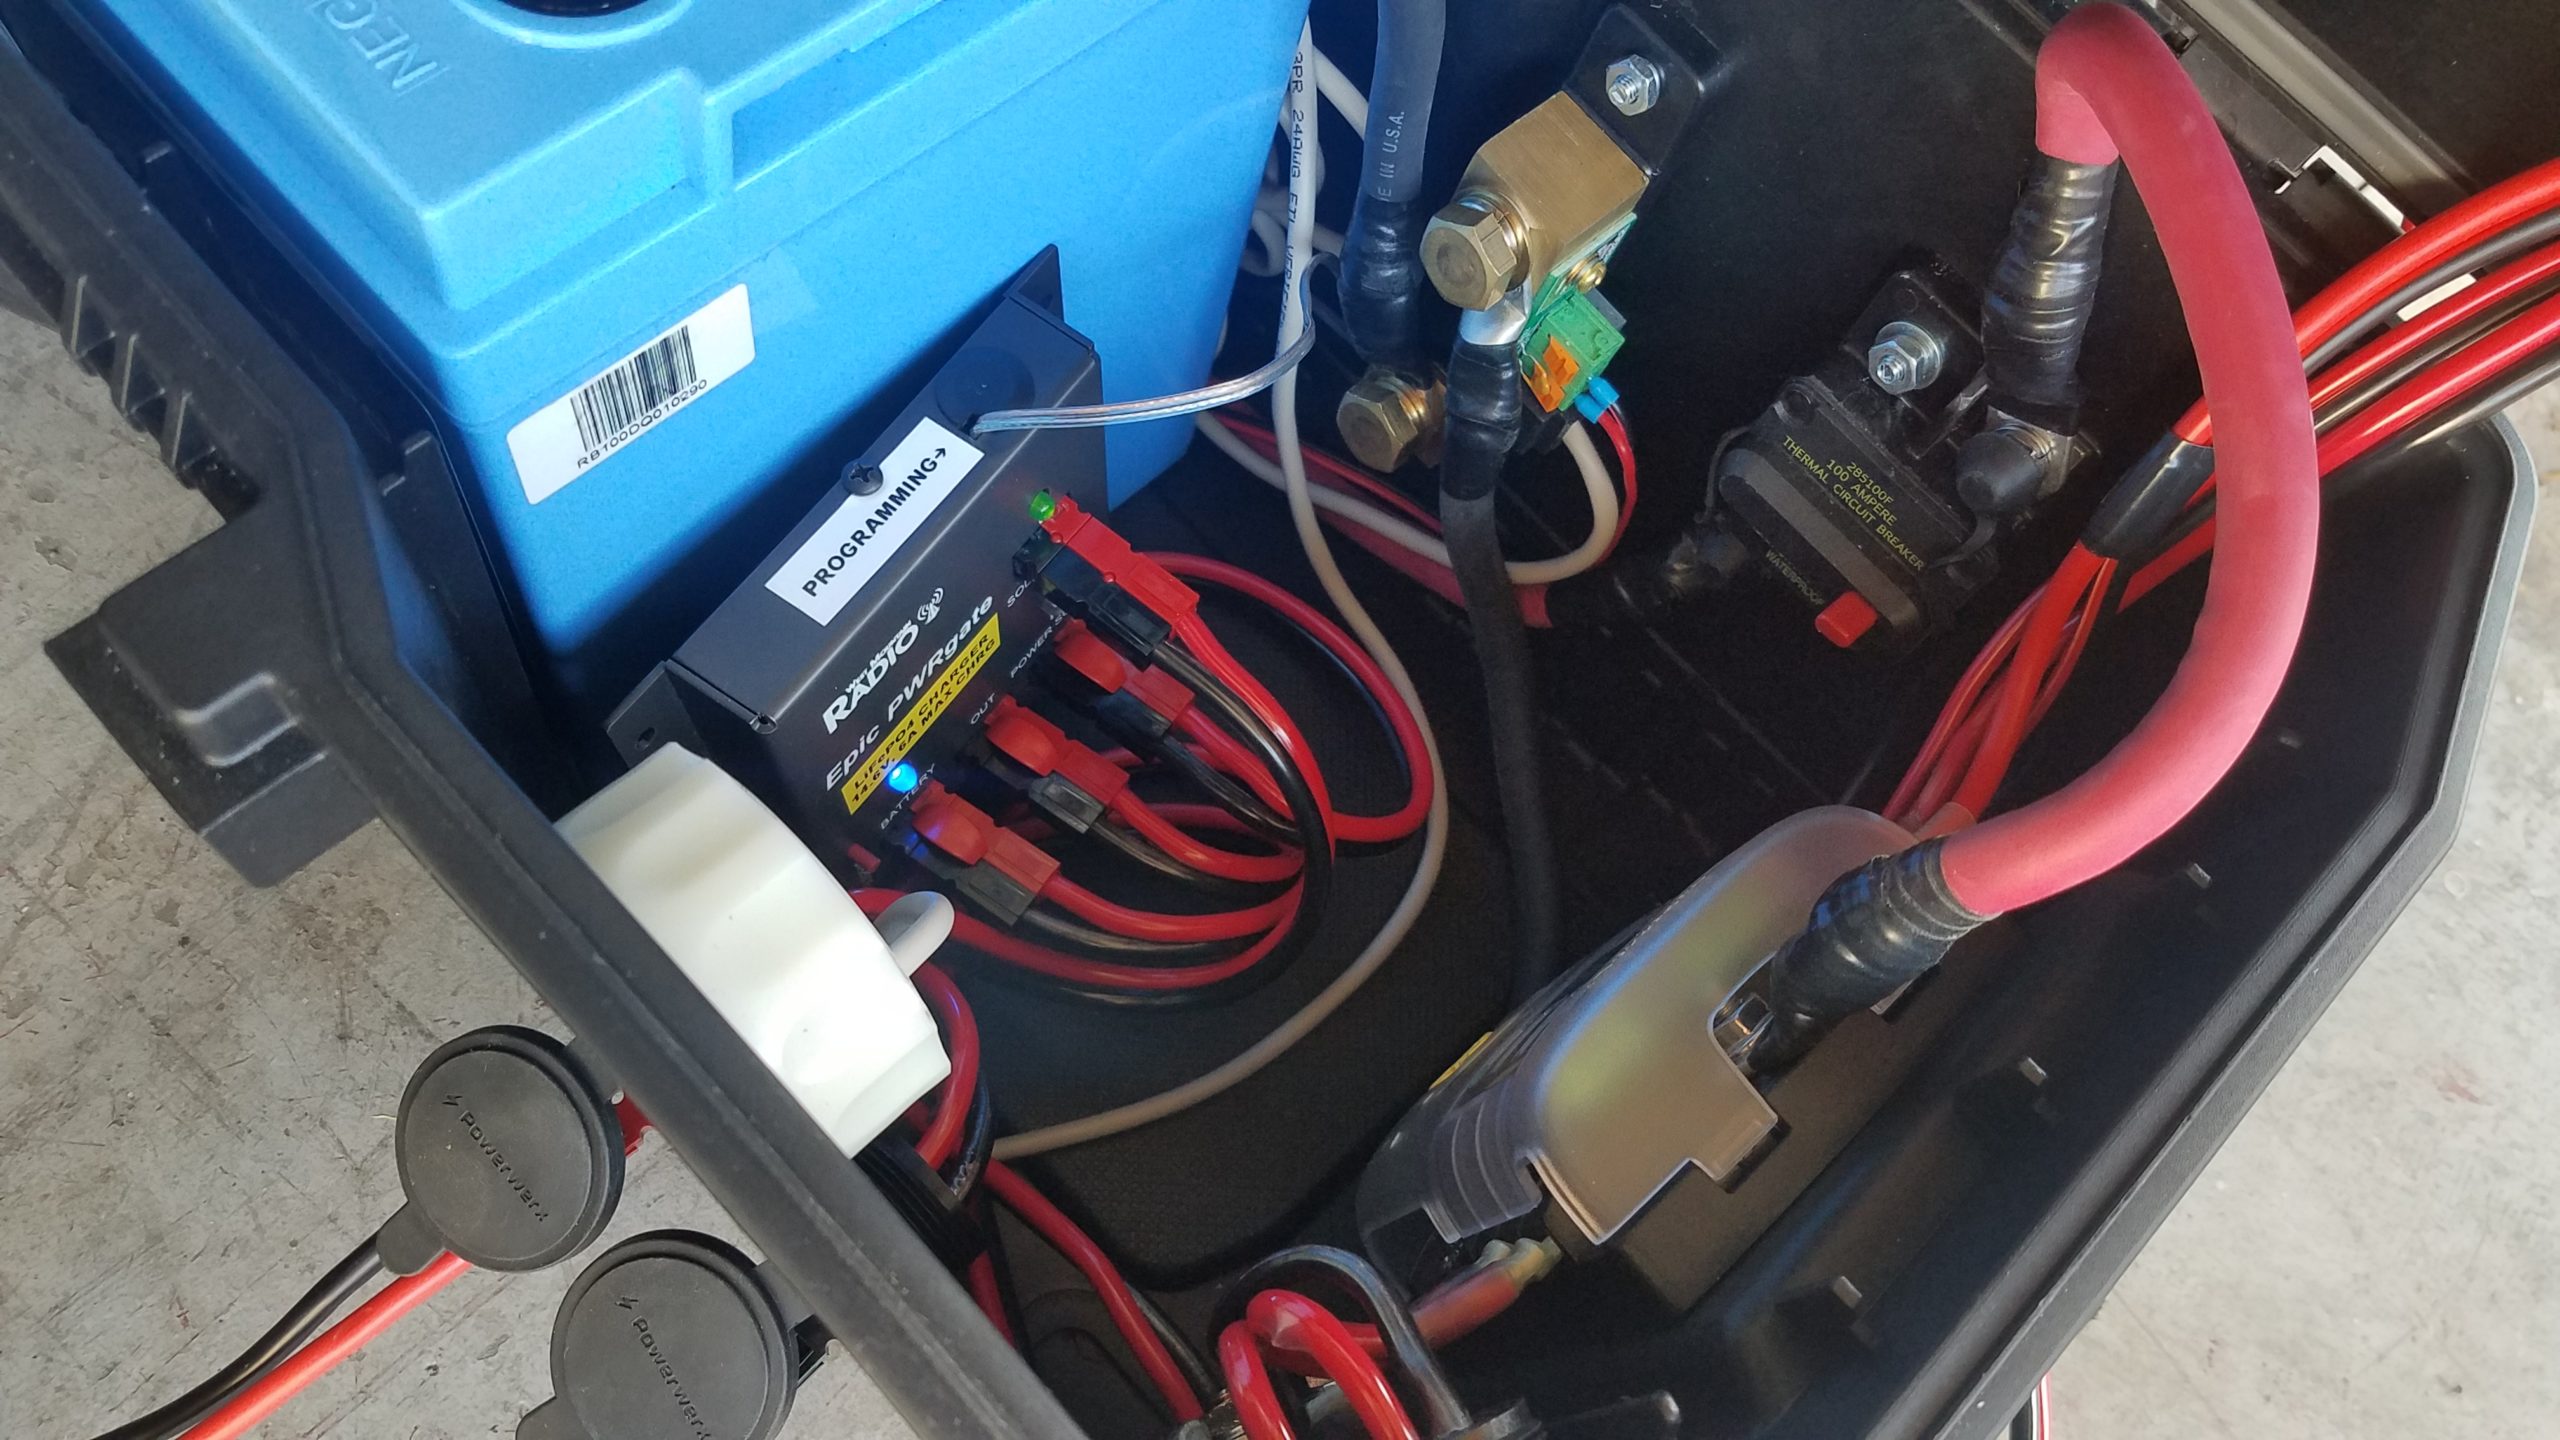
For the entire trip apart from doing some SWL with the TX-599 on its 4.5AH battery away from the truck and by the fire ring I ran all the lighting and radios from the 100AH battery box. We charged the tablet, my partner’s phone, and my phone from the battery box as well. We only drew down to 96% in two days. One day had a lot of heavy radio usage as well so that’s all a good sign.


Yellow witch's butter growing from the top of a tree stump with diamond cut patterns.

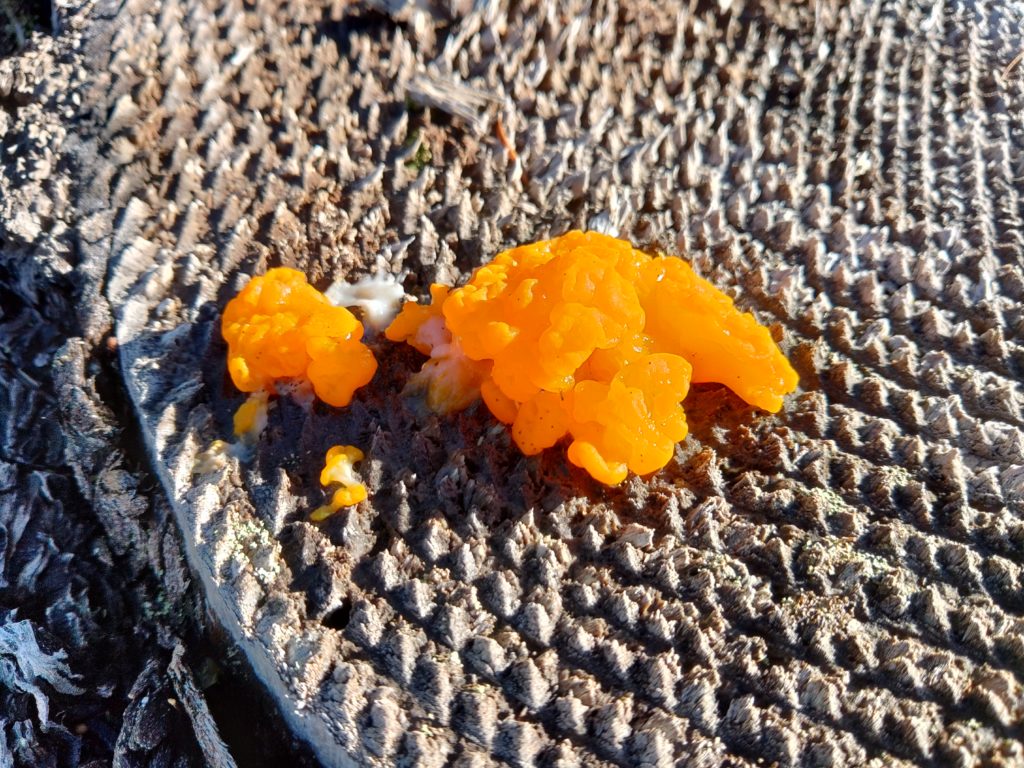
Some witch’s butter we found on a stump near our camp site

Working portable from WY

Hello all, after leaving my last post in draft for a few months and not finishing it I figured I’d move right along and write another one! I had already set up my superantenna last night to do some SWL, but because the space weather is so good I decided to set up the Par EndFedz EFT-10/20/40 antenna to do some work on 20m. For today I used the arborist’s weight to hang the far end of the antenna in a tree in the back yard and connected the transformer end to the deck. The antenna was an estimated 20′ off the ground, and was oriented diagonally SE to NW across the yard. I had intended to run the antenna north to south but was unable to because the antenna was too long to be stretched from the deck to the right tree. I ended up moving it to another tree diagonally across the yard.

I made a partial contact with a Canadian ham out of Victoria, BC that suggested the solution to someone interfering with him was to “invoke the 2nd amendment” and solve the problem with a gun. Following that gem of a first partial contact of the day I decided to get off phone at that point and start operating JS8Call on 20m.

I connected the Raspberry Pi to the battery and Lab599 TX-500 and fired it all up. One of the first things I noticed was that the system clock was wrong. After using “timedatectl status” I saw that my hardware clock was right but on boot it failed to update the system clock. At that point I did it manually (“sudo hwclock –hctosys”). Since I had connected the Pi to the wifi at the house the previous night to run updates I was able to set my tablet up in the kitchen and leave the radio outside while I operated as there wasn’t enough cable to bring the radio inside. The family was around inside and it was considerably warmer in the house than it was outside so I could make QSOs and still talk with everyone that was inside. That’s one of the nice things about using keyboards and a slower mode like JS8Call – you can still talk with people while messages are being sent and received.

I made a few contacts but had a nice long QSO with W7SUA in AZ. Apart from that I was getting two way communications with stations over 1,800 miles away though they were generally automated requests for signal reports and locations.

Radio, Raspberry Pi, and a 4.5Ah Bioenno battery pack connected on a deck railing.
Radio set up with Rasbperry Pi connected.
Samsung Android tablet set up on a table showing a VNC session that's running JS8Call.
Tablet in the kitchen operating the radio while it’s outside.
Side view of the transformer end of the EFHW antenna connected to the deck with orange paracord and a coax cable.
Transformer end of trail-friend EFHW attached to the deck
Long view of the EFHW antenna connecting to a tree across a back yard.
View of the antenna running from the deck to the tree.
Image of https://pskreporter.info showing contacts from my station to others througout the US.
pskreporter.info screenshot showing stations that could hear mine throughout the day.

Bench testing 100Ah battery box improvements

Battery box sitting on a concret slab with wires running from it.
Battery box with solar power and a 90W USB charger connected via a PWRNode
Zoomed out view of the battery box with a wire running to it from the right that's taped down, a laptop on a bench near the battery box with wires running into it from the battery box.
A wider view of the work area with the solar cable taped to the ground and the laptop on a workbench

With a potential COVID-19 exposure I decided to work outside in order keep my housemates’ exposure as low as possible. This afforded me the perfect opportunity to test running a high performance laptop from my batery bank and on solar power. I wanted to bench test integrating a West Mountain Radio Epic PWRGate into the existing battery box that had been intentionally designed without and integrated charger. The first and second days of the test with good and poor sunlight respectively went well. The solar panels were holding the battery up and by the time I was done working the battery was fully charged. It is worth noting that earlier in the morning the laptop was running on the battery, but as the sun came up the battery began recharging in both cases. Of course the battery charged more slowly and sometimes went into a discharging state on the cloudy day but ultiately all the power drawn from the battery was replentished.

Two powerpole ports populated with power cables on the power box's side.
The added solar (left) and UPS (right) powerpole connectors
View of closed powerpole ports, two populated powerpole ports, and a red disconnect switch as seen from the corner of the battery box.
The existing 30A charging port (top), added disconnect swtich for the charger (middle), and added DC in port (bottom)

I added three new Powerpole ports to support the installation of a West Mountain Radio Epic PWRGate for use as a multisource battery charger and to allow one port on the battery box to function as a UPS, one as a DC charging input from a vehicle or other 12v power supply, and a solar panel input that can work with lower voltage (<30V) solar panels. I also added a charger disconnect switch that prevents the charger from acting as a parasitic load when it’s not in use. The specific disconnect switch I added allows the red rotary part of the swtich to be removed n the event you want to make sure the charger isn’t connected to the battery by mistake.

Open battery box revealing connections between internal components including the Epic PWRGate.
Opened battery box with the Epic PWRGate connected for testing

The Epic PWRGate connects to the ports with 10GA stranded copper wire to support 30 amp loads. The “battery” port on the PWRGate is connected to the battery via the DC disconnect switch and the DC subpanel. The leg of the circuit that connects the battery to the charger is also fused with a 30A fuse to allow it to operate a full power radio via the UPS port. The Epic PWRGate will charge a battery with a max current of 10A. I also added an optional temperature probe connected to the positive battery lug that will cut the charger off when the battery gets too cold or warm to prevent harm to the battery. The temperature parameters are configurable using the USB port. The appropriate USB cable, USB C, and USB A OTG cable adapters are included to connect a device with a serial terminal emulator installed.

Block diagram of 100Ah battery box

This updated simplified build diagram for the 100Ah battery box includes the modifications that were being bench tested and will likely remain as a permanent addition to the system for charging from a vehicle or charging from a lower voltage (<30v) portable solar panel.

As a side note an added advantage of including a charger like the Epic PWRGate to this setup is that it can be re-configured to charge another battery, even of a different chemistry from the 100Ah LiFePO4 battery. You can charge a smaller battery or even charge a lead acid battery from it as well. This will require changing jumpers if you’re not programming the unit with a USB port, but I prefer programming it with a USB port as I get a better degree of control over the settings such as charge current than the onboard jumpers provide. It will also require swapping the battery and DC ports. The battery should be connected to the DC port and the DC port should be connected to the battery being charged. In the event the charger is re-configured I also include the custom LiFePO4 battery settings for my Relion RB100 that the kit is designed around so they can be restored on the charger without requiring memorization.

Solar panel suspended from paracord in the sun.
Suspended foldable solar panel

I also ended up having shading issues in the space that was available to set up the solar panels so I used the built-in eyelets and some paracord to suspend the panel in the sun to avoid shading on the ground. I was also able to slide the panel laterally on one piece of cord running left to right (east to west) near the water tank pictured. The other piece of paracord goes through both of the eyelets and forms a tiangle whose point is a knot and the single line of paracord runs back to a single anchor point from the triangle, and is pointed south. You can slide the panel side to side on the paracord running right to left (east to west) as the sun’s position in the sky changes. Getting the panel off the ground was extremely helpful because it got the system out of shadows cast accross the ground most of the day, and also required less maintenance as shadows tracked across the ground and threatened to partially or fully shade the solar panels. Instead the shadows were cast under the suspended panel.

The 100W folding panel was able to charge both a 19″ Macbook Pro connected to a 90W USB C car charger and a phone the an entire work day. This worked well on a bright day and on a cloudy day using this new configuration. I leverage MC4 connectors for the 100W panel to harden the connections against rain and dust. They’re adapted to Anderson Powerpole connectors for connection to the battery box using a pigtail I store in a zippered pouch on the back of the folding panel along with rolled lengths of wire with MC4 connectors attached.

This is an update to this post about building the battery box.

Exploring the Tillamook State Forest and doing nets

This post has been a long time coming, and was delayed by the post about the battery box as well as some sudden health issues my partner and I’s furry companion was dealing with. Unfortunately this would be one of his last trips he took with us but it was extremely enjoyable and we had a wonderful time exploring / sniffing everything depending on who you were. Loki was an incredible companion who visibly cared about not just the humans he lived with but all humans, especially folks that were sad or distressed. He is deeply missed by many around him. Rest in peace Old Man.

As we have been exploring with our vehicle I’ve also been testing various scenarios operating the radio. I wanted to see if I could hit the K7LJ repeater on Mt. Tabor in Portland from this camp site so I set up my portable antenna mast, connected my radio to the newly-constructed 100Ah battery box. I messed up connecting the radio at first, but later saw my current draw while the radio was idling was higher than expected and fixed the issue. More on that later.

The net went fine and I had a decent signal report, but my audio was a bit low due to the headset I was using. Increasing the sensitivity resolved that issue after the net had concluded. I’ve noticed that specific Heil headset tends to require more preamplification to produce quality audio for recieving stations on most of my radios. This specific site was somewhere around CN85ho17.

I was able to reach the repeater with little issue and a decent signal report. Being this far out and in the mountains that was a pleasesent surprise.

View of the battery connected to the radio
View on the table with the radio’s head unit and headphones extended from the vehicle

At this point it’s worth pointing out a mistake I made when connecting the radio to the battery. I saw about 1.5A of current draw when I was expecting to see about 0.6A. It’s important to make sure you connect the battery to the radio and to make sure you’re not energizing your vehicle’s electrical system with the battery. You can easily damage things and burn fuses out if you do that. I noticed the current draw was higher than it should be if I were just powering the Kenwood TM-D710G and investigated the electrical setup. I had disconnected the wrong end of a “Y” cable that splits between the Kenwood radio and the CB radio I use for offroading/trails. I had accidently energized the vehicle’s electrical system when it had some accessories powered on. Lesson learned.

Extender connected to the Kenwood radio base unit and to the headphone adapter / radio display
Field j-pole set up at the camp site

Teaser: 100Ah LiFePO4 battery box

A new project is underway: a 100Ah battery box with a smart power monitor and some good safety features. It’s based around a Relion RB100 battery with a Victron BMV-712 smart battery monitor and is designed to keep my low voltage gear and radios running for multiple days and can be combined with my existing solar charging gear or a vehicle-based DC charger. A detailed post about the build including a bill of materials will be forthcoming once I complete the build!

Black DeWalt toolbox with a side-mounted power meter and black sealed connector port on the top.
Partially completed 100Ah battery box