Bench testing 100Ah battery box improvements

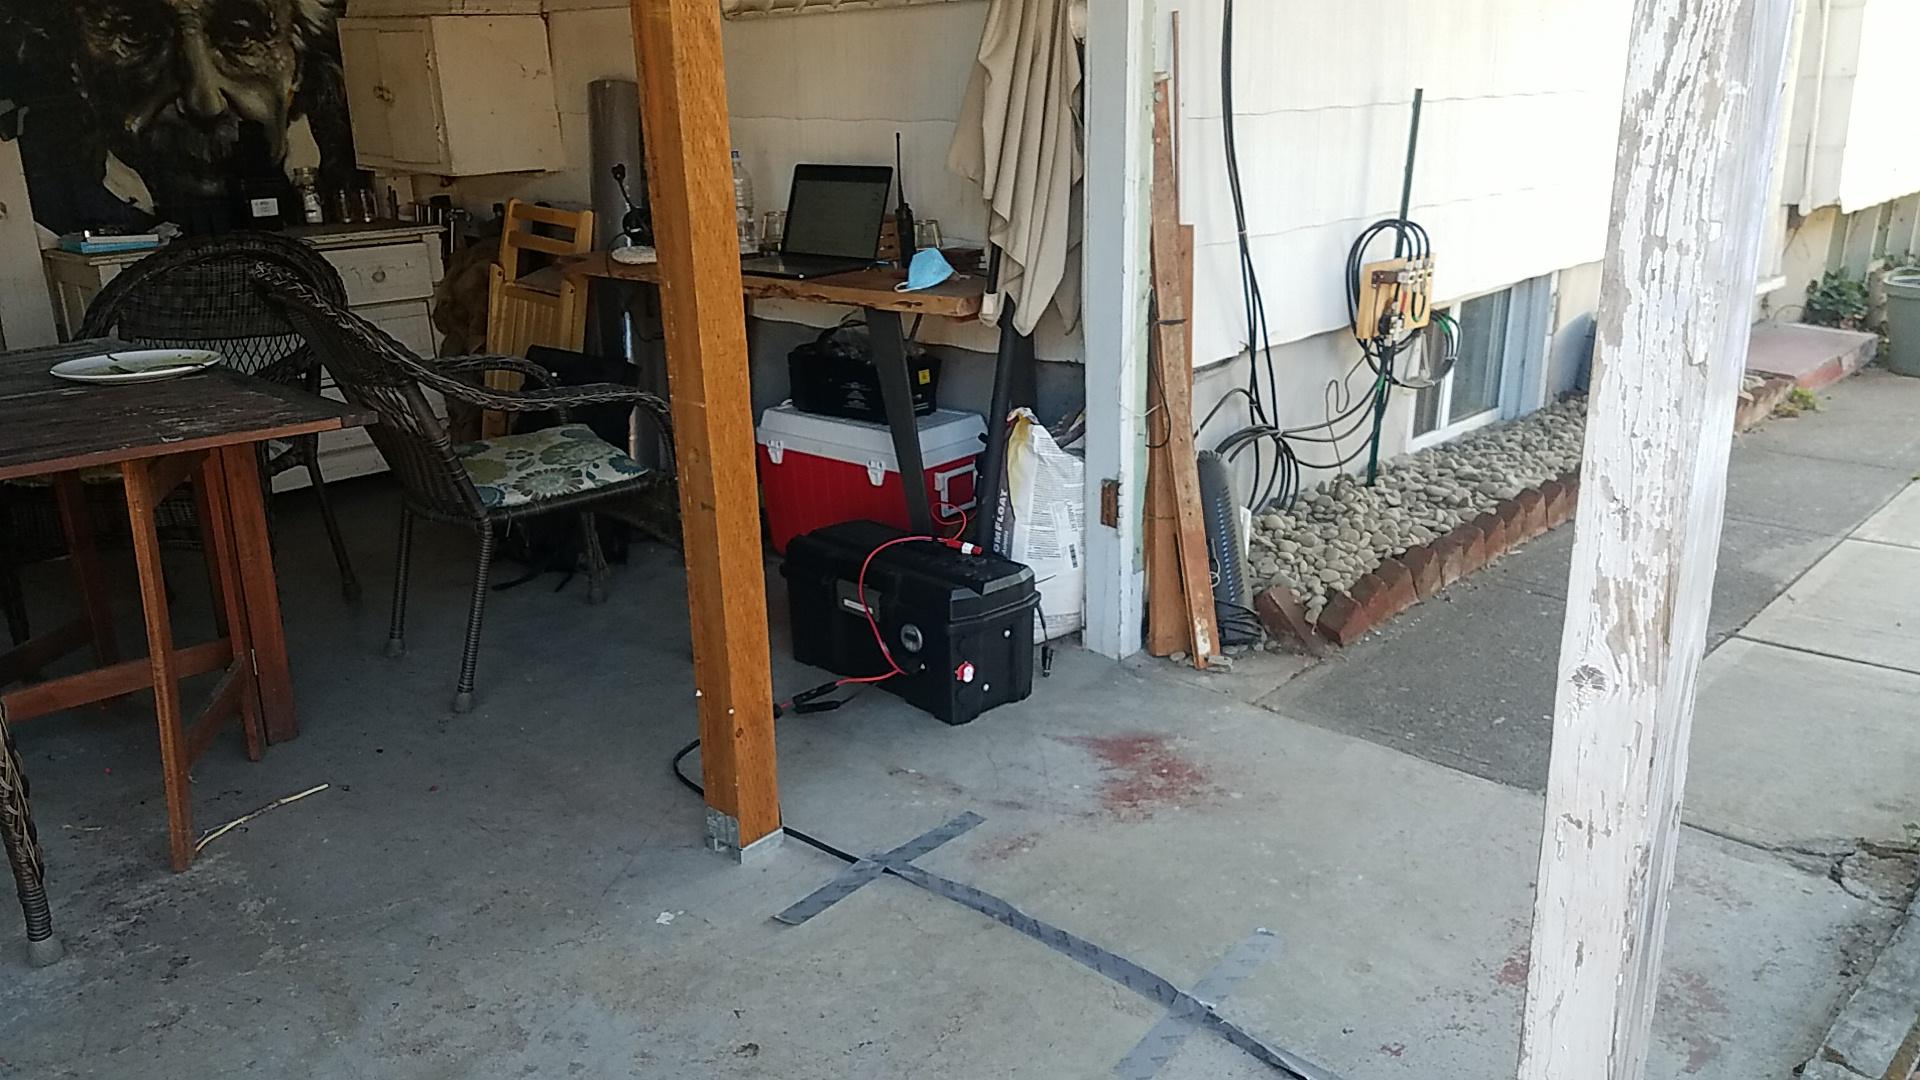
Battery box sitting on a concret slab with wires running from it.
Battery box with solar power and a 90W USB charger connected via a PWRNode
Zoomed out view of the battery box with a wire running to it from the right that's taped down, a laptop on a bench near the battery box with wires running into it from the battery box.
A wider view of the work area with the solar cable taped to the ground and the laptop on a workbench

With a potential COVID-19 exposure I decided to work outside in order keep my housemates’ exposure as low as possible. This afforded me the perfect opportunity to test running a high performance laptop from my batery bank and on solar power. I wanted to bench test integrating a West Mountain Radio Epic PWRGate into the existing battery box that had been intentionally designed without and integrated charger. The first and second days of the test with good and poor sunlight respectively went well. The solar panels were holding the battery up and by the time I was done working the battery was fully charged. It is worth noting that earlier in the morning the laptop was running on the battery, but as the sun came up the battery began recharging in both cases. Of course the battery charged more slowly and sometimes went into a discharging state on the cloudy day but ultiately all the power drawn from the battery was replentished.
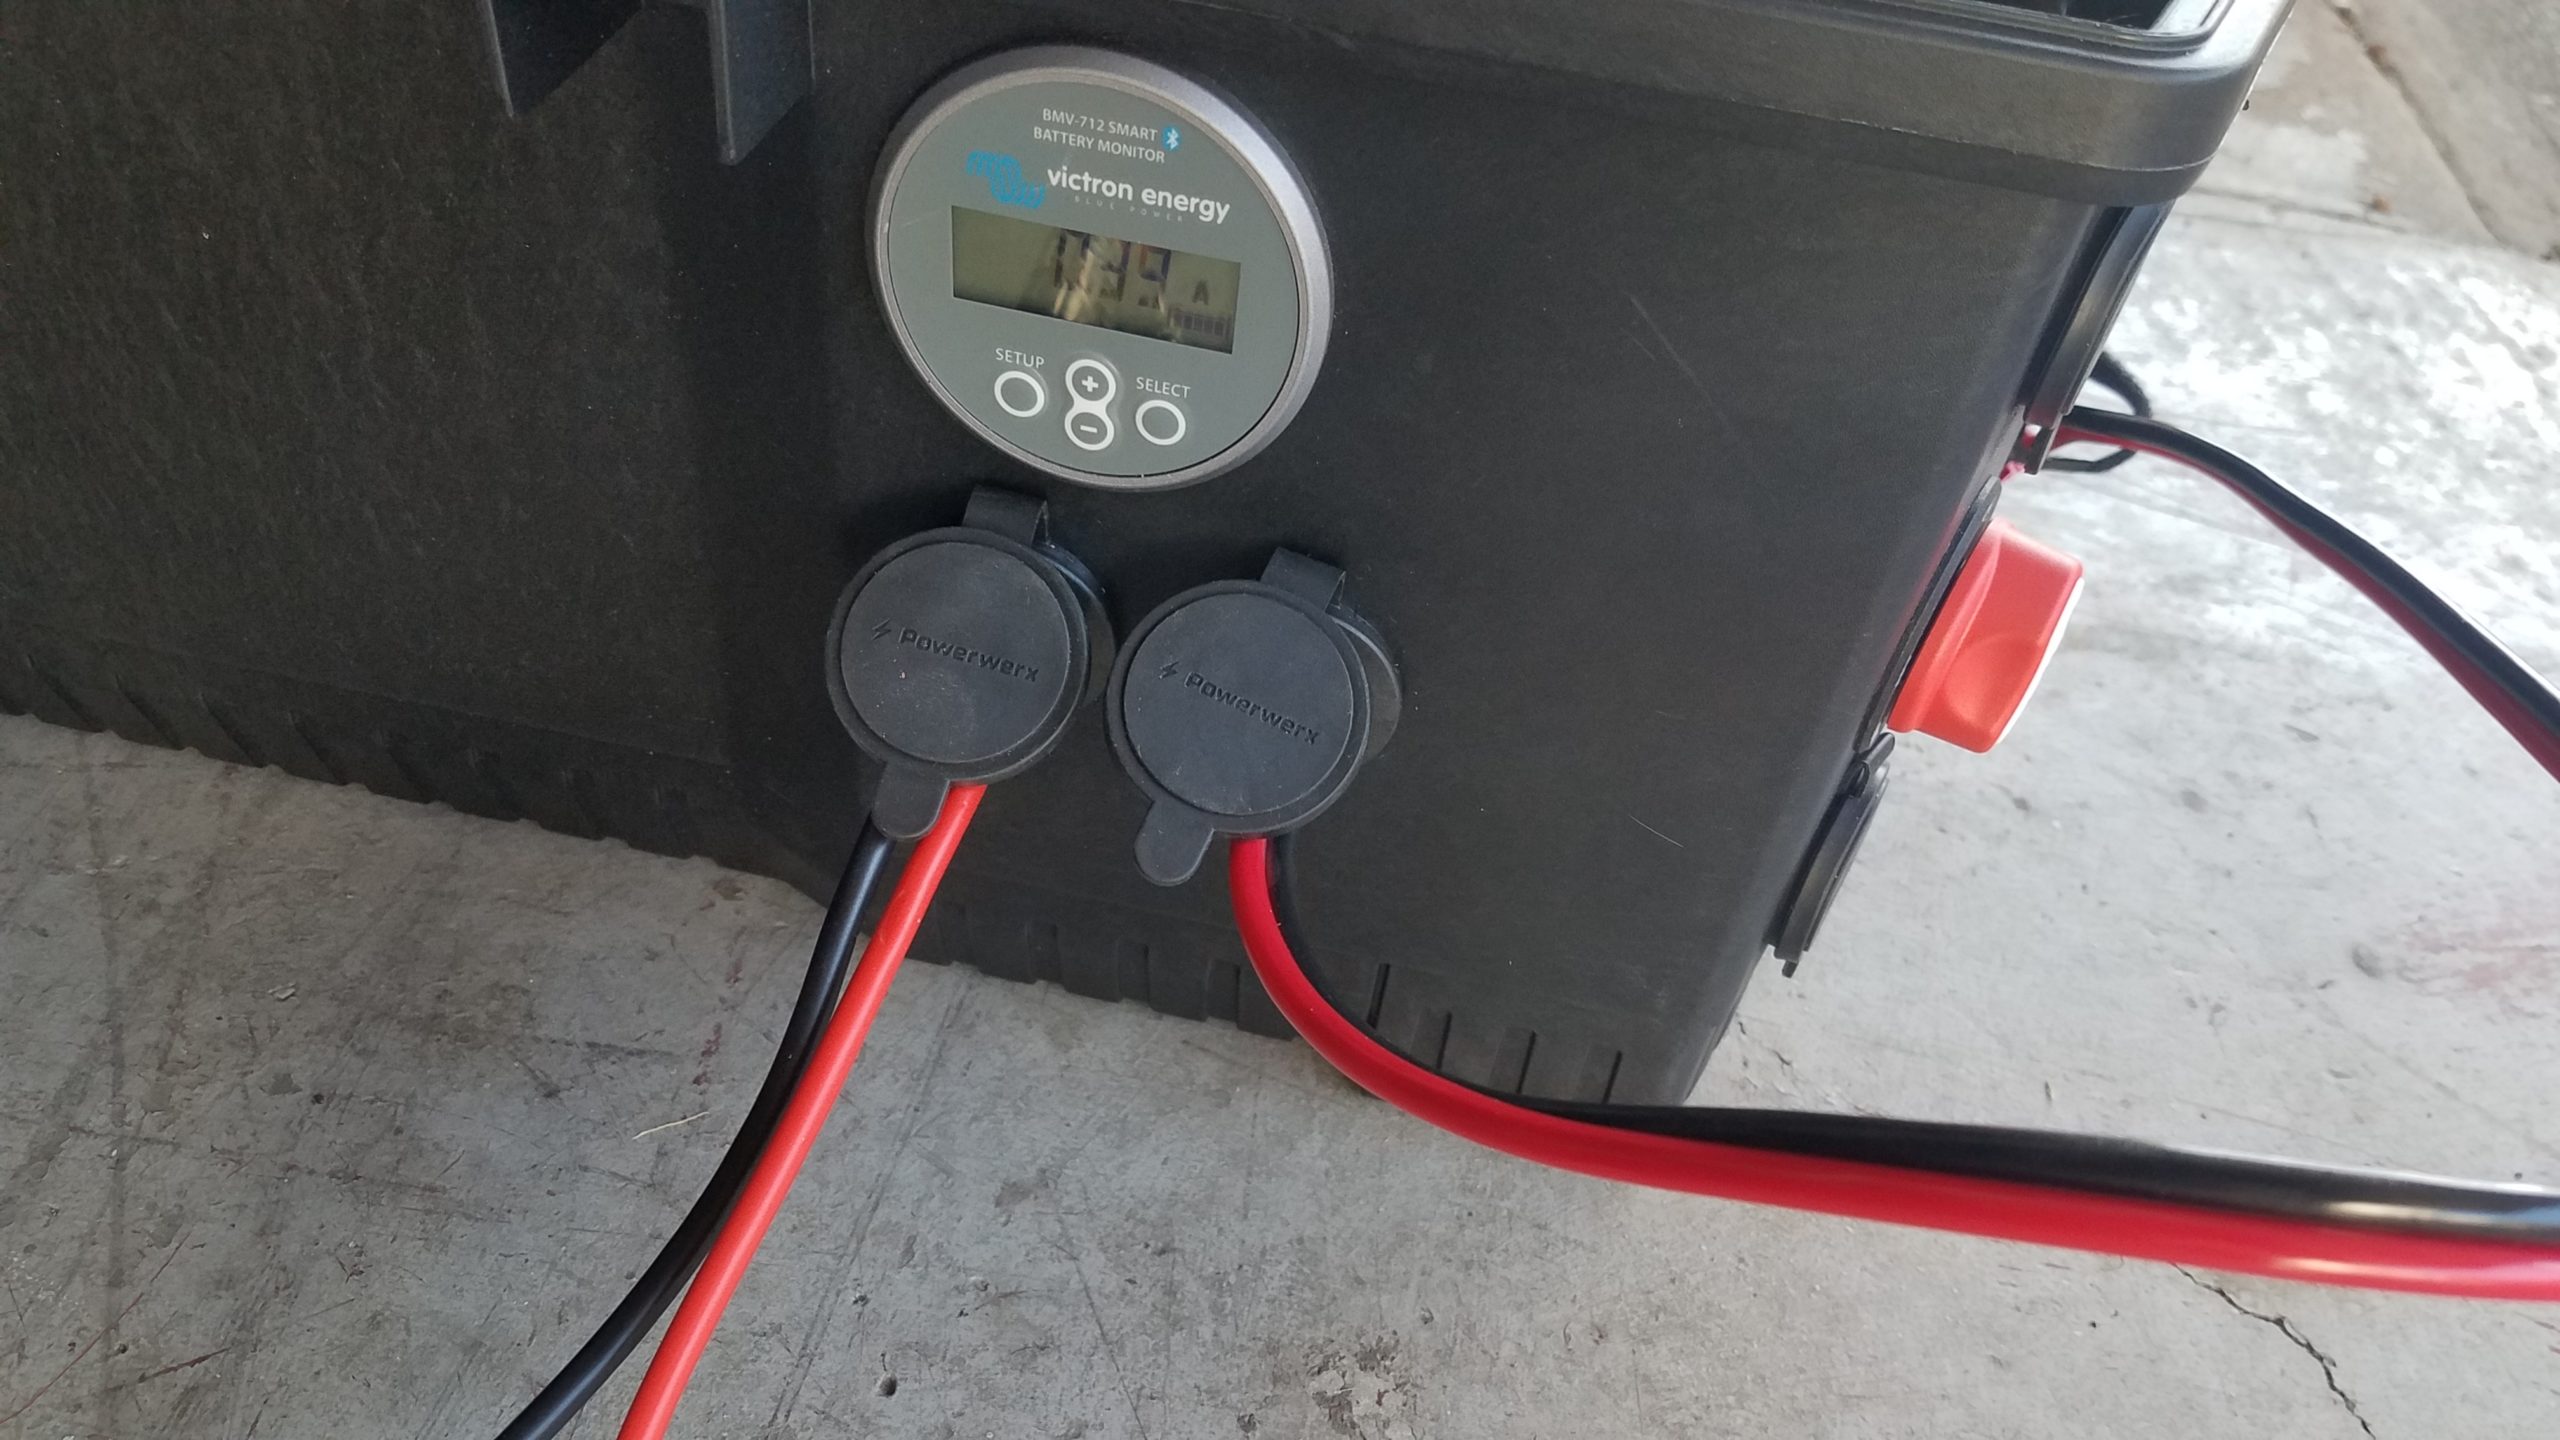
Two powerpole ports populated with power cables on the power box's side.
The added solar (left) and UPS (right) powerpole connectors
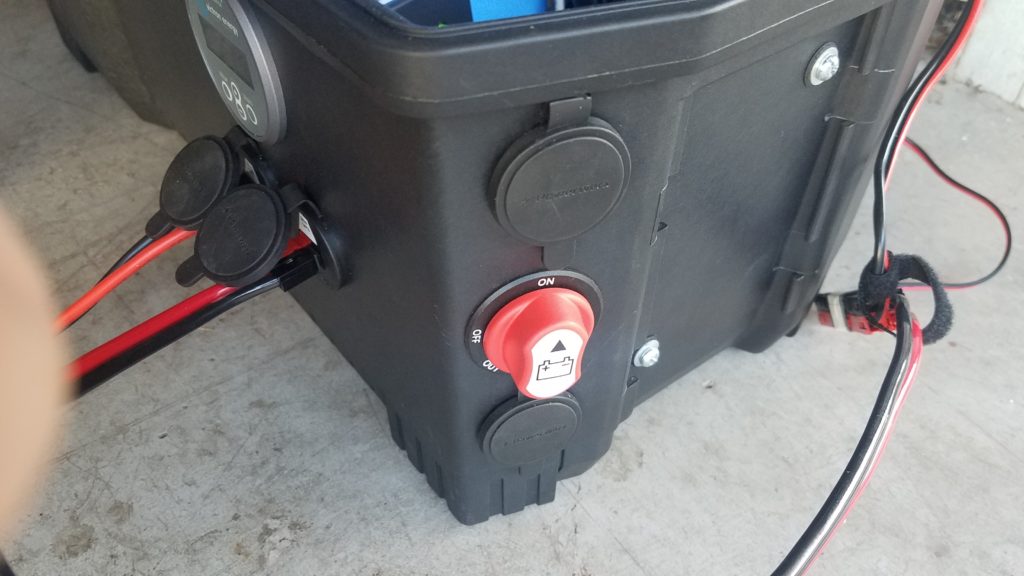
View of closed powerpole ports, two populated powerpole ports, and a red disconnect switch as seen from the corner of the battery box.
The existing 30A charging port (top), added disconnect swtich for the charger (middle), and added DC in port (bottom)

I added three new Powerpole ports to support the installation of a West Mountain Radio Epic PWRGate for use as a multisource battery charger and to allow one port on the battery box to function as a UPS, one as a DC charging input from a vehicle or other 12v power supply, and a solar panel input that can work with lower voltage (<30V) solar panels. I also added a charger disconnect switch that prevents the charger from acting as a parasitic load when it’s not in use. The specific disconnect switch I added allows the red rotary part of the swtich to be removed n the event you want to make sure the charger isn’t connected to the battery by mistake.
Open battery box revealing connections between internal components including the Epic PWRGate.
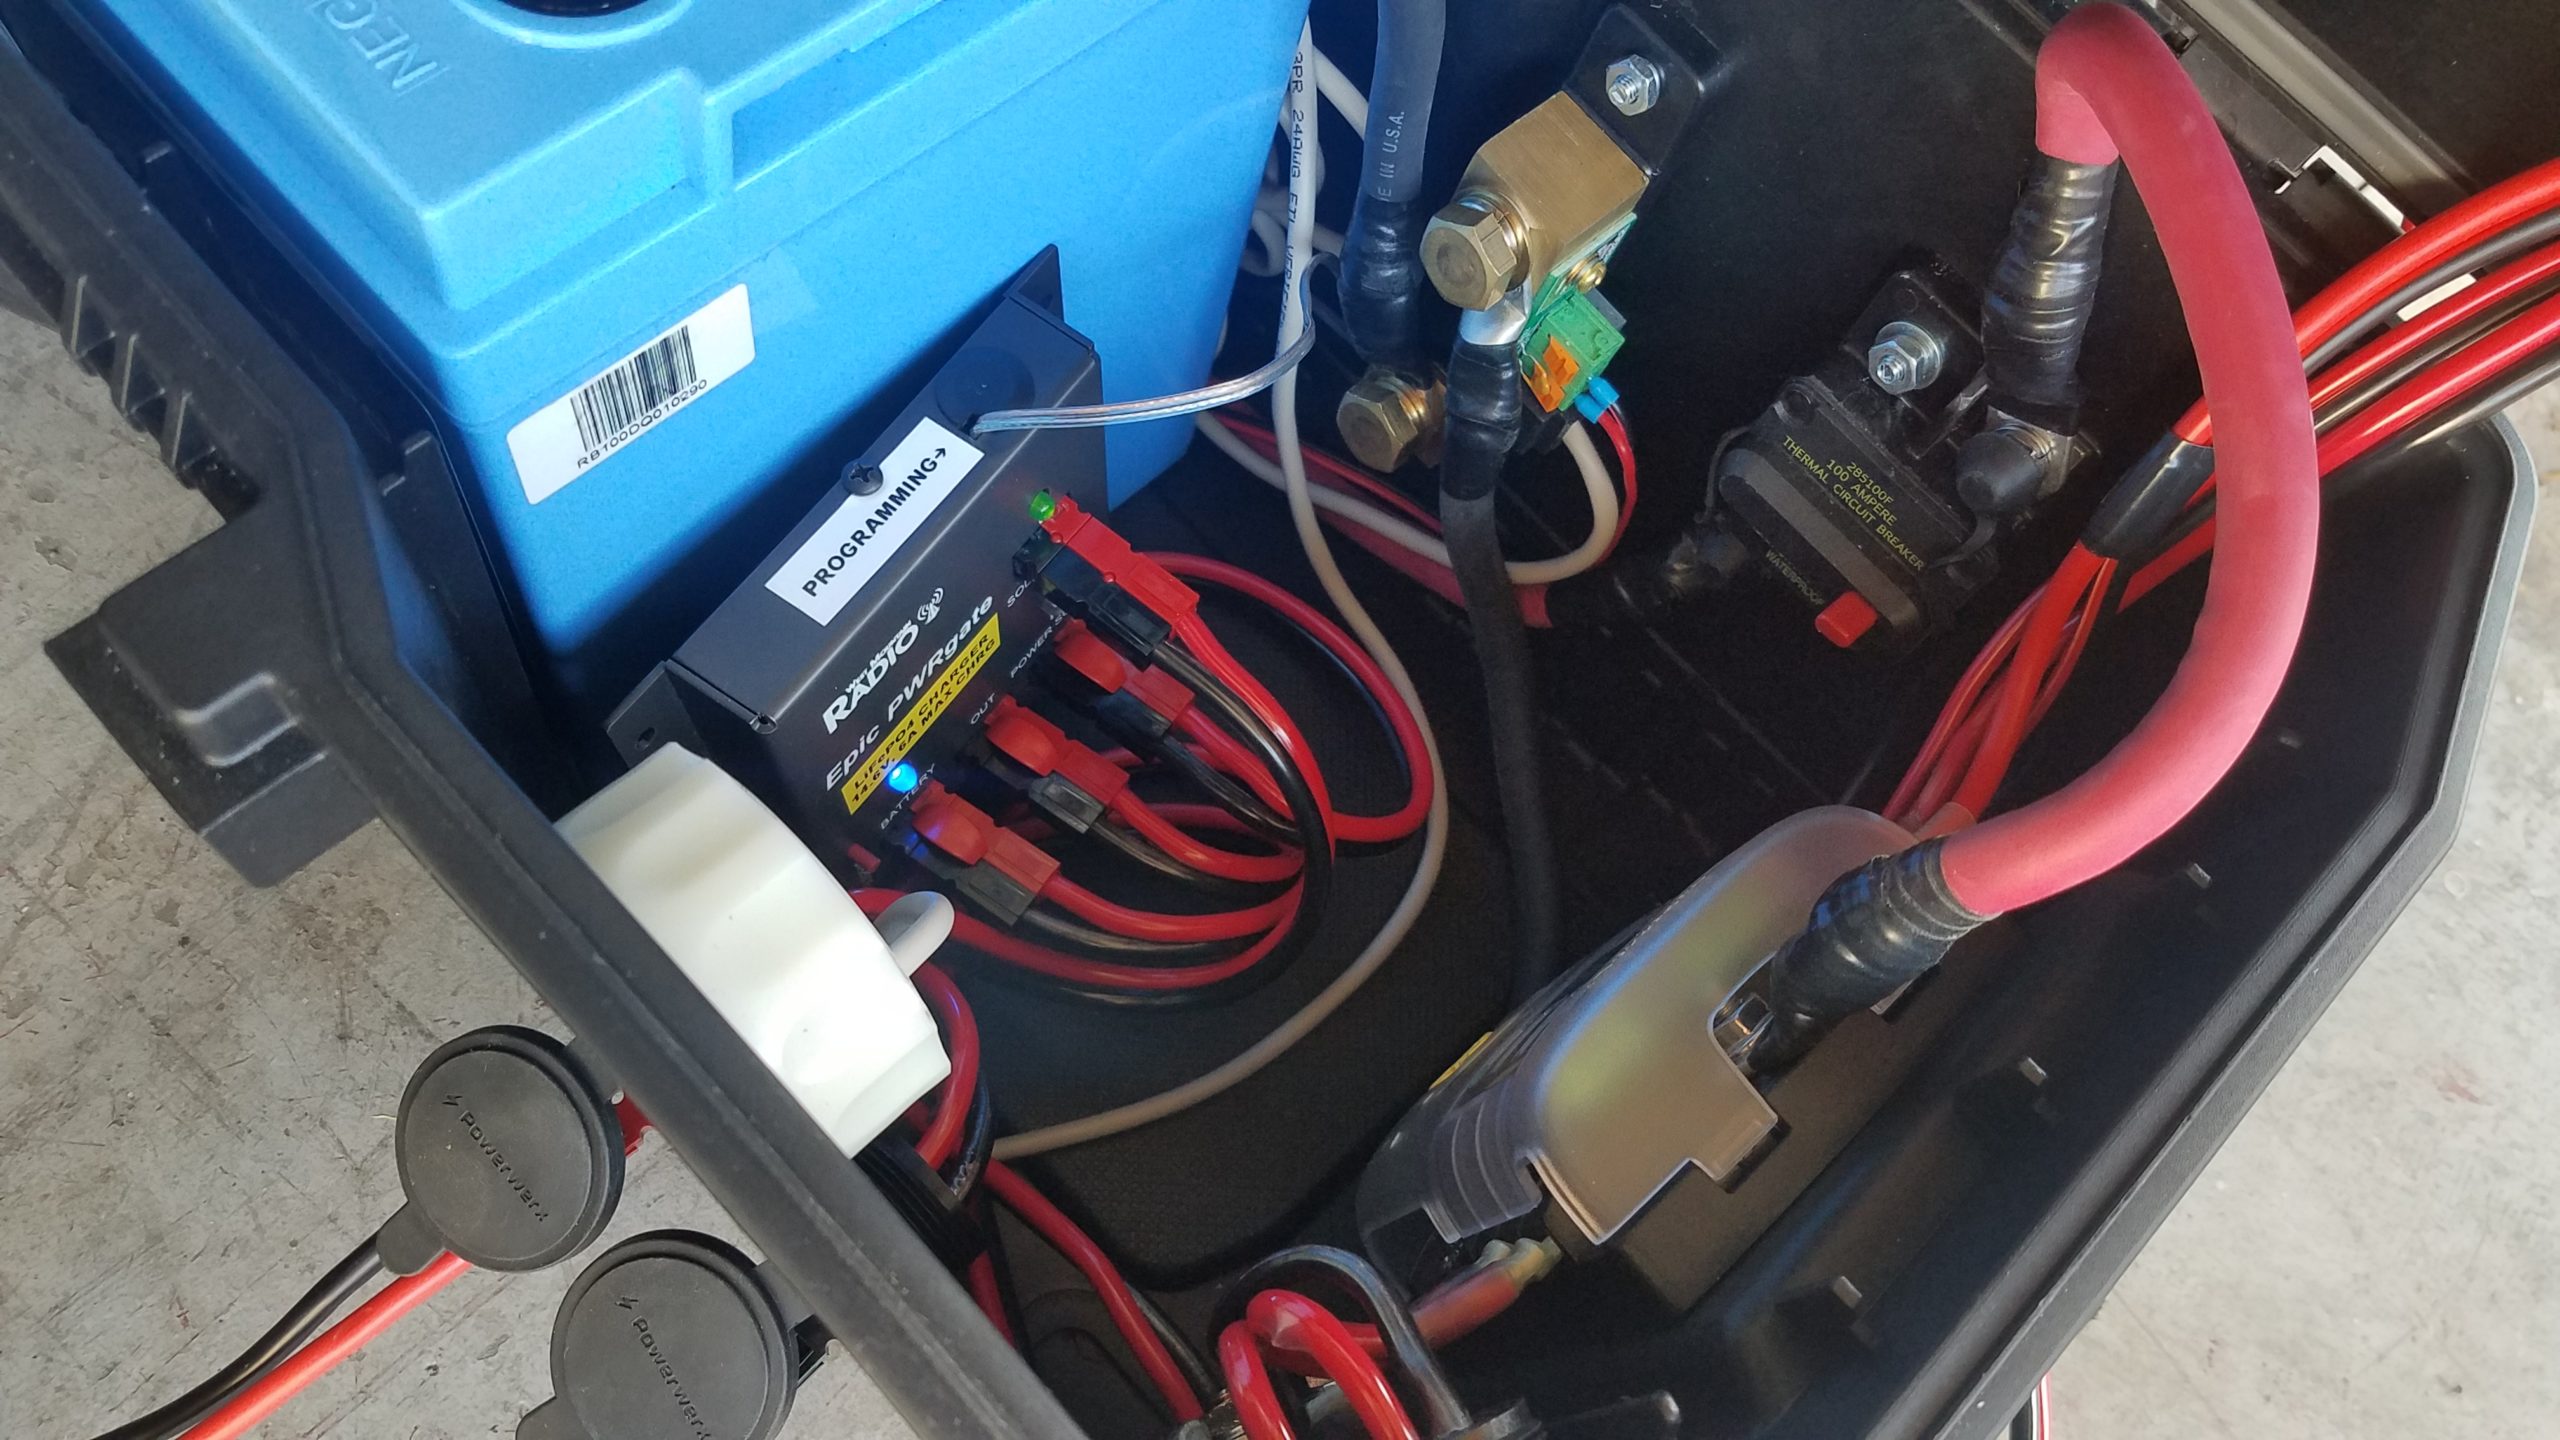
Opened battery box with the Epic PWRGate connected for testing

The Epic PWRGate connects to the ports with 10GA stranded copper wire to support 30 amp loads. The “battery” port on the PWRGate is connected to the battery via the DC disconnect switch and the DC subpanel. The leg of the circuit that connects the battery to the charger is also fused with a 30A fuse to allow it to operate a full power radio via the UPS port. The Epic PWRGate will charge a battery with a max current of 10A. I also added an optional temperature probe connected to the positive battery lug that will cut the charger off when the battery gets too cold or warm to prevent harm to the battery. The temperature parameters are configurable using the USB port. The appropriate USB cable, USB C, and USB A OTG cable adapters are included to connect a device with a serial terminal emulator installed.

Block diagram of 100Ah battery box

This updated simplified build diagram for the 100Ah battery box includes the modifications that were being bench tested and will likely remain as a permanent addition to the system for charging from a vehicle or charging from a lower voltage (<30v) portable solar panel.

As a side note an added advantage of including a charger like the Epic PWRGate to this setup is that it can be re-configured to charge another battery, even of a different chemistry from the 100Ah LiFePO4 battery. You can charge a smaller battery or even charge a lead acid battery from it as well. This will require changing jumpers if you’re not programming the unit with a USB port, but I prefer programming it with a USB port as I get a better degree of control over the settings such as charge current than the onboard jumpers provide. It will also require swapping the battery and DC ports. The battery should be connected to the DC port and the DC port should be connected to the battery being charged. In the event the charger is re-configured I also include the custom LiFePO4 battery settings for my Relion RB100 that the kit is designed around so they can be restored on the charger without requiring memorization.

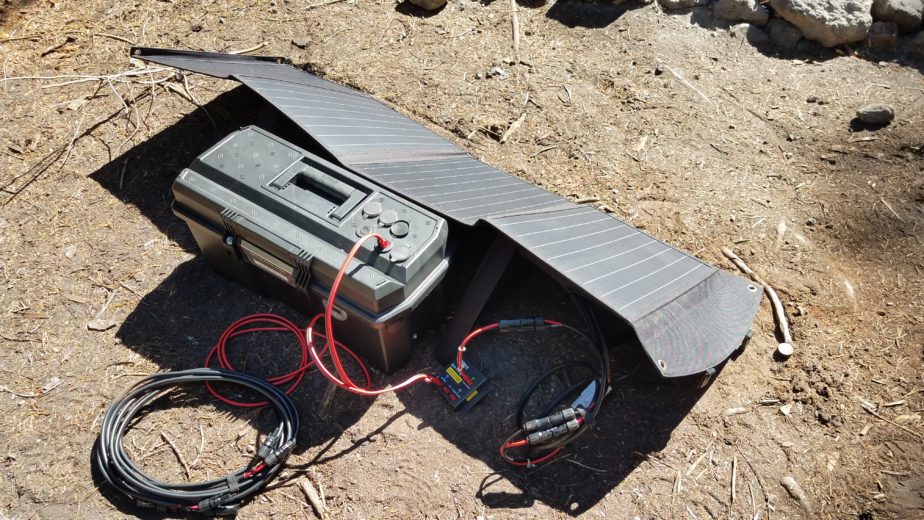
Solar panel suspended from paracord in the sun.
Suspended foldable solar panel

I also ended up having shading issues in the space that was available to set up the solar panels so I used the built-in eyelets and some paracord to suspend the panel in the sun to avoid shading on the ground. I was also able to slide the panel laterally on one piece of cord running left to right (east to west) near the water tank pictured. The other piece of paracord goes through both of the eyelets and forms a tiangle whose point is a knot and the single line of paracord runs back to a single anchor point from the triangle, and is pointed south. You can slide the panel side to side on the paracord running right to left (east to west) as the sun’s position in the sky changes. Getting the panel off the ground was extremely helpful because it got the system out of shadows cast accross the ground most of the day, and also required less maintenance as shadows tracked across the ground and threatened to partially or fully shade the solar panels. Instead the shadows were cast under the suspended panel.

The 100W folding panel was able to charge both a 19″ Macbook Pro connected to a 90W USB C car charger and a phone the an entire work day. This worked well on a bright day and on a cloudy day using this new configuration. I leverage MC4 connectors for the 100W panel to harden the connections against rain and dust. They’re adapted to Anderson Powerpole connectors for connection to the battery box using a pigtail I store in a zippered pouch on the back of the folding panel along with rolled lengths of wire with MC4 connectors attached.

This is an update to this post about building the battery box.

Using the portable LiFePO4 battery banks in the Gifford Pinchot National Forest

This won’t really be a post about doing a lot of operating. It’s mostly about powering and recharging stuff. The long story short of operating from the specific site we were at is that I didn’t make any contacts apart from another station on JS8Call that heard one of my heartbeats. I wasn’t in a good position to be heard, but I could hear a lot of other stations on 40m throughout the afternoon and evening. I was also able to hear Radio Havana and what I suspect might have been Zambia NBC Radio 1 for a few minutes.

I was able to recharge the Bioenno 4.5Ah battery in an hour or so as we broke camp and packed the vehicle. I’d been using that radio the previous day and listening to shortwave stations the whole night. A solid hour of charging at 1.1A using the BuddiPole PowerMini on a single GoalZero Nomad 20 solar panel was enough to replentish the battery.

The 100Ah battery was easily charged in about 45 minutes. We’d only drawn about 3.5Ah from the battery running lights, charging a phone, and a portable projector. The panel in use here is a Bioenno 100W folding panel and from the VictronConnect application screenshot it’s charging at about 4.5A. The back view shows how the solar panel is connected to the charging unit and the battery. This is the first time I’ve used the West Mountain Radio Epic PWRGate to charge the 100Ah battery. I’m hoping to use it for charging from a vehicle alternator, an existing DC power supply, or solar panel. I’m also hoping to add a charger like this to the box along with a temperature probe to ensure the battery isn’t charged when it’s too hot or cold. The Relion RB100 has a minimum charging temperature of -4F.

This a detailed view of the West Mountain Radio Epic PWRGate. The green LED indicates it has good solar charging voltage, and the blue LED that was slowly pulsing which indicated that the battery was being bulk charged by the solar panel. The PWRGate is programmed with the specific battery chemistry settings for LiFePO4 batteries and is current limited at 6A for some of the other batteries I charge with this setup.

Exploring the Tillamook State Forest and doing nets

This post has been a long time coming, and was delayed by the post about the battery box as well as some sudden health issues my partner and I’s furry companion was dealing with. Unfortunately this would be one of his last trips he took with us but it was extremely enjoyable and we had a wonderful time exploring / sniffing everything depending on who you were. Loki was an incredible companion who visibly cared about not just the humans he lived with but all humans, especially folks that were sad or distressed. He is deeply missed by many around him. Rest in peace Old Man.

As we have been exploring with our vehicle I’ve also been testing various scenarios operating the radio. I wanted to see if I could hit the K7LJ repeater on Mt. Tabor in Portland from this camp site so I set up my portable antenna mast, connected my radio to the newly-constructed 100Ah battery box. I messed up connecting the radio at first, but later saw my current draw while the radio was idling was higher than expected and fixed the issue. More on that later.

The net went fine and I had a decent signal report, but my audio was a bit low due to the headset I was using. Increasing the sensitivity resolved that issue after the net had concluded. I’ve noticed that specific Heil headset tends to require more preamplification to produce quality audio for recieving stations on most of my radios. This specific site was somewhere around CN85ho17.

I was able to reach the repeater with little issue and a decent signal report. Being this far out and in the mountains that was a pleasesent surprise.

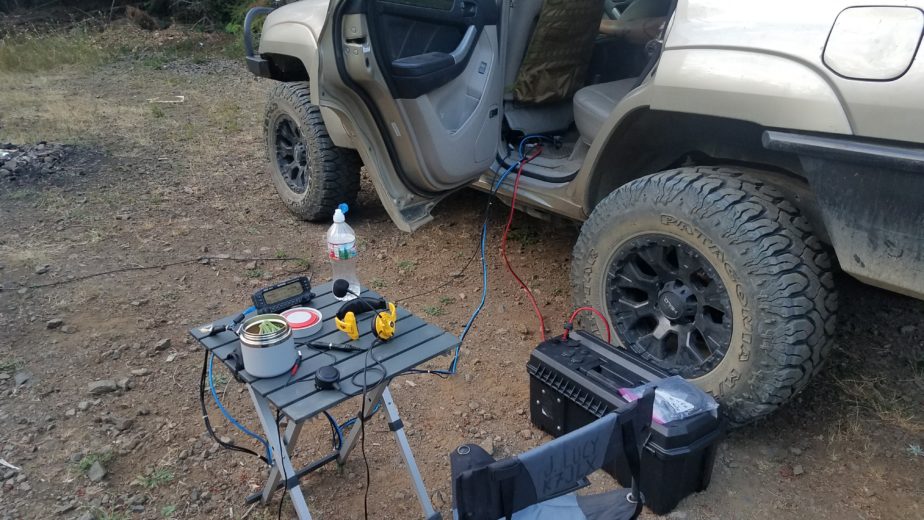
View of the battery connected to the radio
View on the table with the radio’s head unit and headphones extended from the vehicle

At this point it’s worth pointing out a mistake I made when connecting the radio to the battery. I saw about 1.5A of current draw when I was expecting to see about 0.6A. It’s important to make sure you connect the battery to the radio and to make sure you’re not energizing your vehicle’s electrical system with the battery. You can easily damage things and burn fuses out if you do that. I noticed the current draw was higher than it should be if I were just powering the Kenwood TM-D710G and investigated the electrical setup. I had disconnected the wrong end of a “Y” cable that splits between the Kenwood radio and the CB radio I use for offroading/trails. I had accidently energized the vehicle’s electrical system when it had some accessories powered on. Lesson learned.

Extender connected to the Kenwood radio base unit and to the headphone adapter / radio display
Field j-pole set up at the camp site